
RAM 3500 HD Truck 4WD L6-6.7L DSL Turbo (2008)
1. Disconnect and isolate negative battery cable.
2. Remove the accessory drive belt See: Engine, Cooling and Exhaust/Engine/Drive Belts, Mounts, Brackets and Accessories/Drive Belt/Service and
Repair/Removal and Replacement/Accessory Drive Belt - Removal .
3. Raise and support the vehicle.
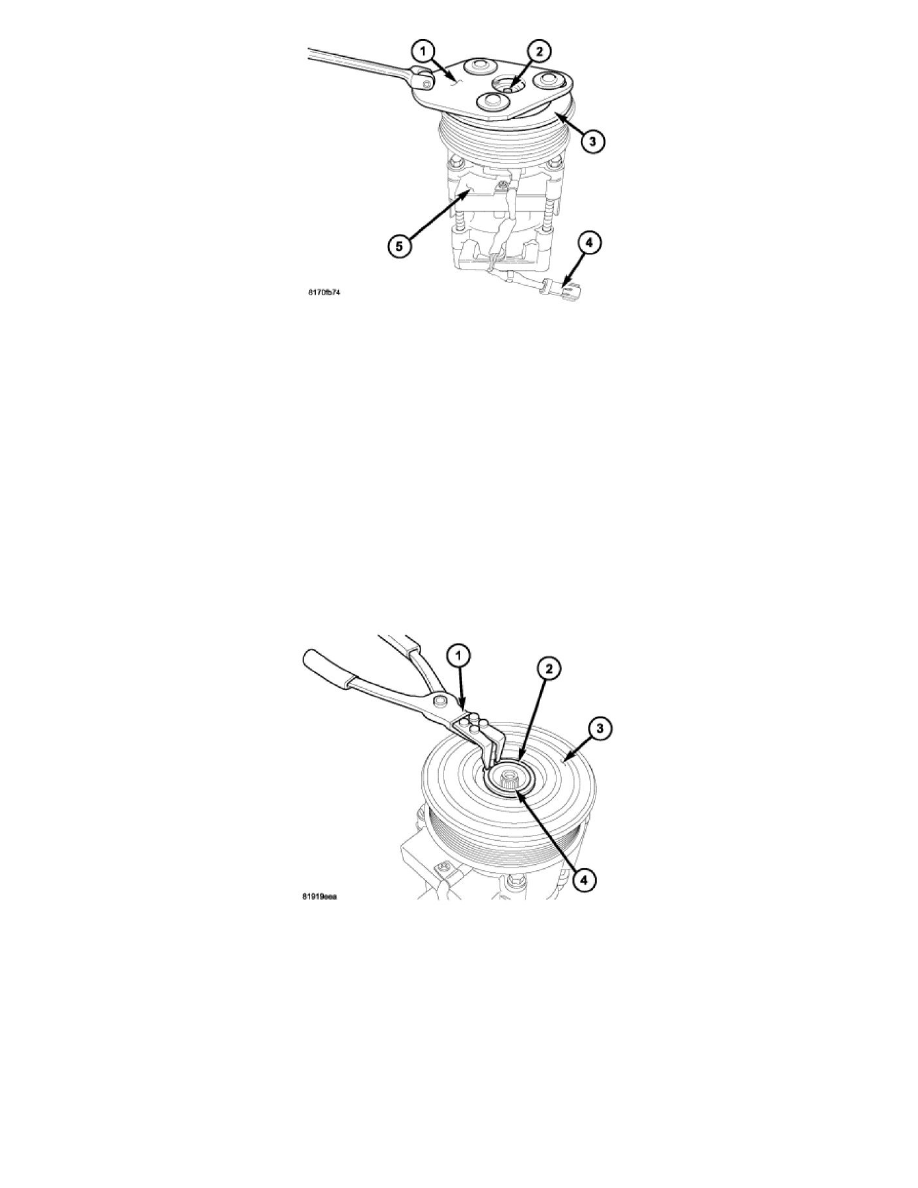
4. Disconnect the engine wire harness from the clutch field coil connector (4).
5. Remove the bolts that secure the A/C compressor (5) to the mounting bracket See: Service and Repair/A/C Compressor - Removal .
6. Remove the A/C compressor from the mounting bracket and support the compressor while servicing the clutch.
7. Using compressor clutch holding fixture (Special Tool 9351 in Kit 9349) (1), remove the bolt (2) that secures the clutch plate (3) to the
compressor shaft.
NOTE: The clutch plate can be removed from the compressor shaft by hand or, if required, pressed off with an 8 x 1.25 mm bolt.
NOTE: Clutch plate shim(s) may remain inside the hub of the clutch plate. Be sure to remove all of the shims from inside the hub or from the
end of the compressor shaft.
8. Remove the clutch plate and shim(s) from the A/C compressor. If required, install a 8 x 1.25 mm bolt into the center of the clutch plate and turn
the bolt clockwise until the clutch plate is completely removed from the A/C compressor.
9. Using Snap Ring Pliers 9764 or equivalent (1), remove the snap ring (2) that secures the pulley and bearing assembly (3) to the front of the A/C
compressor (4).