
RAM 3500 Van V8-360 5.9L VIN 5 Magnum (1998)
Power Seat Motor: Service and Repair
REMOVAL
If the driver side front power seat is in the raised position, it is possible to access and remove the seat and/or the power seat adjuster and motors
assembly without removing the seat riser, go to Step 7. If the driver side front power seat is not in the raised position, the seat assembly must be removed
from the passenger compartment for service of the power seat adjuster and motors. The seat assembly includes the seat, the seat adjuster and the seat
riser. Proceed as follows:
1. Disconnect and isolate the battery negative cable.
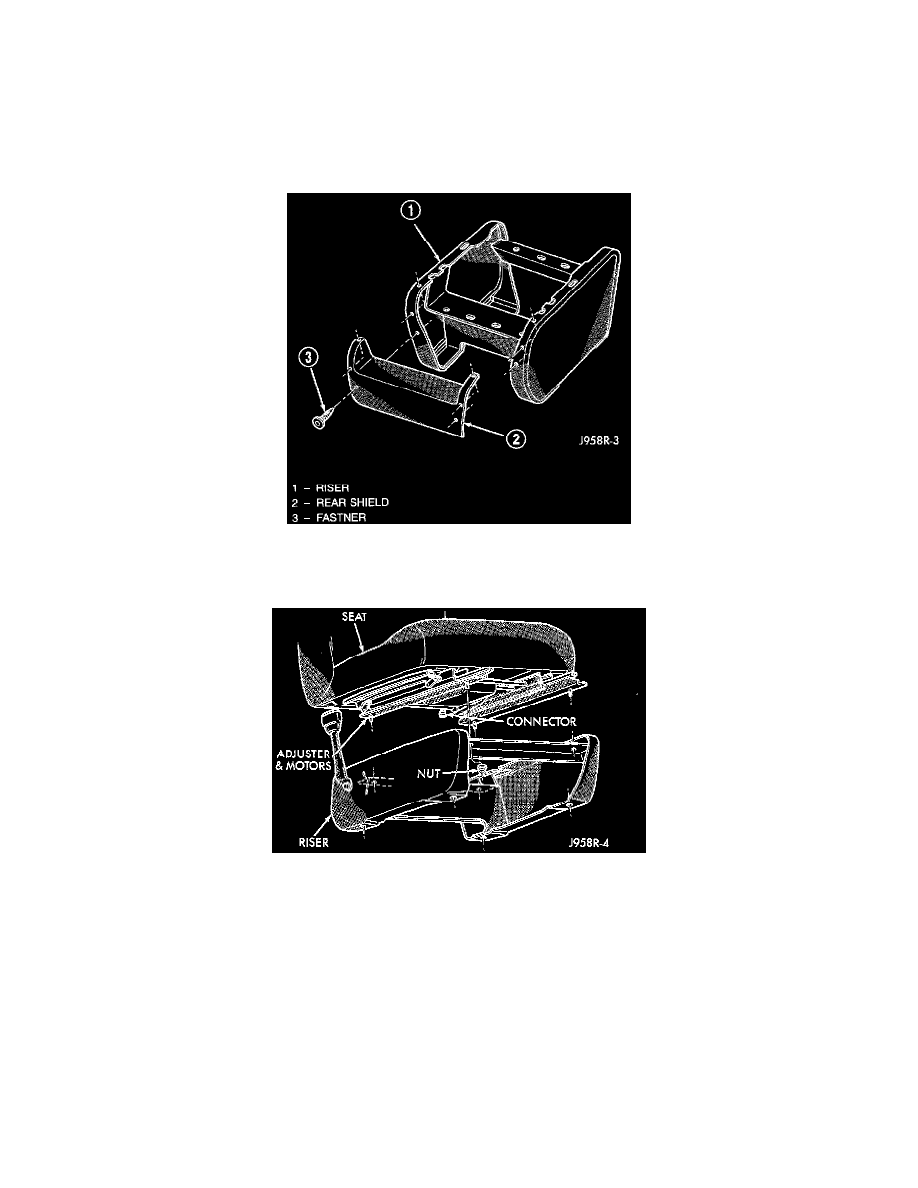
Seat Riser Rear Shield Remove/Install
2. Remove the four fasteners that secure the lower portion of the rear shield to the seat riser.
Power Seat Adjuster And Motors Remove/Install
3. Unplug the power seat adjuster and seat belt switch wire harness connectors.
4. Remove the four nuts that secure the seat riser to the studs on the floor panel. The rear nuts are accessed by lifting up the seat riser rear shield.
5. Remove the seat assembly from the passenger compartment and place it on a suitable work surface for further service.
6. Remove the four screws that secure the power seat adjuster and motors assembly to the bottom of the seat cushion frame.
7. Unplug the wire harness connector between the power seat switch and the power seat adjuster and motors wire harnesses.
8. Remove the seat cushion frame from the power seat adjuster and motors unit.
9. Remove the four nuts that secure the power seat adjuster and motors unit to the seat riser.
10. Remove the power seat adjuster and motors unit from the seat riser.
11. Reverse the removal procedures to install. Tighten the seat mounting hardware as follows:
-
Seat adjuster to seat cushion frame screws - 22.6 N.m (200 in.lbs.)
-
Seat adjuster to seat riser nuts - 22.6 N.m (200 in.lbs.)