
RAM 3500 Van V8-360 5.9L VIN 5 Magnum (1998)
Heater Hose: Service and Repair
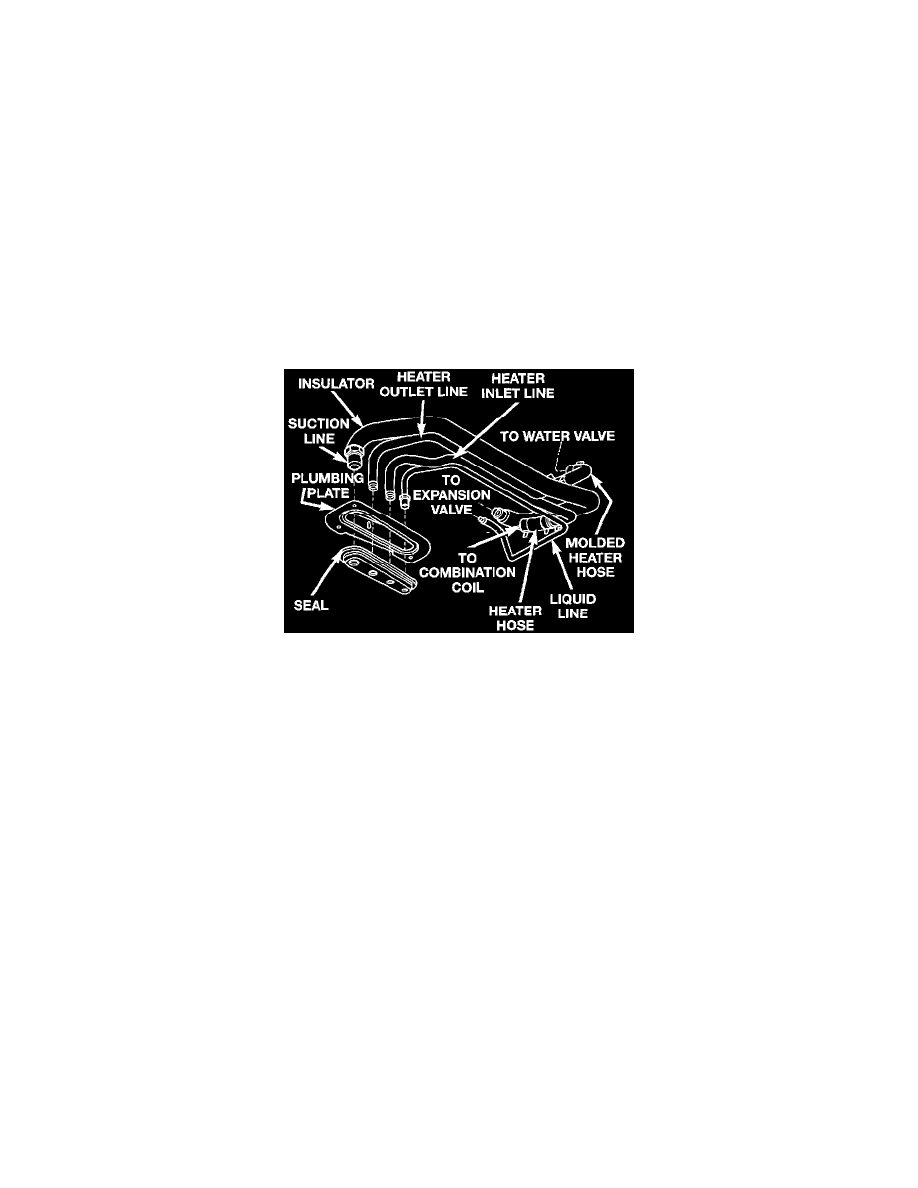
Rear Heater-A/C Unit Plumbing
The rear heater-A/C unit plumbing is used only on models with the optional rear heater-A/C unit. while the formed metal rear heater-A/C unit suction
line, liquid line, and heater lines are available for separate service replacement, the rear heater-A/C unit must be removed from the vehicle in order to
service them. The molded and straight heater hoses used on the rear heater-A/C unit can be serviced in the vehicle.
Any kinks or sharp bends in the rear heater-A/C unit plumbing will reduce the capacity of the entire heating and air conditioning system. Kinks and sharp
bends reduce the system flow. High pressures are produced in the refrigerant system when the air conditioning compressor is operating. High
temperature coolant is present in the heater plumbing when the engine is operating. Extreme care must be exercised to make sure that each of the
plumbing connections is pressure-tight and leak free.
WARNING: REVIEW THE WARNINGS AND CAUTIONS IN THE GENERAL INFORMATION BEFORE PERFORMING THE
FOLLOWING OPERATION.
REMOVAL
1. Remove the rear heater-A/C unit from the vehicle.
2. Disconnect the rear heater-A/C unit liquid and suction lines from the expansion valve. See Expansion Valve - Rear replacement procedures.
3. Disconnect the rear heater-A/C unit heater hoses from the heater inlet and outlet lines.
Rear Heater-A/c Plumbing Remove/Install
4. Disengage the seal from the plumbing plate, which is secured to the forward outboard corner of the rear heater-A/C unit lower housing. Push the
bottom of the seal out through the top of the plumbing plate from underneath.
5. Remove the plumbing lines and seal as an assembly from the rear heater-A/C unit.
6. If the suction line is being serviced, remove the tie-wraps that secure each end of the insulator to the line, then slide the insulator off.
7. Push the line through the hole from the top of the seal, twisting and turning the line as needed, while pulling it from the bottom of the seal.
INSTALLATION
1. Push the line through the hole from the bottom of the seal, twisting and turning the line as needed, while pulling it from the top of the seal.
2. If the suction line is being serviced, slide the insulator onto the line, then secure each end of the insulator to the line with a tie-wrap.
3. Position the plumbing lines and seal as an assembly to the rear heater-A/C unit.
4. Reinstall the seal to the plumbing plate. Push the seal into the plumbing plate from the top until it is fully seated.
5. Connect the rear heater-A/C unit heater hoses to the heater inlet and outlet lines.
6. Connect the rear heater-A/C unit liquid and suction lines to the expansion valve.
7. Reinstall the rear heater-A/C unit in the vehicle.