
RAM 3500 Van V8-360 5.9L VIN 5 Magnum (1998)
Valve Body: Service and Repair
Disassembly and Assembly
32RH 3-Speed
DISASSEMBLY
Valve Body Assembly
CAUTION: Do not clamp any part of the valve body assembly in a vise. This practice will distort the valve body and transfer plate resulting in valve
bind. Slide valves and plugs out carefully. Do not use force at any time. The valves and valve body will be damaged if force is used. Also tag or mark
the valve body springs for reference as they are removed. Do not allow them to become intermixed.
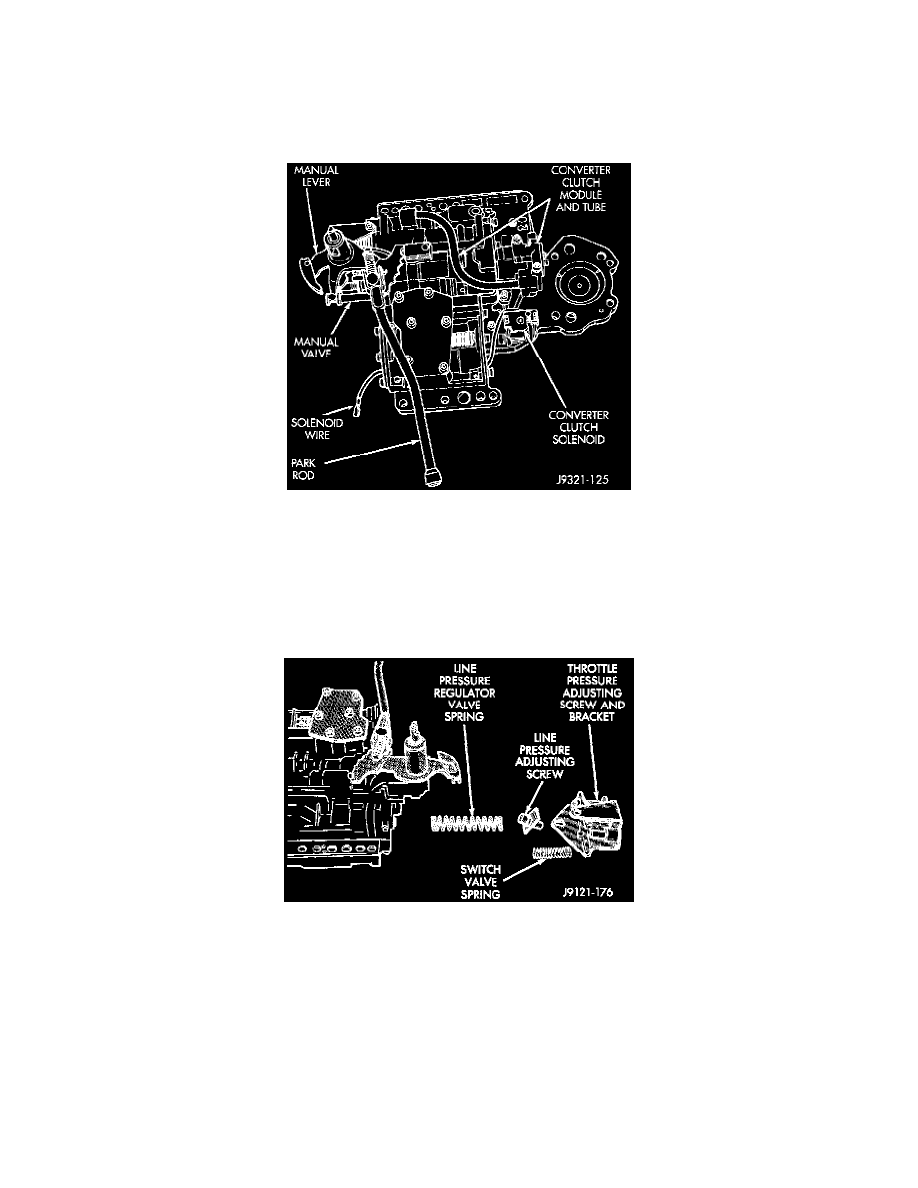
1. Remove screws attaching adjusting screw bracket to valve body and transfer plate. Hold bracket firmly against spring force while removing last
screw.
Adjusting Screw Bracket And Spring Removal
2. Remove adjusting screw bracket, line pressure adjusting screw, pressure regulator spring and switch valve spring. Do not remove throttle pressure
adjusting screw from bracket and do not disturb adjusting screw settings during removal.