
RAM 3500 Van V8-5.2L CNG VIN T (1996)
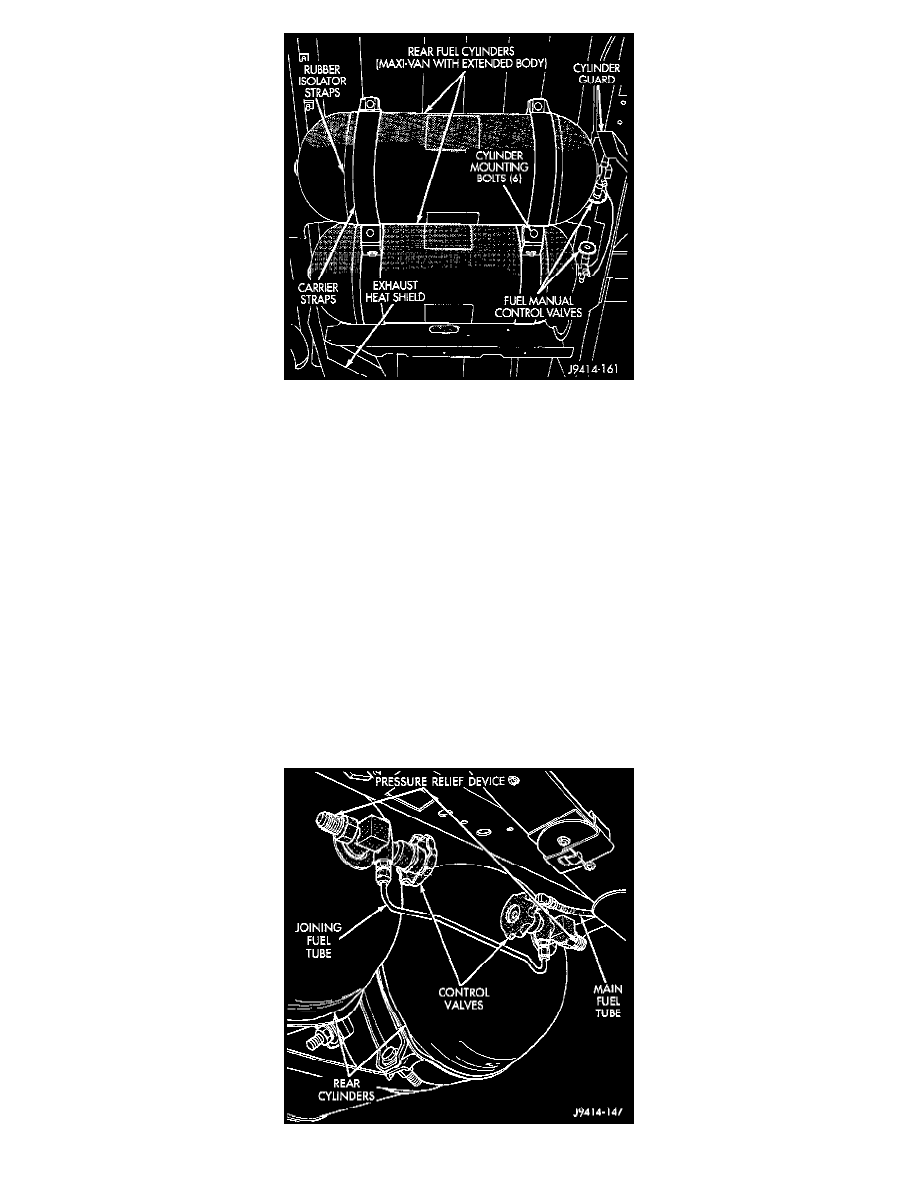
Rear Fuel Cylinders-(Maxi Van)
7. Remove four bolts and two straps securing each cylinder to cylinder carrier.
8. Carefully lower each cylinder for removal.
WARNING: If the cylinder fuel control valve is to be removed from cylinder, and cylinder is under natural gas pressure, move cylinder
outdoors. This must be done before attempting to open control valve allowing gas to escape.
9. Remove fuel control valve (counterclockwise) from cylinder.
INSTALLATION
1. If fuel control valve(s) were removed, apply Parker 0-Lube to new o-ring(s). Install new o-ring(s) to valve(s) and install valve to each fuel
cylinder. Tighten control valve(s) to 100 N.m (80 ft. lbs.) torque.
2. Position each fuel cylinder to a hydraulic jack.
3. Raise each fuel cylinder into position to the cylinder carrier.
4. Rotate each cylinder until the fuel control valve is in the horizontal position. This step must be followed in order to allow proper installation of
cylinder fuel tubes.
5. Install and tighten 4 outer cylinder carrier strap bolts to 20 N.m (15 ft. lbs.) torque.
6. Install and tighten 4 inner cylinder carrier strap bolts to 100 N.m (80 ft. lbs.) torque.
7. Install fuel tube (line) between both cylinders. A Go No-Go gauge tool must be used to check fittings after tightening.
8. Remove hydraulic jack.