RAM 3500 Van V8-5.9L VIN Z LDC (1998)

Amplifier: Service and Repair
REMOVAL
WARNING: ON VEHICLES EQUIPPED WITH AIRBAGS, REFER TO AIRBAGS BEFORE ATTEMPTING ANY STEERING WHEEL,
STEERING COLUMN, OR INSTRUMENT PANEL COMPONENT DIAGNOSIS OR SERVICE. FAILURE TO TAKE THE PROPER
PRECAUTIONS COULD RESULT IN ACCIDENTAL AIRBAG DEPLOYMENT AND POSSIBLE PERSONAL INJURY.
1. Disconnect and isolate the battery negative cable.
2. Remove the end cap from the passenger side end of the instrument panel. Refer to Instrument Panel End Cap in the Removal and Installation
Instrument Panel, Gauges and Warning Indicators/Instrument Panel for the procedures.
3. Roll down the glove box from the instrument panel. Refer to Glove Box - Roll Down in the Removal and Installation Instrument Panel, Gauges
and Warning Indicators/Instrument Panel for the procedures.
4. Reach through the outboard side of the glove box opening to access and unplug the two wire harness connectors from the lower end of the
amplifier.
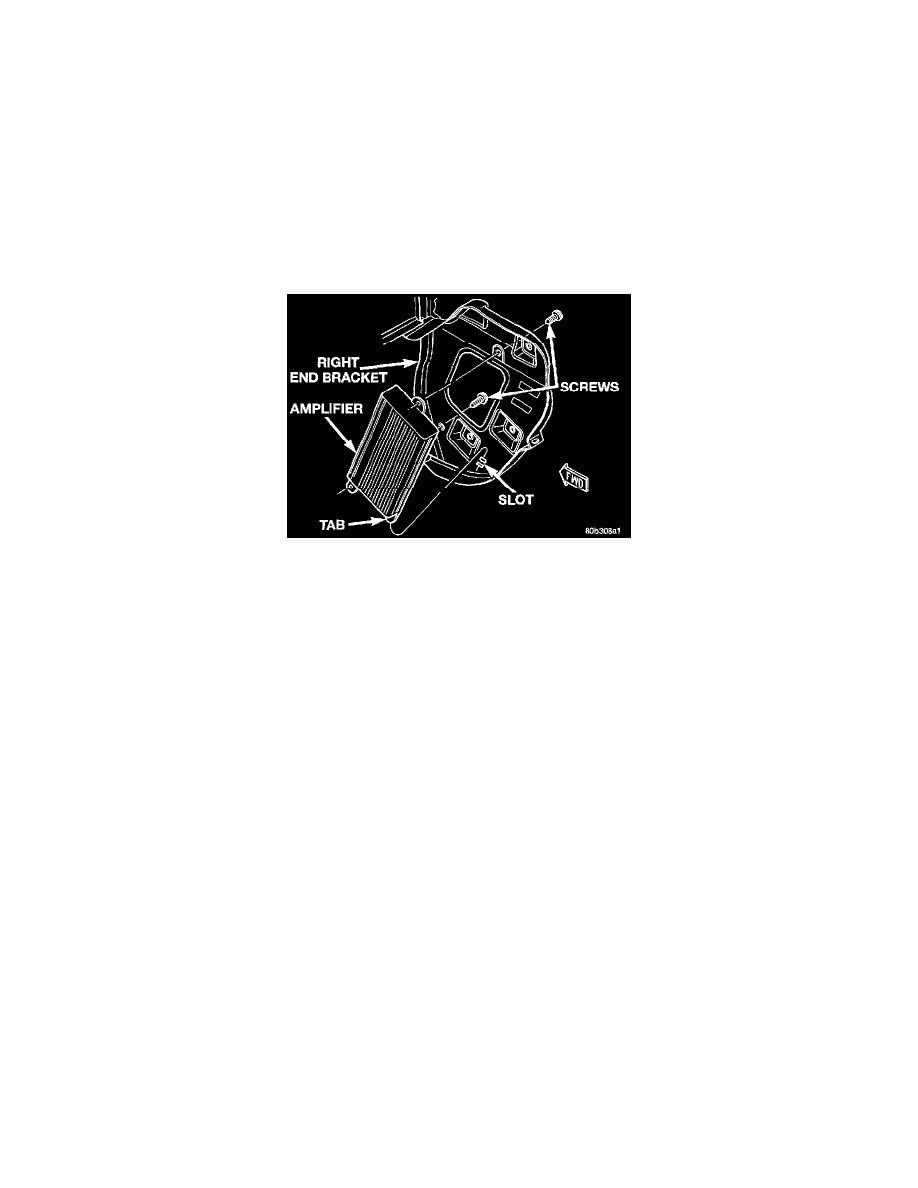
Amplifier Remove/Install
5. Reach through the outboard side of the glove box opening to support the amplifier while removing the two screws that secure the amplifier from
the outboard side of the right instrument panel end bracket.
6. Lift the amplifier upwards far enough to disengage the mounting tab from the slot in the lower rear corner of the right instrument panel end
bracket.
7. Remove the amplifier through the instrument panel glove box opening.
8. Reverse the removal procedures to install. Tighten the mounting screws to 3.3 N.m (30 in. lbs.).
