
RAM 4500 Chassis Cab Truck 4WD Rear Door Latch Campaign | Mar 11 Technical Service Bulletin
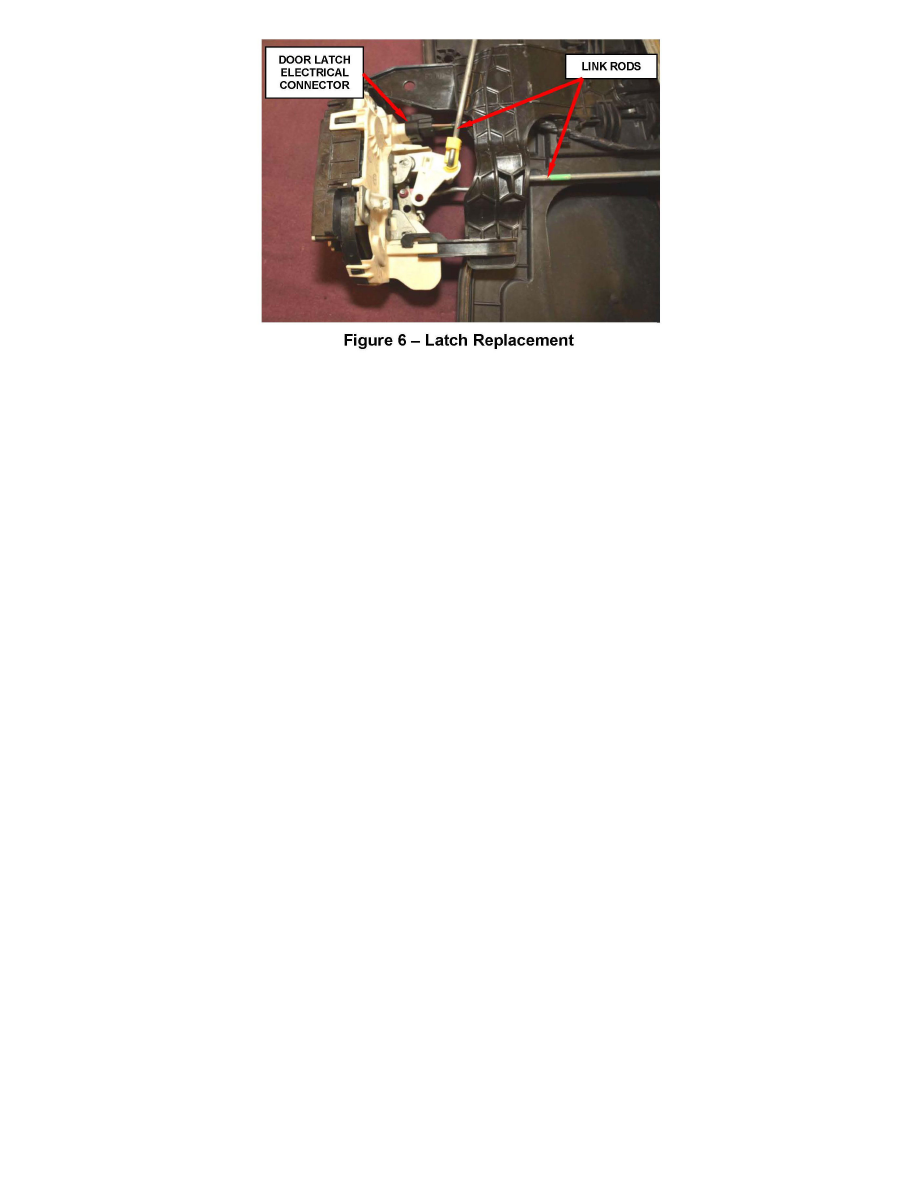
20. Disconnect the two link rods at the door latch (Figure 6).
21. Disconnect the door latch electrical connector (Figure 6).
22. Unsnap the original door latch from the carrier plate and discard.
23. Snap the new door latch into position on the carrier plate.
24. Connect the electrical connector to the door latch.
25. Connect the two link rods to the door latch.
26. Place the carrier plate into the door shell.
27. Install the 12 carrier plate mounting bolts and tighten the bolts to 49 in. lbs. (5.5 N.m) (Figure 5).
28. Install the three door latch retaining screws and tighten them to 62 in. lbs. (7 N·m).
29. Connect the door wiring electrical connector to the body harness and then snap the grommet into place.
30. Install the door wiring harness rubber grommet into place and install the two mounting screws (Figure 4).
31. Connect the power mirror electrical connectors to the door module.
32. Connect the outside door handle link rod to the door latch.
33. Remove the tape from the window, carefully lower the glass and snap it into the window regulator.
34. Install the door speaker.
35. Install the door latch access panel door.
36. Snap the door panel onto the door.
37. Install the six door panel push pins.
38. Install the mirror flag bezel.
39. Install the power window switch (Figure 2).
40. Install the inside door handle bezel (Figure 2).
41. Connect the negative battery cable and cycle test the door glass.
42. Clean the door glass with Mopar Glass Cleaner (P/N 04318014AB) or equivalent.