
RAM 50 4WD L4-143 2.3L DSL Turbo VIN J FI (1983)
should be replaced.
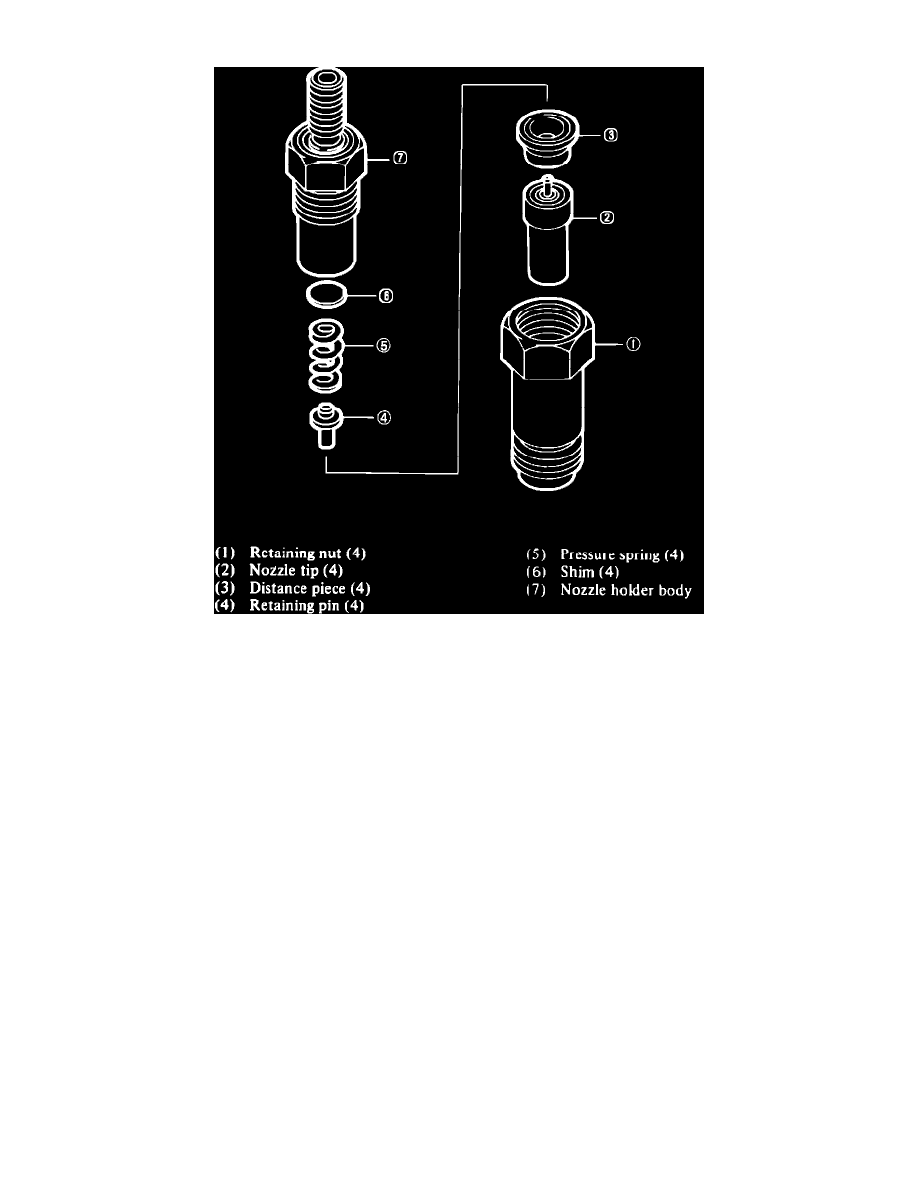
Fig. 41 Disassembled view of injector nozzle
DISASSEMBLY
1.
Position nozzle holder body in a soft jawed vise, then remove retainer nut using tool No. MD99838.
2.
Disassemble injection nozzle, Fig. 41. Use a piece of wood to remove carbon from nozzle component, then clean components in a suitable
cleaning solvent. After cleaning immerse components in light oil. Use care not to damage nozzle tip needle tip valve.
INSPECTION
1.
Position nozzle tip and plunger in fuel oil, then lift plunger upward and allow plunger to slide downward into nozzle tip, Fig. 41.
2.
Plunger should slide smoothly within the nozzle tip, if not replace nozzle assembly.
3.
Also check plunger tip for damage and replace as necessary.
ASSEMBLY
1.
Clean all components with fuel oil before assembling.
2.
Assemble fuel injection nozzle components, Fig. 41.
3.
Position nozzle holder body in soft jawed vise.
4.
Using tool No. MD998387, tighten injection nozzle retaining nut.
INJECTION NOZZLE PRESSURE ADJUSTMENT
1.
Position injection nozzle on a suitable injection pressure tester and check pressure as described under ``Nozzle Pressure Test.''
2.
Injection pressure should be 1707-1849 psi.
3.
If pressure is not within limits, adjust by changing the thickness of the internal shim. An increase of .004 inch in shim thickness will increase
pressure by 142 psi.