
RAM 5500 Chassis Cab Truck 2WD L6-6.7L DSL Turbo (2008)
Timing Cover: Service and Repair
Timing Cover - Installation
INSTALLATION
1. Install a new front crankshaft oil seal.
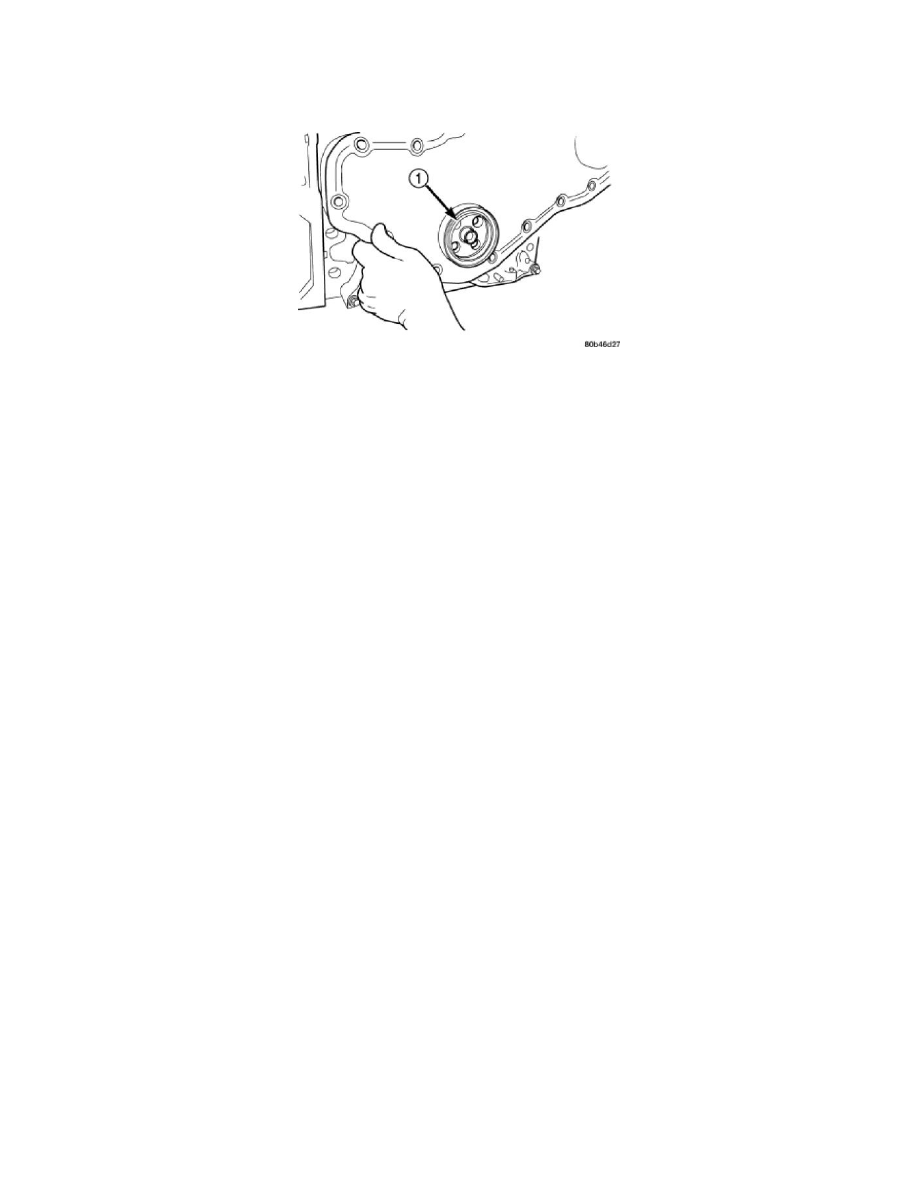
2. Obtain a seal pilot (1) installation tool from a crankshaft front seal service kit and install the pilot into the seal.
3. Apply a bead of Mopar(R) Silicone Rubber Adhesive Sealant or equivalent to the gear housing cover. Be sure to surround all through holes.
4. Using the seal pilot to (1) align the cover , install the cover to the housing and install the bolts. Tighten the bolts at the 3 and 9 o'clock position
finger tight, then in a clockwise direction starting at the 3 o'clock position, torque to 24 Nm (18 Ft. lbs).
5. Snug, but do not torque one bolt at the 3 o'clock and 9 o'clock positions. This centers the seal on the crankshaft.
6. Tighten the bolts to 24 Nm (18 ft. lbs.) in a circular pattern.
7. Remove the seal pilot. Install front seal dust shield.
8. Raise the vehicle.
9. Install the crankshaft damper See: Cylinder Block Assembly/Harmonic Balancer - Crankshaft Pulley/Service and Repair/Removal and
Replacement/Vibration Damper - Installation .
10. Lower vehicle.
11. Install the fan support/hub assy, and tighten bolts to 32 Nm (24 ft. lbs.) torque.
12. Install power steering pump.
13. Install accessory drive belt tensioner. Torque bolt to 43 Nm (32 ft. lbs.) torque.
14. Install the accessory drive belt See: Drive Belts, Mounts, Brackets and Accessories/Drive Belt/Service and Repair/Removal and
Replacement/Accessory Drive Belt - Installation .
15. Install the cooling fan/drive/shroud assembly.
16. Install the radiator upper hose and clamps.
17. Add coolant See: Cooling System/Service and Repair .
18. Connect the battery cables.
19. Start engine and inspect for leaks.