
RAM 5500 Chassis Cab Truck 2WD L6-6.7L DSL Turbo (2008)
Marker Lamp Bulb: Service and Repair
Marker Lamp Bulb
Rear Fender
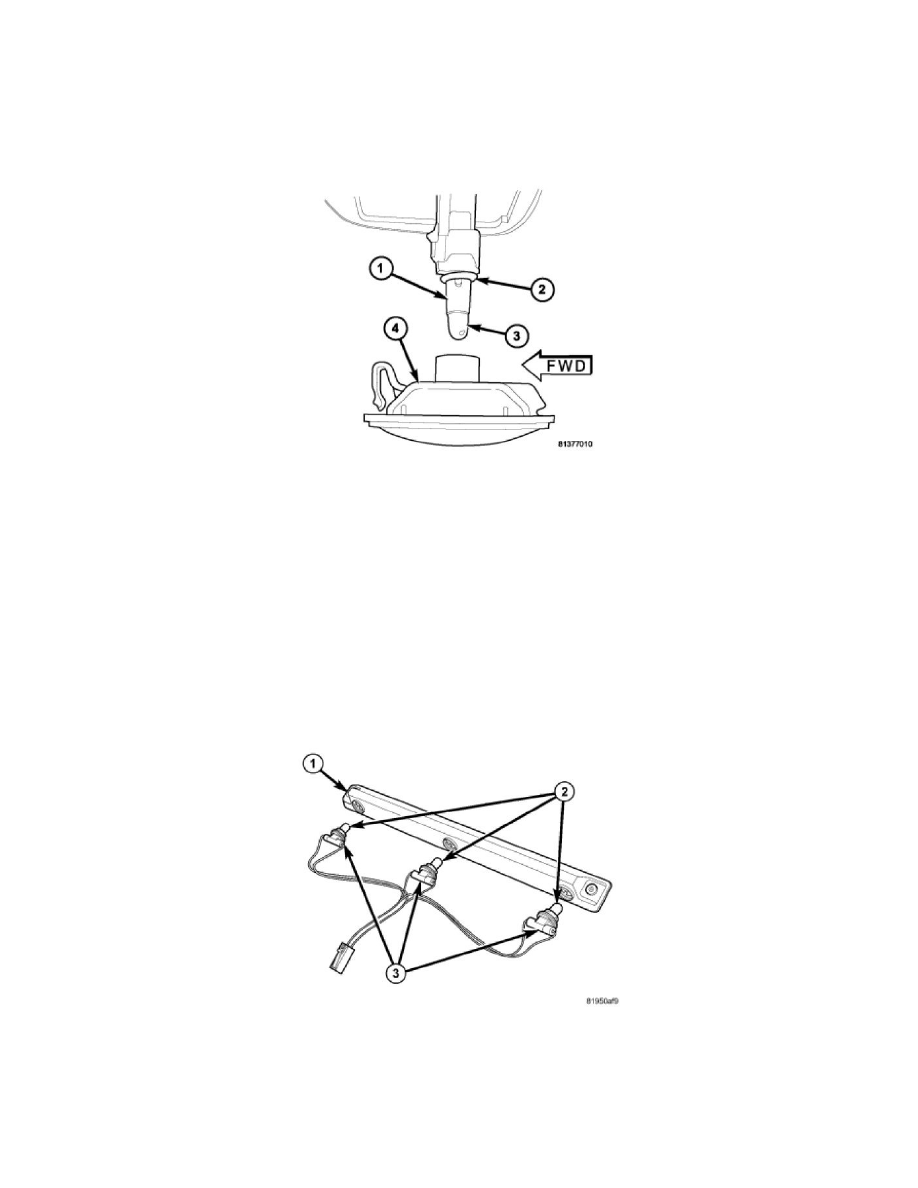
BULB - REAR FENDER
NOTE: These lamps are used on vehicles with a pick-up bed and dual rear wheels only. A lamp with an amber lens is located on the rear fender
ahead of each rear wheel opening, and a lamp with a red lens is located on the rear fender behind each rear wheel opening. The bulb types and
service procedures are identical for all four of these lamps.
1. Disconnect and isolate the battery negative cable.
2. Using hand pressure, press the rear edge of the rear fender marker lamp lens/housing (4) toward the front of the vehicle against the spring pressure
of the retaining clip, then pull the rear edge of the lamp outward to disengage it from the mounting hole in the rear fender.
3. Pull the lamp out from the rear fender far enough to access the bulb socket (1) on the back of the lamp lens/housing.
4. Firmly grasp the bulb socket on the back of the lamp lens/housing and rotate it counterclockwise about 30 degrees to unlock it.
5. Pull the socket and bulb straight out from the keyed opening in the housing.
6. Pull the base of the bulb (3) straight out of the socket.
Tailgate
BULB - TAILGATE
NOTE: This lamp is used on vehicles with a pick-up bed and dual rear wheels only. A lamp with a red lens and containing three bulbs is located
on the rearward facing surface of the pick-up bed sill below the tailgate. The bulb types and service procedures are identical for all three of
these bulbs.
1. Disconnect and isolate the battery negative cable.
2. Remove the two screws that secure the outboard ends of the tailgate marker lamp lens/housing (1) to the rearward facing surface of the sill panel.
3. Pull the marker lamp out from the sill panel far enough to access the sockets (3) on the bottom of the lamp housing.