
RAM 5500 Chassis Cab Truck 2WD L6-6.7L DSL Turbo (2008)
d. Alternately tighten injector holdown bolts to 8 Nm (71 in. lbs.) torque.
e. Do a final tightening of the high-pressure connector and retaining nut (12). Tighten to 50 Nm (37 ft. lbs.) torque.
10. Noise isolators (14) are used on the six high-pressure fuel lines. They should be positioned in the middle of the horizontal or longest straight
section of each fuel line. The split on each isolator should be facing downward. Be sure the noise isolator is not touching another isolator or any
other components.
11. Install integrated gasket
12. Connect injector solenoid wires and nuts to top of injectors. Tighten connector nuts to 1.25 Nm (11 in. lbs.) torque. Be very careful not to
overtighten these nuts as damage to fuel injector will occur.
13. Install exhaust rocker arm assembly.
14. Set exhaust valve lash.
15. Install fuel connector tube nut at cylinder head and tighten to 50 Nm (37 ft. lbs.). Be sure to use a secondary back-up wrench on the connector
nut (fitting) while torquing fuel line fitting. .
16. Install valve cover See: Engine, Cooling and Exhaust/Engine/Cylinder Head Assembly/Valve Cover/Service and Repair/Removal and
Replacement/Cylinder Head Cover - Installation .
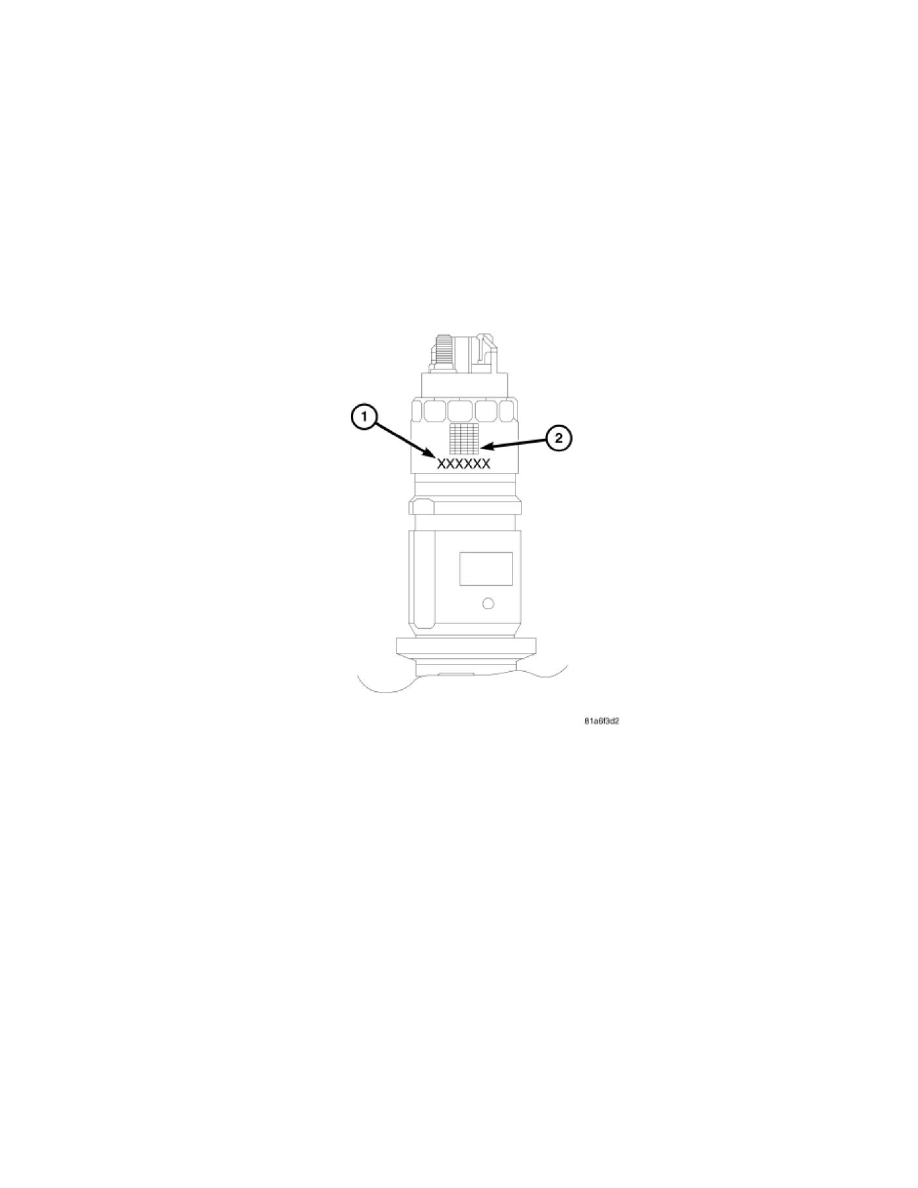
17. Install breather assembly.FUEL INJECTOR ID CORRECTION CODES:
Each fuel injector has a six-digit alphanumeric correction code. The correction code is printed on the intake side of the fuel injector (1) and is used to
identify injector calibration. When replacing any fuel injectors, this code must be entered into the vehicles Engine Control Module (ECM) using a
diagnostic scan tool. In addition, if a new ECM is installed, use a diagnostic scan tool to program all six of the injector codes from the original fuel
injectors into the new ECM.
1. Connect negative battery cables to both batteries.
2. Programming Fuel Injector Correction Code:
-
Turn ignition switch "ON".
-
Using a diagnostic scan tool, select ECU View> PCM > MISCELLANEOUS FUNCTIONS.
-
Select Injector Quantity Adjustments and click Start.
-
Choose appropriate cylinder number and click next.
-
Click on Show Keyboard. NOTE: A fault code will be set if incorrect serialization codes have been inputted.
-
Input six-digit Injector Correction Code and click enter.
-
Review code as it was typed, then click Next if correct, or edit if necessary.
-
Repeat the preceding steps for other cylinders if necessary.
-
Once all fuel injector correction codes are entered, cycle the ignition to complete.