
RAM 5500 Chassis Cab Truck 2WD L6-6.7L DSL Turbo (2008)
Ball Joint: Service and Repair
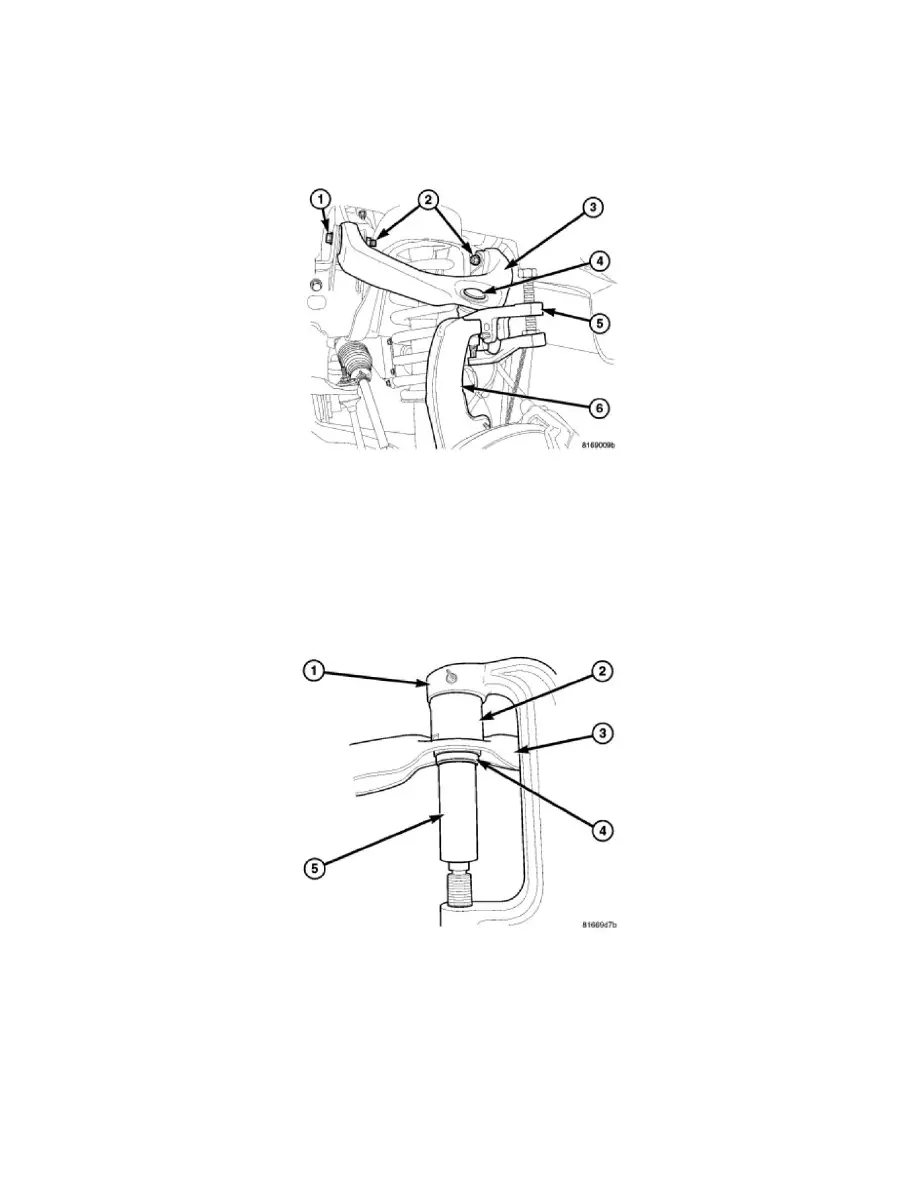
Front Upper Ball Joint - Removal
Independent Front Suspension
REMOVAL
1. Raise vehicle and support the axle.
2. Remove the tire and wheel.
3. Remove the upper ball joint retaining nut.
4. Separate the upper ball joint (4) from the knuckle (6) using separator #9360 (5).
5. Remove the wheel speed sensor wire from the knuckle (HD) and from the upper control arm (LD).
6. Move the knuckle out of the way to allow ball joint removal tool access.
7. Remove the ball joint boot for removal.
NOTE: It may be necessary to install a block of wood between the control arm and frame bracket to allow clearance for the ball joint
press tool.
NOTE: Extreme pressure lubrication must be used on the threaded portions of the tool. This will increase the longevity of the tool and insure
proper operation during the removal and installation process.
8. Press the ball joint (4) from the upper control arm (3) using special tools C-4212-F (PRESS) (1), 9770-1 (Receiver) (2) and 9770-2 (Driver) (5).
4500 & 5500 - Link/Coil
4500 & 5500
NOTE: The upper ball joints screw in and out (they are not pressed in).