
Ram Raider V6-2972cc 3.0L SOHC (1989)
Brake Shoe: Service and Repair
Brake Shoe Removal and Installation
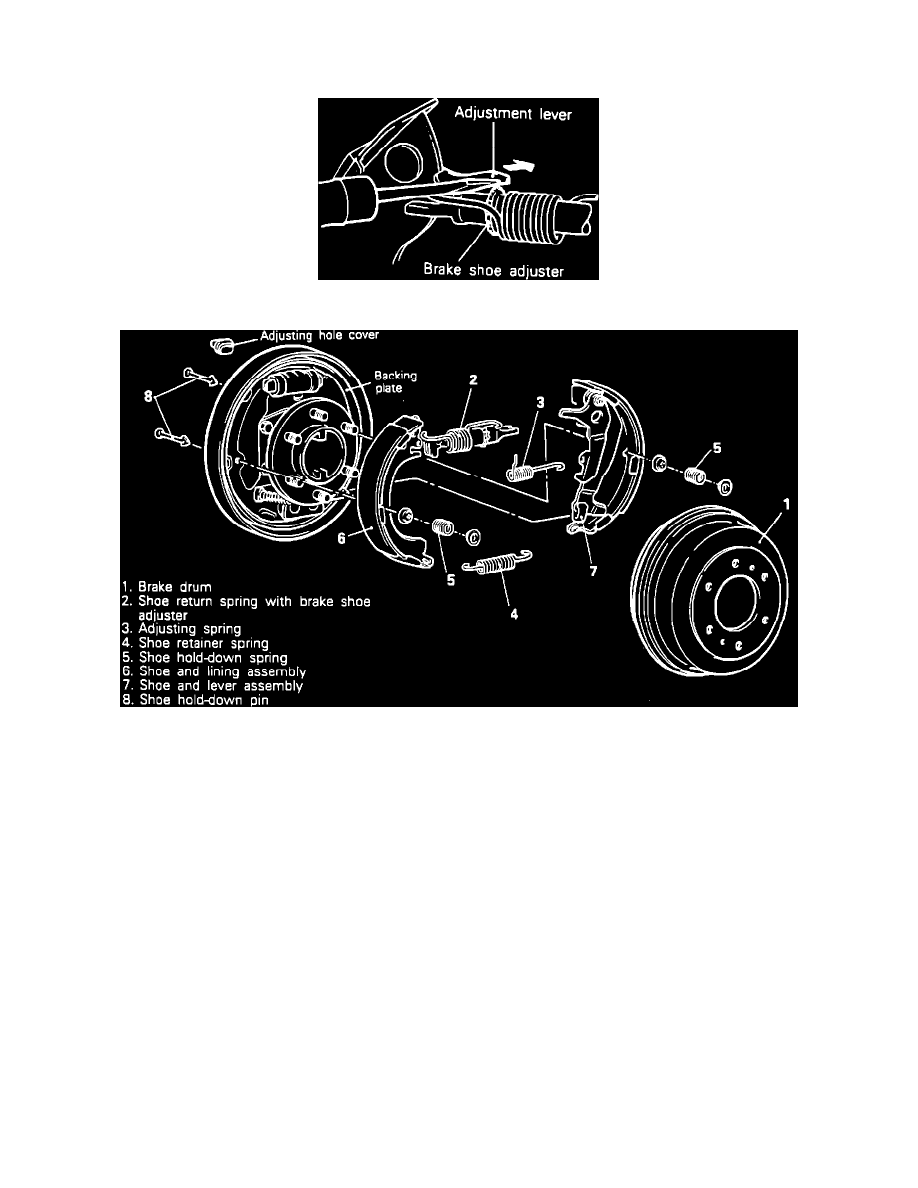
Fig. 3 Drum Brake Self-adjuster Lever
Fig. 4 Exploded View of Drum Brake Assembly.
REMOVAL
1.
Raise and support rear of vehicle, then remove tire and wheel assembly.
2.
Remove brake drum. If brake drum hangs up on brake lining, back off brake adjustment by rotating adjustment screw.
3.
Using brake spring pliers, remove adjuster lever spring.
4.
Remove adjuster lever.
5.
Remove hold-down springs.
6.
Pull brake shoe assembly down and away from anchor plate.
7.
Remove parking brake cable to trailing brake shoe lever assembly.
8.
Remove shoe assembly.
9.
Clean dirt from brake drum, anchor plate and all other components.
INSPECTION
1.
Inspect components for damage and wear. Replace as necessary.
2.
Inspect wheel cylinders for torn, cut or heat damaged boots. Peel back lower edge of boot and check for cup leakage. Replace wheel cylinder as
necessary. A slight amount of fluid is always present and is considered normal. Fluid acts as a lubricant for the cylinder pistons.
3.
Inspect anchor plate attaching bolts and tighten.
4.
Inspect automatic adjuster screw assembly operation. If operation is satisfactory, lightly lubricate threads with suitable brake lube. If operation is
not satisfactory, replace adjuster.
5.
Using fine emery cloth or other suitable abrasive, clean rust and dirt from anchor plate shoe contact surfaces.
INSTALLATION