
Ram Raider V6-2972cc 3.0L SOHC (1989)
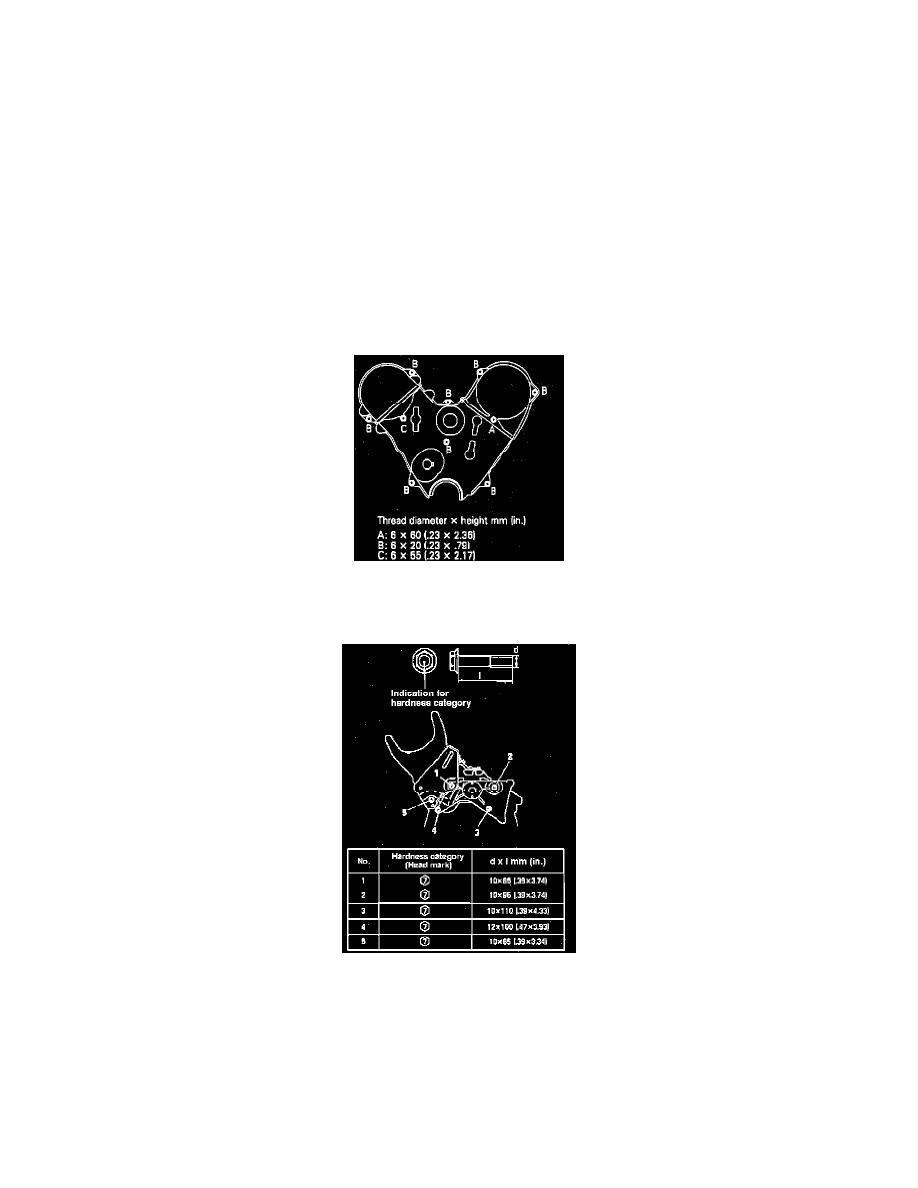
Fig. 6 Tensioner Spring Installation
b.
Engage top of tensioner spring on water pump pin keeping hook in direction shown, Fig. 6.
c.
Turn timing belt tensioner to extreme counterclockwise position along elongated hole and temporarily tighten timing belt tensioner bolt.
7.
Install timing belt as follows:
a.
Align timing marks of the camshaft and crankshaft sprockets.
b.
First, route timing belt on crankshaft sprocket then on the lefthand camshaft sprocket.
c.
Next, run timing belt onto water pump pulley, righthand camshaft pulley and the timing belt tensioner.
d.
Apply force counterclockwise to the camshaft sprocket on the right side. When the tension side of the belt is taut, ensure that the timing
marks are aligned.
e.
Install the front flange.
f.
Loosen tensioner retaining bolts and tighten timing belt using tensioner spring force.
g.
Using crankshaft wrench tool No. MD998716 or equivalent, turn crankshaft clockwise two full turns.
h.
Re-align sprockets timing marks and tighten tensioner fixing bolts.
8.
Reverse numbered sequence shown in Fig. 5 when installing, noting the following:
a.
Using an old drive belt and crankshaft holding tool No. MD998747 or equivalent, tighten crankshaft pulley bolt. Belt used during this
operation will be damaged and cannot be reused.
b.
Apply a coating of Mopar adhesive No. 4318034 or equivalent, to all gasket surfaces.
Fig. 7 Timing Belt Cover Bolt Identification
c.
Install timing belt cover bolts in correct position as shown in Fig. 7.
Fig. 8 Cooling Fan & Tensioner Pulley Bracket Bolt Identification
d.
Install cooling fan and tensioner pulley bracket in correct position as shown in Fig. 8.