
RAM SRT-10 Pickup V10-505 8.3L (2004)
Driver/Vehicle Information Display: Service and Repair
Module Lens Replacement
1. Remove the overhead console.
2. Remove the electronic overhead module from the overhead console.
3. Unsnap the lens from the module and replace lens as necessary.
Overhead Console
REMOVAL
1. Disconnect and isolate the battery negative cable.
2. Remove the overhead console retaining screws, located in the sunglass storage bin.
3. Using your fingertips, grasp the sides of the overhead console and pull straight down evenly to disengage the two snap clips at the front of the unit.
4. Lower the overhead console far enough to access the wire harness connectors.
5. Disconnect the Electronic Overhead Module and the reading/courtesy lamps electrical connectors.
6. Remove the overhead console from the vehicle.
INSTALLATION
1. Position the overhead console in the vehicle.
2. Connect the Electronic Overhead Module and the reading/courtesy lamps electrical connectors.
3. Grasp the sides of the overhead console and push straight up evenly to engage the two snap clips at the rear of the unit.
4. Install the overhead console retaining screws, located in the sunglass storage bin. Torque the screws to 1.2 N.m (10 in.lbs.).
5. Connect the battery negative cable.
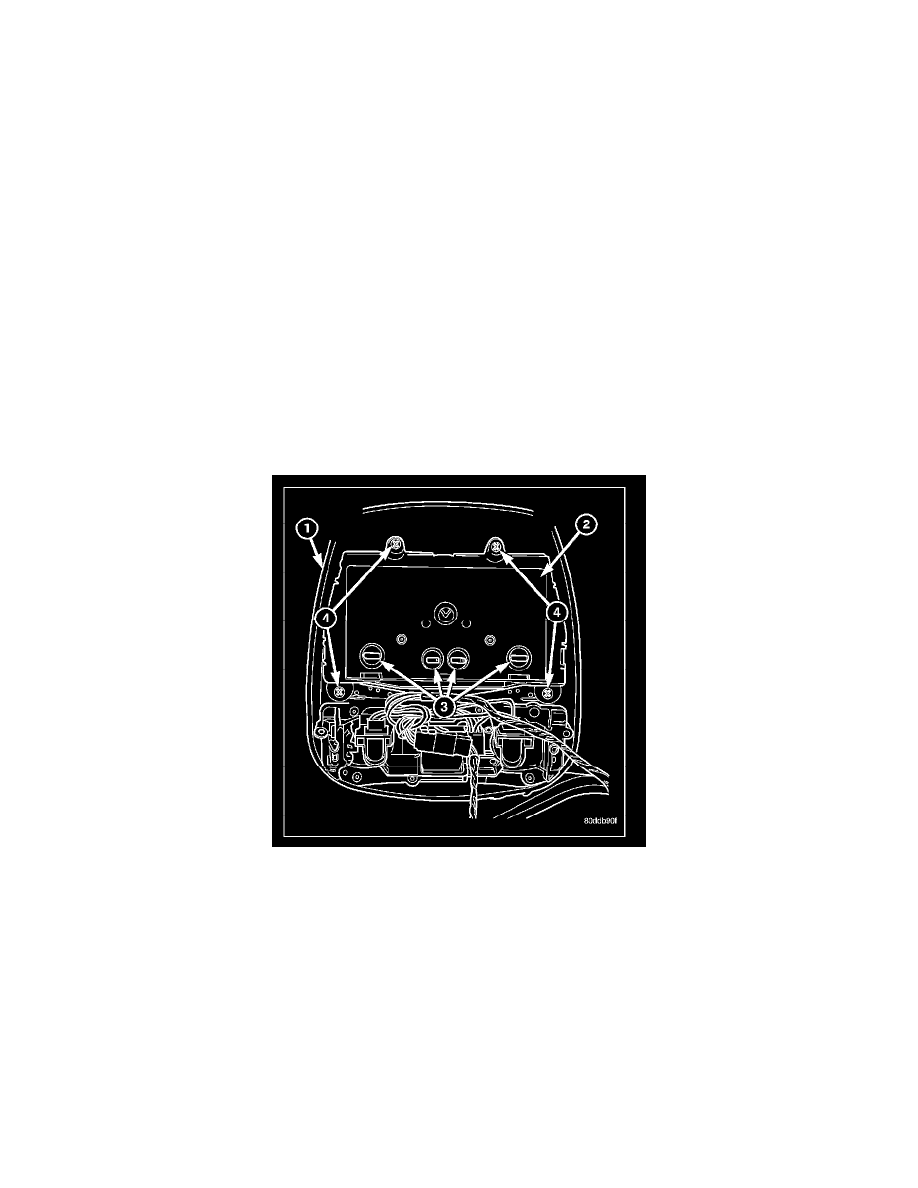
Module Lamp Replacement
1. Remove the overhead console.
2. Using a flat blade screwdriver twist out socket/lamp (3).
3. Replace lamp(s) as necessary.
Programming Transmitter Codes
CAUTION:
-
Vehicle exhaust contains carbon monoxide, a dangerous gas. Do not run the vehicle's exhaust while training the transceiver. Exhaust gas can cause
serious injury or death.
-
Your motorized door or gate will open and close while you are training the Universal Transceiver. Do not train the transceiver if people or pets are
in the path of the door or gate. A moving door or gate can cause serious injury or death to people and pets or damage to objects.
1. Press and hold the two outer HomeLink buttons, and release only when the EVIC display shows "Channels Cleared" (after 20 seconds). Do not
hold the buttons for longer than 30 seconds and do not repeat step one to program a second and/or third hand-held transmitter to the remaining two
HomeLink buttons.
2. Position the end of your hand-held transmitter 1-3 inches (3-8 cm) away from the HomeLink buttons.
3. Simultaneously press and hold both the HomeLink button that you want to train and the hand-held transmitter buttons. Do not release the buttons