
RAM SRT-10 Pickup V10-505 8.3L (2004)
Catalytic Converter: Service and Repair
CONVERTER - CATALYTIC
8.3L ENGINE
1. Raise and support vehicle.
2. Saturate the bolts and nuts with heat valve lubricant. Allow 5 minutes for penetration.
3. Disconnect oxygen sensor electrical connectors.
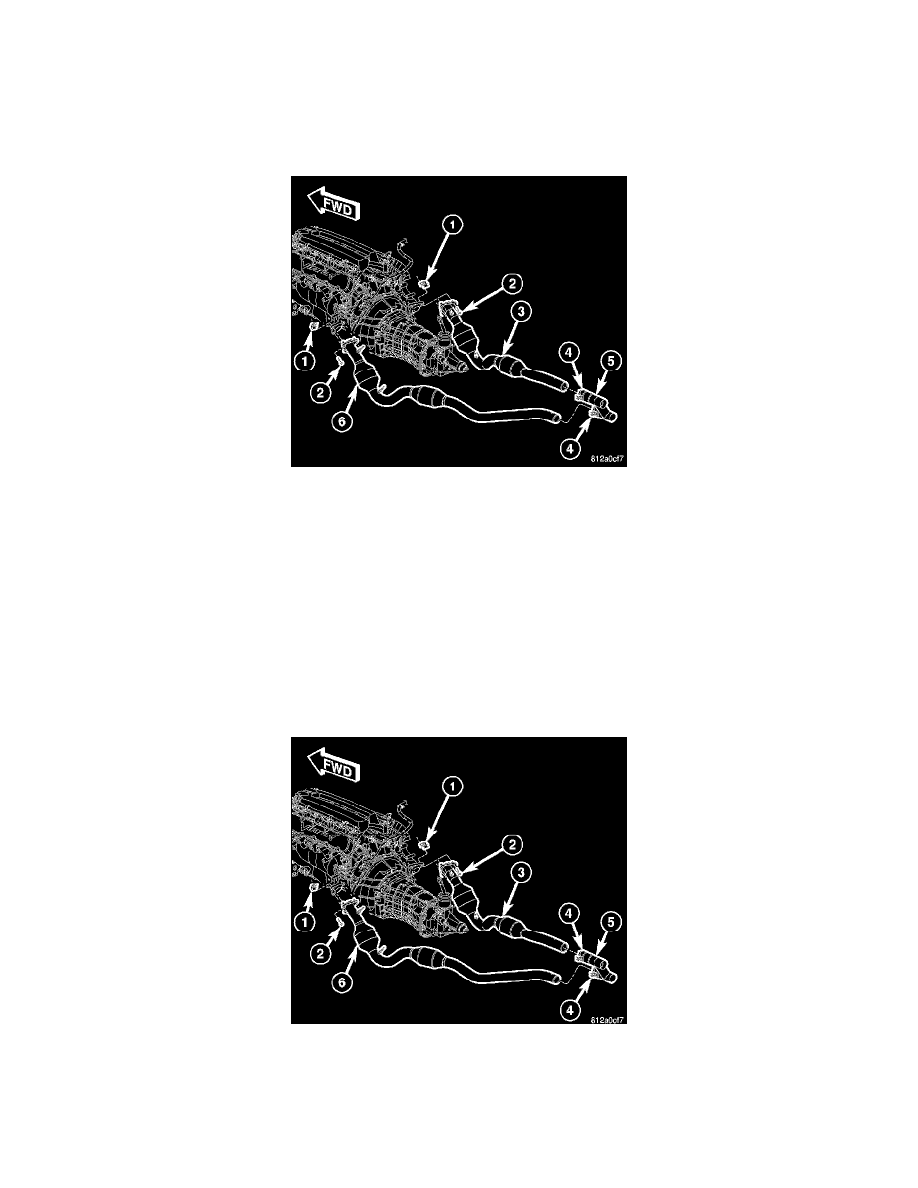
4. Remove LH exhaust pipe to manifold bolts (2), retainers and nuts (1).
5. Remove LH catalytic converter to muffler clamp nuts (4).
6. Rotate LH catalytic converters (6) from the muffler (5).
7. Remove RH exhaust pipe to manifold bolts (2), retainers and nuts (1).
8. Remove RH catalytic converter to muffler clamp nuts (4).
9. Rotate RH catalytic converter (3) from the muffler (5).
10. Remove clamps and nuts (4).
INSPECTION
Look at the stainless steel body of the converter, inspect for bulging or other distortion that could be a result of overheating. If the converter has a heat
shield attached make sure it is not bent or loose.
If you suspect internal damage to the catalyst, tapping the bottom of the catalyst with a rubber mallet may indicate a damaged core.
INSTALLATION
1. Make sure catalytic converters (3, 6) and mufflers (5) are free of burrs.
2. Insert RH catalytic converter (3) into muffler (5).
3. Make sure the alignment tang on the catalytic converter (3) seats in the alignment slot on the muffler (5).
4. Position the catalytic converter (3) to the exhaust manifold. Install and hand tighten bolts (2), retainers and nuts (1).
5. Insert LH catalytic converter (6) into muffler (5).
6. Make sure the alignment tang on the catalytic converter (6) seats in the alignment slot on the muffler (5).