
Shadow L4-153 2.5L SOHC (1988)
Console: Service and Repair
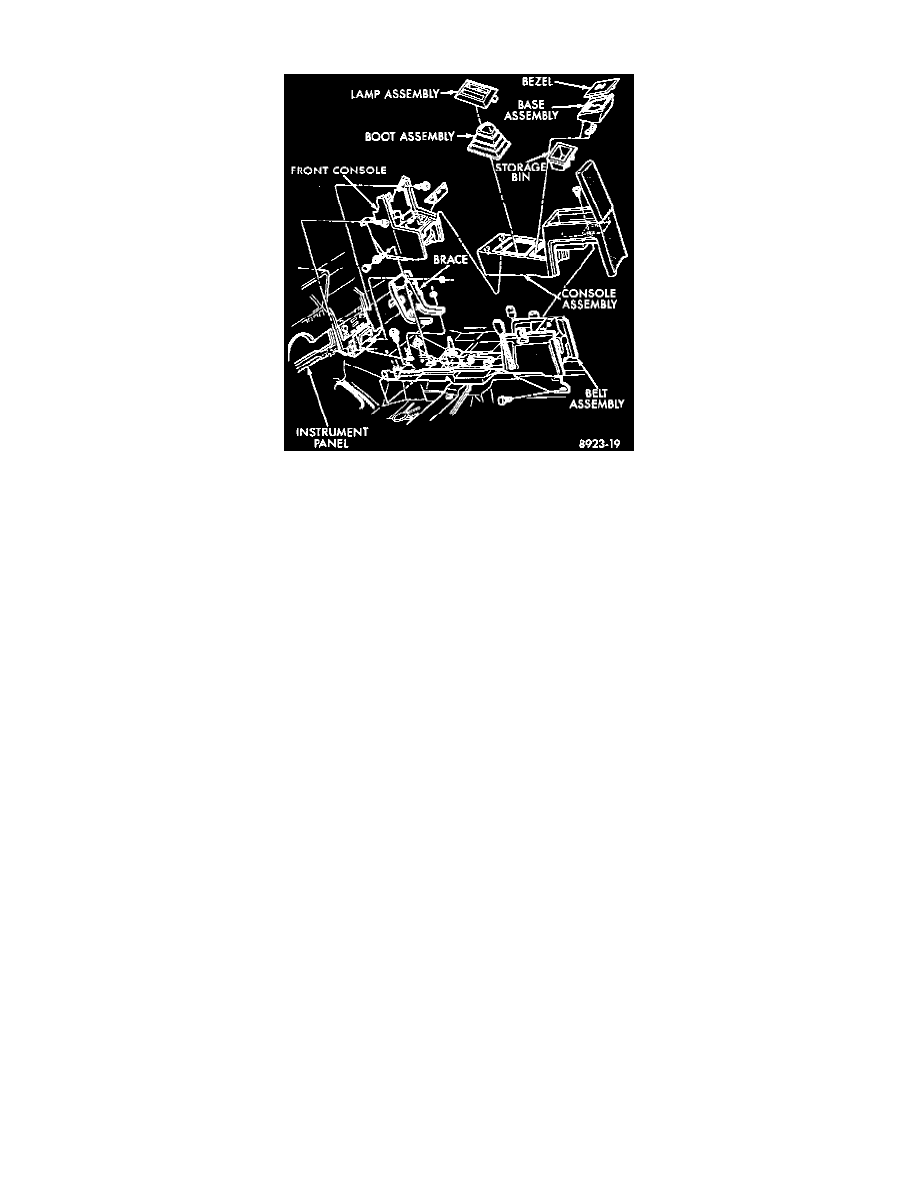
Console Assembly
GENERAL INFORMATION
The center and rear console must be removed from vehicle as an assembly, before the forward floor console can be removed.
CENTER AND REAR CONSOLE REMOVAL
1. Place automatic or manual transaxle shifter in neutral before removing console and disconnect battery.
2. Remove set screw from front of shifter knob and twist off shifter knob.
3. Remove two screws from rear console (armrest) to floor bracket. Easiest access is from rear seat.
4. Pulling up on both sides of center console at front will release two spring fasteners to front console.
5. With center and rear console assembly raised away from floor, disconnect lamp from automatic gear select indicator (if so equipped) by pulling
lamp downward. If not equipped with power switches, the center and rear console can now be removed from vehicle.
6. If equipped with power windows, door locks or mirrors, the top of the switch bezel is popped off by inserting a screwdriver blade into the slot
located on either side of the power switches box, and twisting.
7. With bezel top removed, wiring connections to the switches may be unplugged. The center and rear console can now be removed from vehicle.
FORWARD FLOOR CONSOLE
1. Remove center and rear console armrest assembly.
2. Remove center instrument panel trim bezel, (pulls straight off-no screws). It may be necessary to remove ash receiver tray from instrument panel.
3. Remove six screws, two each side to instrument panel, and one each side panel to floor bracket. The console may be pulled rearward and up over
gearshift.