
Shadow L4-153 2.5L SOHC Turbo (1989)
Heated Glass Element: Testing and Inspection
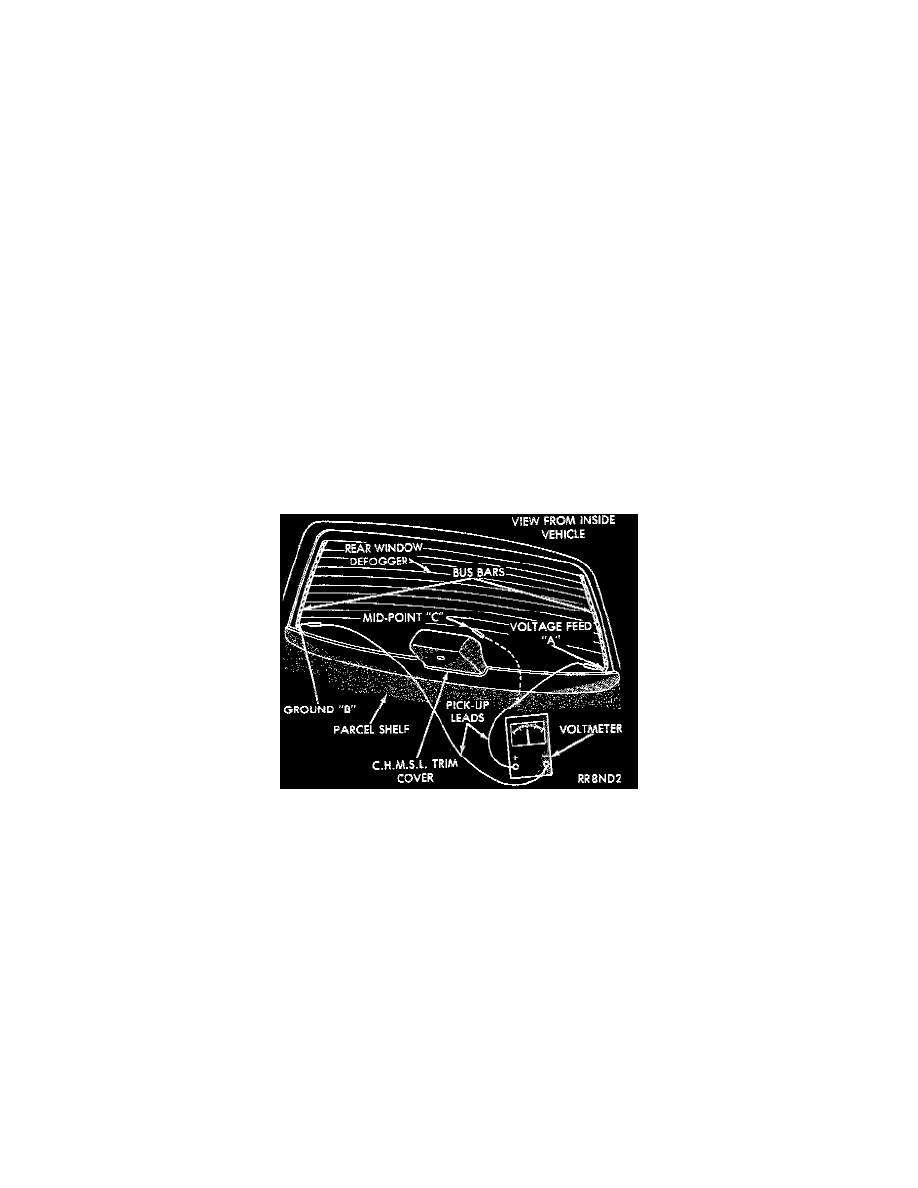
SYSTEM TEST
Electrically heated rear window defogger operation can be checked in vehicle in the following manner:
1. Turn ignition ON.
2. Turn rear window defogger control switch on.
3. Monitor vehicle voltmeter. With the control switch ON, a distinct needle deflection should be noted.
4. If vehicle is not equipped with ammeter, the rear window defogger operation can be checked by feeling the glass. A distinct difference in
temperature between the grid lines and adjacent clear glass can be detected in 3 to 4 minutes of operation.
5. Using a DC voltmeter contact terminal "B" with the negative lead, and terminal "A" with the positive lead. The voltmeter should read 10-14 volts.
Indicator light illumination means that there is power available at the output of the relay only, and does not necessarily verify system operation.
If the rear window defogger does not operate, the problem should be isolated in the following manner:
1. Confirm the ignition switch is ON.
2. Ensure that the heated rear glass feed wire is connected to the terminal or pigtail and that the ground wire is in fact grounded.
3. Ensure that the fusible link and control circuit fuse is operational and all electrical connections are secure.
When the above steps have been completed and the system is still inoperative, one or more of the following is defective:
a. Control switch/timer relay module.
b. Rear window grid lines (all grid lines would have to be broken, or one of the feed wires not connected for the system to be inoperative.
If turning the switch on produces severe voltmeter deflection, the circuit should be closely checked for a shorting condition.
If the system operation has been verified but indicator bulb does not light, check and replace bulb.