
Shadow Convertible L4-135 2.2L SOHC (1991)
mm) fore and aft, the header will have to be cut to provide enough space to install the new header seal, go to Step 21B. If the header does
not need to be cut, go to Step 27.
B.
Measure across the header horizontally 3.0 in. (75 mm) and scribe marks at that location as shown. Make vertical cuts or grind along the
scribe marks. (if the A-pillar measurement is greater than 3.0 in. [75 mm] and has a vertical cut, grinding is not required).
22.
Cut any metal protrusion from the inside corner of the pinch weld, if present.
NOTE:
APPLY ANTI-CORROSION RUST PROHIBITIVE PAINT TO THE BARE METAL EDGES OF ALL CUT OR GROUND AREAS.
Reinforcing Header
23.
If cutting or grinding was required in Step 21B, reinforcing of the header will be necessary due to possible weakening. Perform the procedure
below.
A.
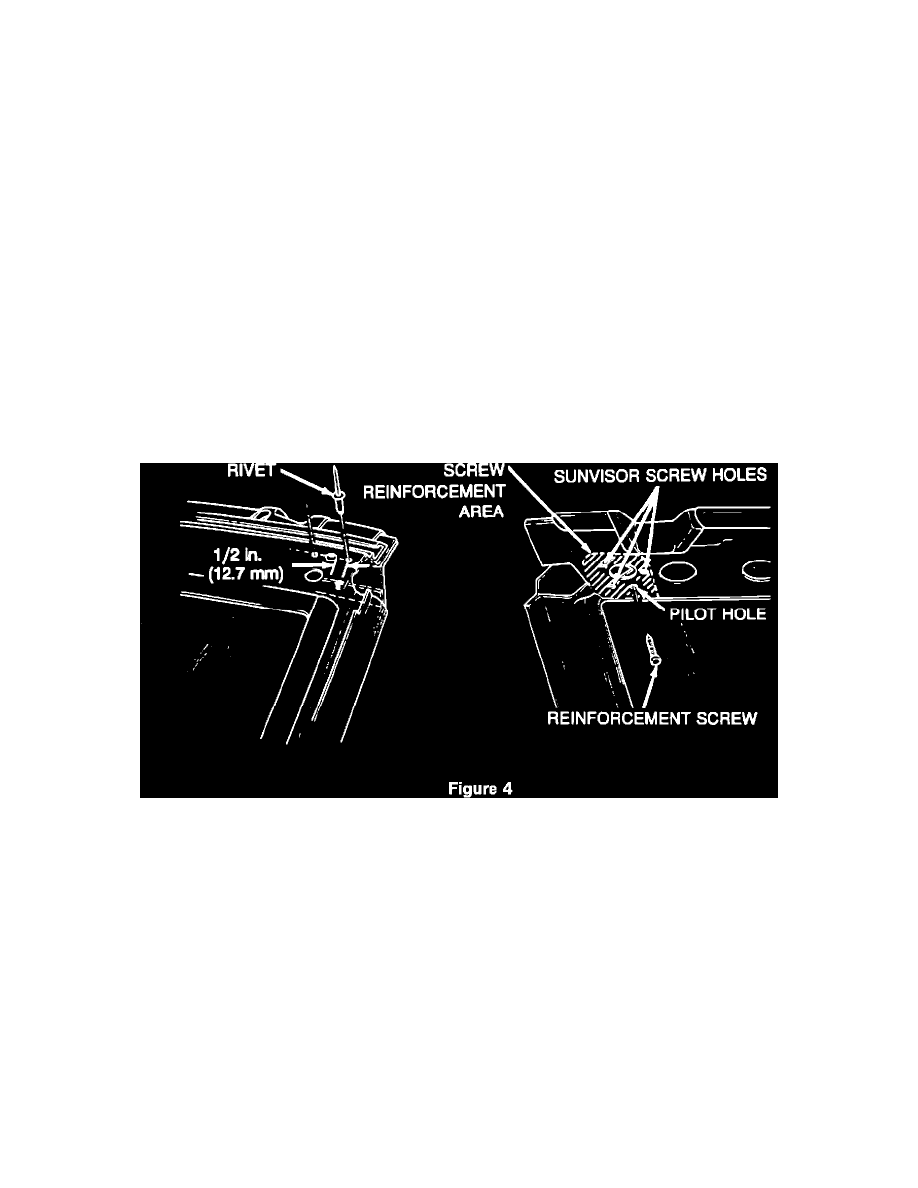
Clean both corners of the header thoroughly using grease and wax remover until the outboard rivet heads are visible.
B.
Using a 1/8 in. (3.17 mm) drill bit, drill a hole 1/2 in. (12.7 mm) inboard and outboard of each of the existing outboard rivets.
NOTE:
WHEN DRILLING THE HOLES, THE DRILL MUST PIERCE TWO LAYERS OF SHEET METAL.
24.
Install the gray steel rivets provided at each location.
25.
Install two, 4.8 mm (# 10) self-tapping screws each into the underside of the header at the outboard ends. Choose a location where there is material
sufficient to screw into without the screw heads interfering with the header garnish molding. Note the marks made earlier when the header garnish
molding was removed. Drill two 1/8 in. (3.17 mm) pilot holes and place the screws within the shaded area shown (Fig. 4).
26.
Inspect for any flex in the header. If necessary, add one additional screw and rivet as required.
Windshield Header Exterior Molding and Seal Installation
NOTE:
CLEAN THE ENTIRE AREA THOROUGHLY WITH GREASE AND WAX REMOVER PRIOR TO STARTING THE SEAL INSTALLATION
PROCEDURE.