
Shadow Convertible L4-135 2.2L SOHC (1991)
SCREWDRIVER AND THEN REMOVE THE PAPER BACKING FROM THE TAPE.
35.
Unlatch and raise the top off the header.
NOTE:
HEADER SEAL ATTACHING TABS MUST REMAIN LOOSE UNTIL STEP 70.
36.
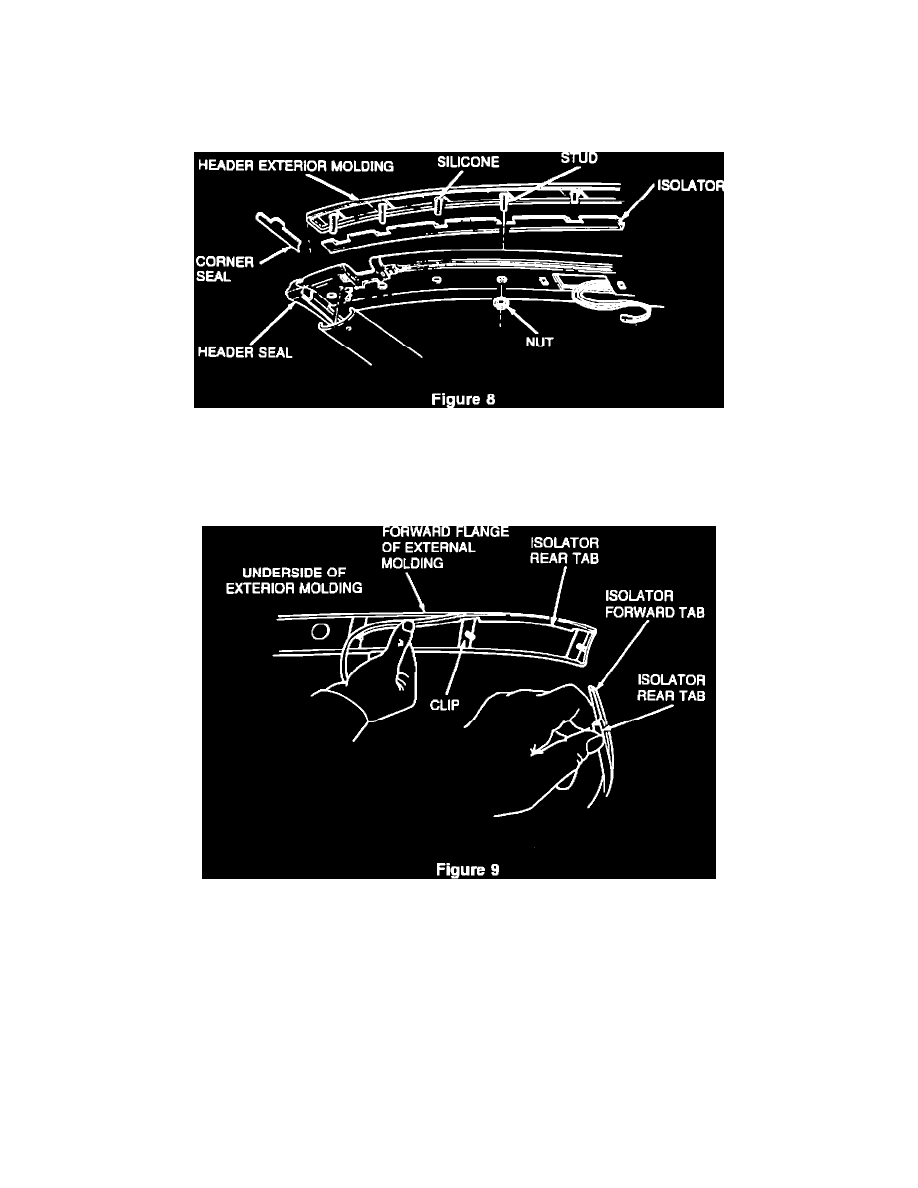
Install the exterior header molding clips to the exterior molding using the alignment marks to position correctly (Fig. 8).
NOTE:
THE SHORTER STUD MUST BE PLACED IN THE CENTER OF THE HEADER. THE THIN EDGE OF THE INTERIOR MOLDING CLIPS ARE
INSTALLED TO THE FRONT.
37.
Attach the header exterior molding isolator to the exterior molding by hooking the edge of the isolator under the forward edge of the exterior
molding. Center the clips within the notches on the isolator. Attach the isolator a foot at a time and tape the seal to temporarily hold it in place as it
is installed (Fig. 9).
NOTE:
TO INSTALL THE ISOLATOR, GRASP THE ISOLATOR WITH THE THUMB AND FOREFINGER. SQUEEZE THE OUTSIDE EDGES OF THE
ISOLATOR TOGETHER SPREADING THE TABS APART ON THE CHANNEL.
38.
Apply clear silicone to the base of each exterior molding stud.
39.
Carefully remove the tape and install the exterior molding to the header.
A.
Install the header corner seal using 3M Weatherstrip Adhesive (08011). It may require trimming as shown (Fig. 7).
B.
Install the header exterior molding aftaching nuts provided in the package.