
Shadow Convertible L4-153 2.5L SOHC Turbo (1991)
2
Header Spacing Strips
2
Side Rail
2
Door End Cap Foam Seal
2
Rear Rail Water Deflector
1
Butyl Tape, 60.0 in.
4
Bolt (M8-1.25 x 23 mm)
9
Nut (8-32)
8
Rivet (1/8 x.25 in.)
2
Screw (8-18 x.50 in.)
2
Push Pin
2
Butyl Patch, (2 x 2 in.)
6
Stainless Steel Rivets (Header
4
Screws
1
Kit, No. 1 Bow Garnish
5242132
(The Bow Garnish Kit may not be required, refer to Page 12, Step 40 for garnish identification.)
Repair Procedure:
NOTE:
THIS REPAIR PROCEDURE APPLIES TO ALL 1991 SHADOW CONVERTIBLE MODELS; HOWEVER, DUE TO COMPONENT CHANGES
MADE DURING THE MODEL YEAR, THERE MAY BE DIFFERENCES FROM VEHICLE TO VEHICLE THAT MAY NOT BE NOTED IN THE
PROCEDURAL STEPS.
This procedure involves installing an updated convertible top sealing package.
Door End Cap Removal
1.
Open the doors and roll down the windows.
CAUTION:
THE DOOR GLASS MUST BE ROLLED DOWN PRIOR TO LOWERING THE TOP OR DAMAGE MAY RESULT.
2.
Unlatch and lower the top.
CAUTION:
COVER THE INTERIOR AND EXTERIOR OF THE VEHICLE TO PREVENT DAMAGE DURING THE REPAIR PROCEDURE.
3.
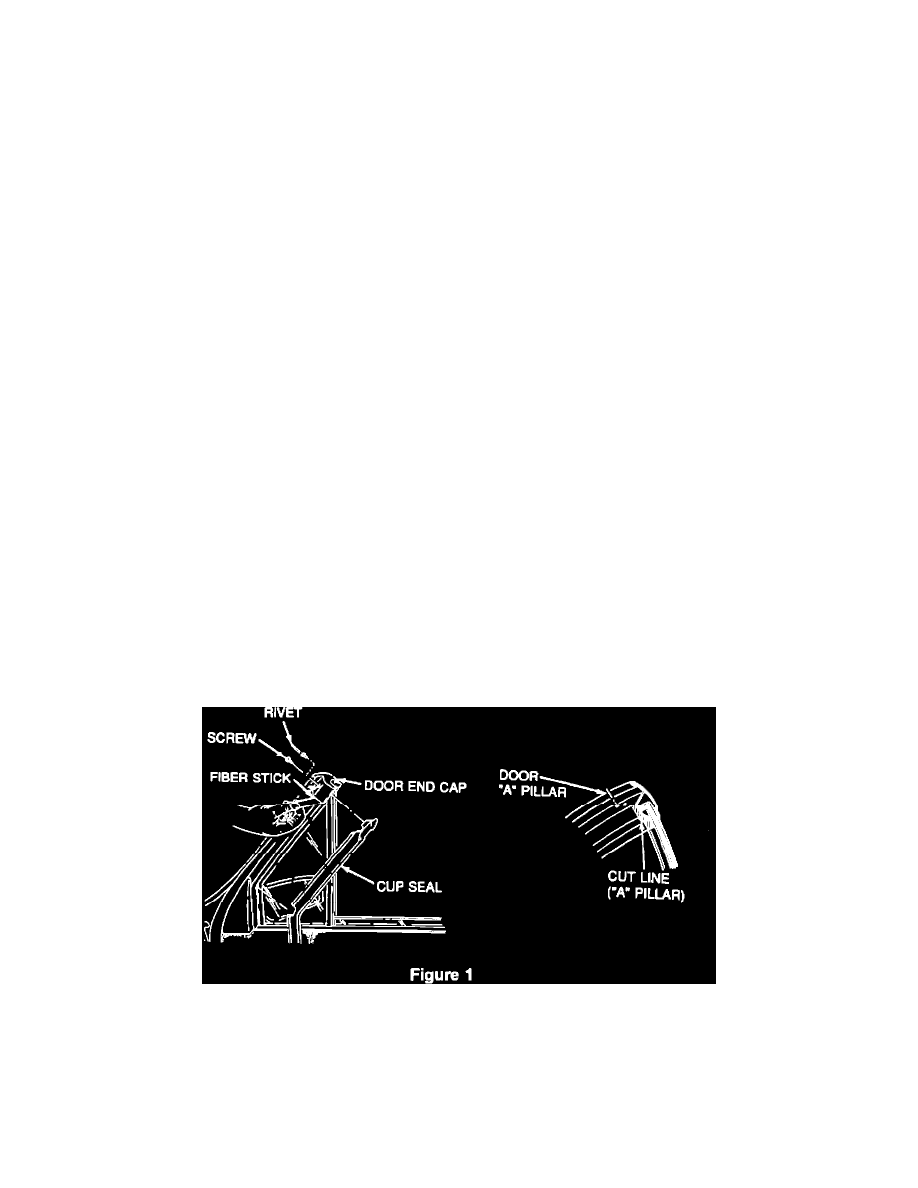
Remove the screws or rivets from the door end cap (Fig.1).
NOTE:
USE A 1/8 IN. (3.17 MM) DRILL BIT TO REMOVE THE RIVETS. AVOID ENLARGING THE EXISTING HOLES.
4.
Carefully separate the inboard bottom of the end cap from the door division bar using a thin fiber stick to detach the adhesive, considerable effort
may be required.