
Shadow Convertible L4-153 2.5L SOHC Turbo (1991)
25.
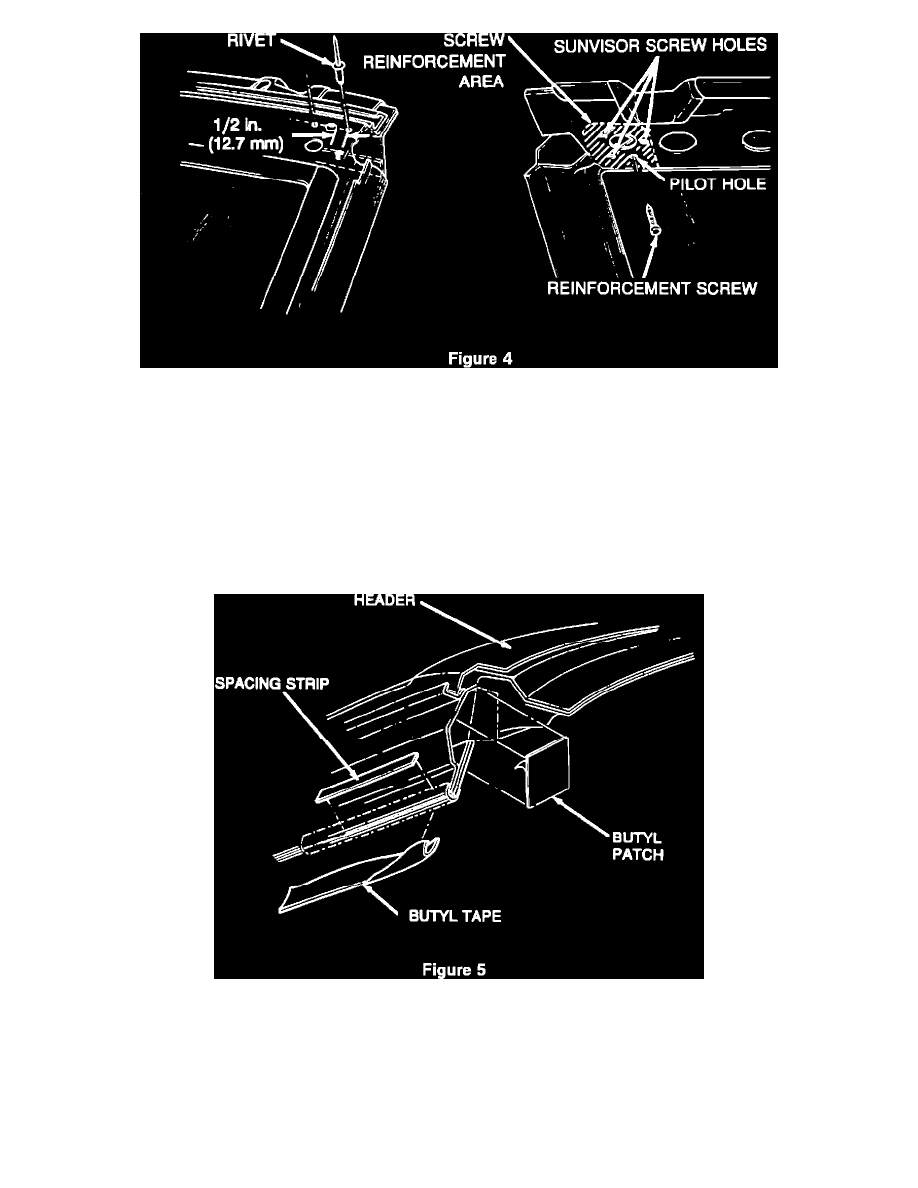
Install two, 4.8 mm (# 10) self-tapping screws each into the underside of the header at the outboard ends. Choose a location where there is material
sufficient to screw into without the screw heads interfering with the header garnish molding. Note the marks made earlier when the header garnish
molding was removed. Drill two 1/8 in. (3.17 mm) pilot holes and place the screws within the shaded area shown (Fig. 4).
26.
Inspect for any flex in the header. If necessary, add one additional screw and rivet as required.
Windshield Header Exterior Molding and Seal Installation
NOTE:
CLEAN THE ENTIRE AREA THOROUGHLY WITH GREASE AND WAX REMOVER PRIOR TO STARTING THE SEAL INSTALLATION
PROCEDURE.
27.
Apply one, 2 x 2 in. (50.8 x 50.8 mm) butyl patch provided to each A-pillar corner to seal the A-pillar (See Fig. 5).
28.
Cut two, 8 in. (203 mm) pieces of butyl tape provided 1 x 1/16 in. (25.4 x 1.58 mm) and apply it to the pinch weld from the cut edge forward,
(both left and right sides of vehicle).
29.
Fold the pieces lengthwise around the bend of the header A-pillar from the edge of the pinch welds forward.
30.
Attach the two, 6 in. (152 mm) plastic spacing strips provided, (one on each side of vehicle), over the butyl tape on the outboard surface.