
Shadow Convertible V6-181 3.0L SOHC VIN 3 FI (1993)
6.
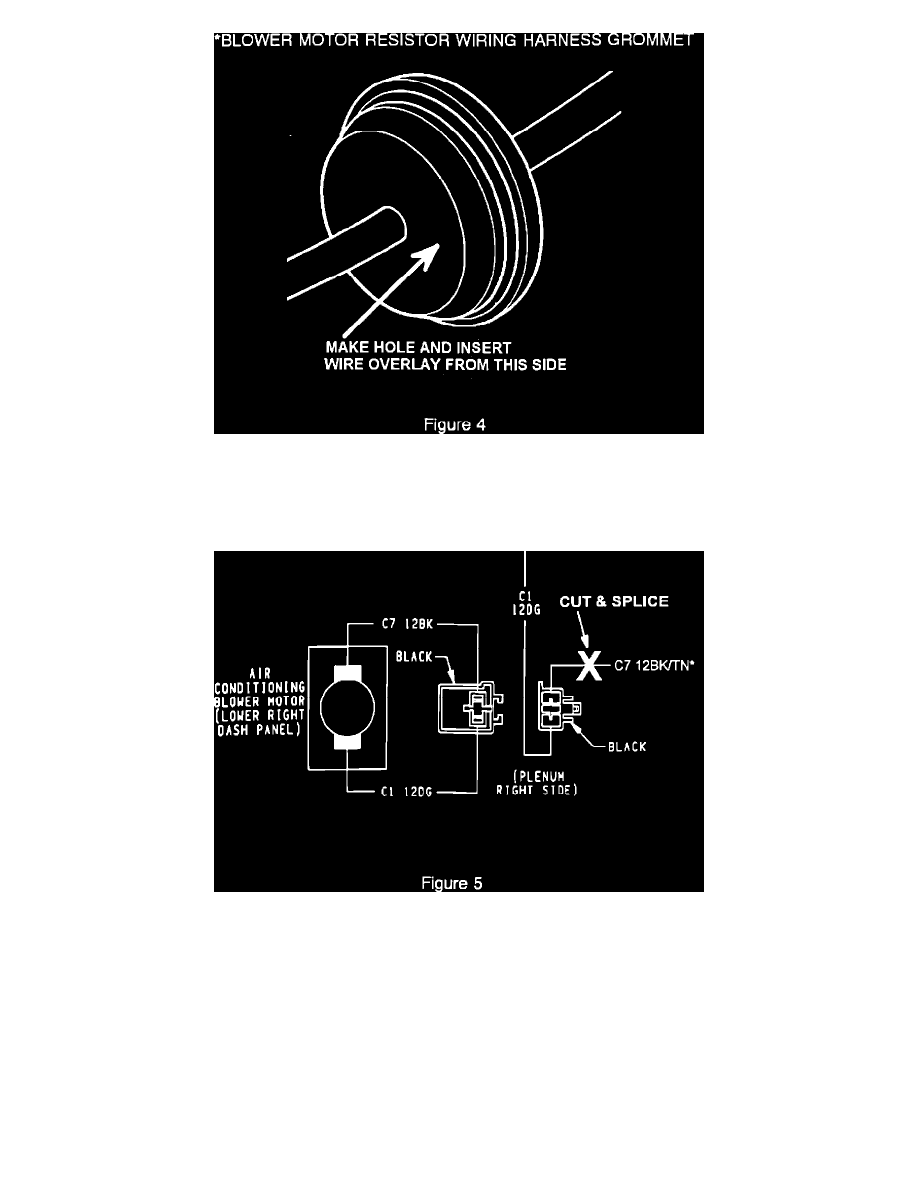
Locate the blower motor resistor wiring harness grommet and carefully push the grommet and harness through the dash panel. Feed the wire
overlay P/N 4741933 through the dash also. In the passenger side compartment, using an awl or similar tool, make a hole in the grommet as
indicated in Figure 4. Feed the open end of the wire overlay through the grommet on the side indicated. Using two tie straps, P/N 6015756, secure
the overlay wire to the existing blower motor resistor harness. Feed the wire overlay and blower motor resistor wiring harness back through the
hole in the dash panel, and secure the grommet in place and plug the black 5-way: connector onto the new resistor block.
7.
On the inside passenger side compartment, cut the C7 (12BK/TN*) wire approximately 2" from the blower motor wiring harness, black 2-way
connector, see Figure 5. Seal off the harness end of the wire with heat shrink sleeve P/N 4419644. Slide another heat shrink sleeve P/N 4419644
over the wire overlay. Splice and solder the overlay wire P/N 4741933 to the short length of wire left at the connector, following the wiring repair
procedures outlined in the appropriate service manual. Reinstall the black 2-way connector to the blower motor harness connector.
8.
Reinstall the glove box and all parts removed gaining access to the blower motor resistor in the engine compartment. Reconnect the battery and
verify that the A/C and heater blower operates on all four speeds.
POLICY:
Reimbursable within the provisions of the warranty.
TIME ALLOWANCE:
Labor Operation No.
24-55-10-90
0.8 Hrs.