
Spirit L4-153 2.5L SOHC Flex Fuel (1995)
Console: Service and Repair
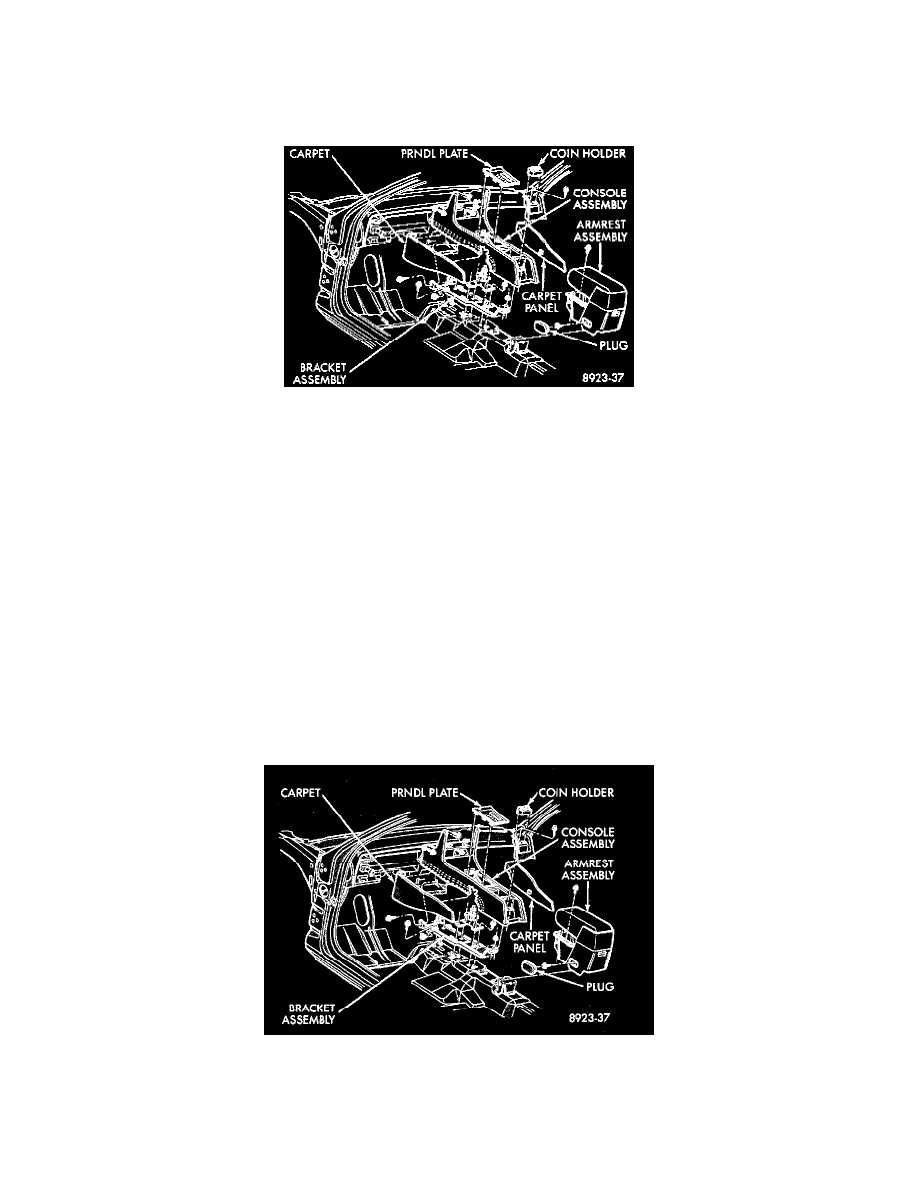
Console Replacement
Floor Console
Console Assembly
1. Position front seats full forward.
2. Remove access hole plugs on sides of center arm rest riser and remove bolts holding riser to floor bracket.
3. Remove coin holder and remove screws holding arm rest riser to front console.
4. Position front seats full rearward.
5. Remove radio bezel from instrument panel. Refer to Group SE, Instrument Panel. Remove screws holding console to instrument panel.
6. Remove screws holding console to lower instrument panel rail.
7. Remove screws and disengage hook and loop fastener holding carpet panels to sides of console and separate panels from console.
8. Remove screws holding console to forward floor mounting bracket.
9. Remove set screw holding gear selector knob to shift lever and pull knob from shifter on vehicles with automatic transaxle.
10. Lift forward edge of PRNDL cover and separate cover from console on vehicles with automatic transaxle.
11. Lift gear shift boot adapter from console and push adapter through opening in console on vehicles with manual transaxle.
12. Separate console from floor and remove from vehicle.
13. For installation, reverse the preceding operation. On vehicles with automatic transaxle, verify gear selector indicator adjustment before returning
vehicle to use.
Front Center Console
FRONT CENTER CONSOLE
REMOVAL
1. Position front seats full forward.
2. Remove access hole plugs on sides of center arm rest riser and remove bolts holding riser to floor bracket.
3. Remove coin holder and remove screws holding arm rest riser to front console.