
Spirit L4-153 2.5L SOHC VIN K TBI (1993)
Engine Mount: Service and Repair
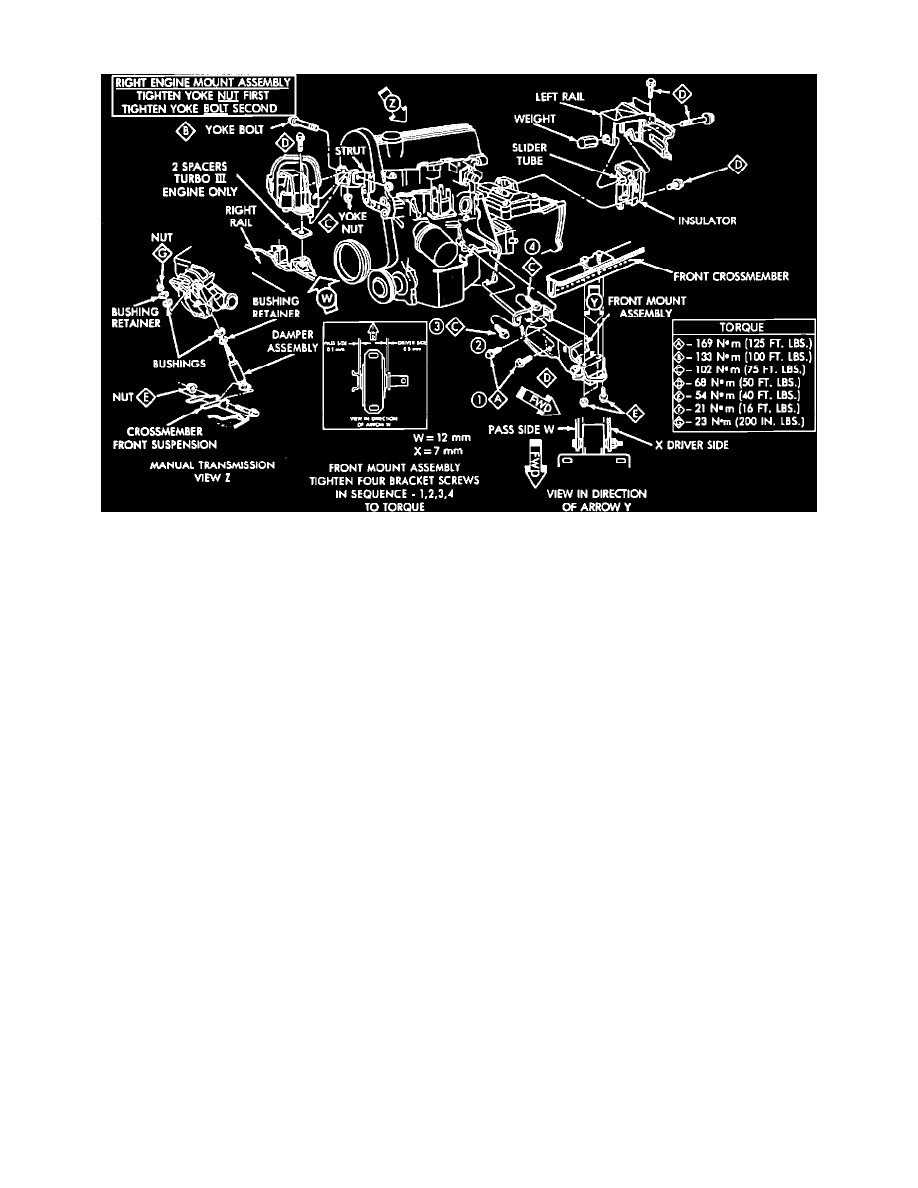
Fig. 3 Engine Mounting
REMOVAL AND INSTALLATION
Note: The engine mounts incorporate slotted bolt holes to permit side to side positioning of the engine, thereby affecting the length of the
driveshaft.
Caution: Failure to properly position engine may result in extensive damage to the engine or driveshafts.
Right Side Mount
1. Remove right engine mount insulator vertical fasteners from frame rail.
2. Remove load on engine mount by supporting engine and transmission assembly with a floor jack.
3. Remove through bolt from insulator assembly then the insulator.
4. Reverse procedure to install, noting the following:
a. Tighten bolts to specification. See Figure 3.
b. Adjust engine mount. Refer to Engine Mount Insulator Adjustment.
See: Adjustments
Left Side Mount
1. Raise and support vehicle and remove inner splash shield.
2. Support transaxle with a transmission jack.
3. Remove insulator through bolt then the transaxle mount bolts and mount.
4. Reverse procedure to install, noting the following:
a. Ensure slide tube is seated into rail bracket guides.