
Spirit V6-181 3.0L SOHC (1990)
1.
Remove the intake plenum and manifold.
2.
Remove the rocker cover, rocker shaft and cam bearing cap assembly on the forward bank using the procedure in the appropriate technical service
manual.
3.
Remove one of the cam journal caps from the assembly and reinstall on the head. This will prevent the cam from possibly coming out of the
journals when the engine is rotated later.
4.
Check front bank cylinders in # 4, # 2, then # 6 sequence.
NOTE:
IF A VALVE GUIDE CAN BE MOVED WITH FINGER PRESSURE, REPLACE THE CYLINDER HEAD.
5.
Remove the spark plug and apply compressed air to the cylinder to prevent valve dropping. Use special tool MD998772A to remove the intake
and exhaust valve locks, the valve spring retainer, valve spring and valve spring seat.
6.
Remove the valve stem seals.
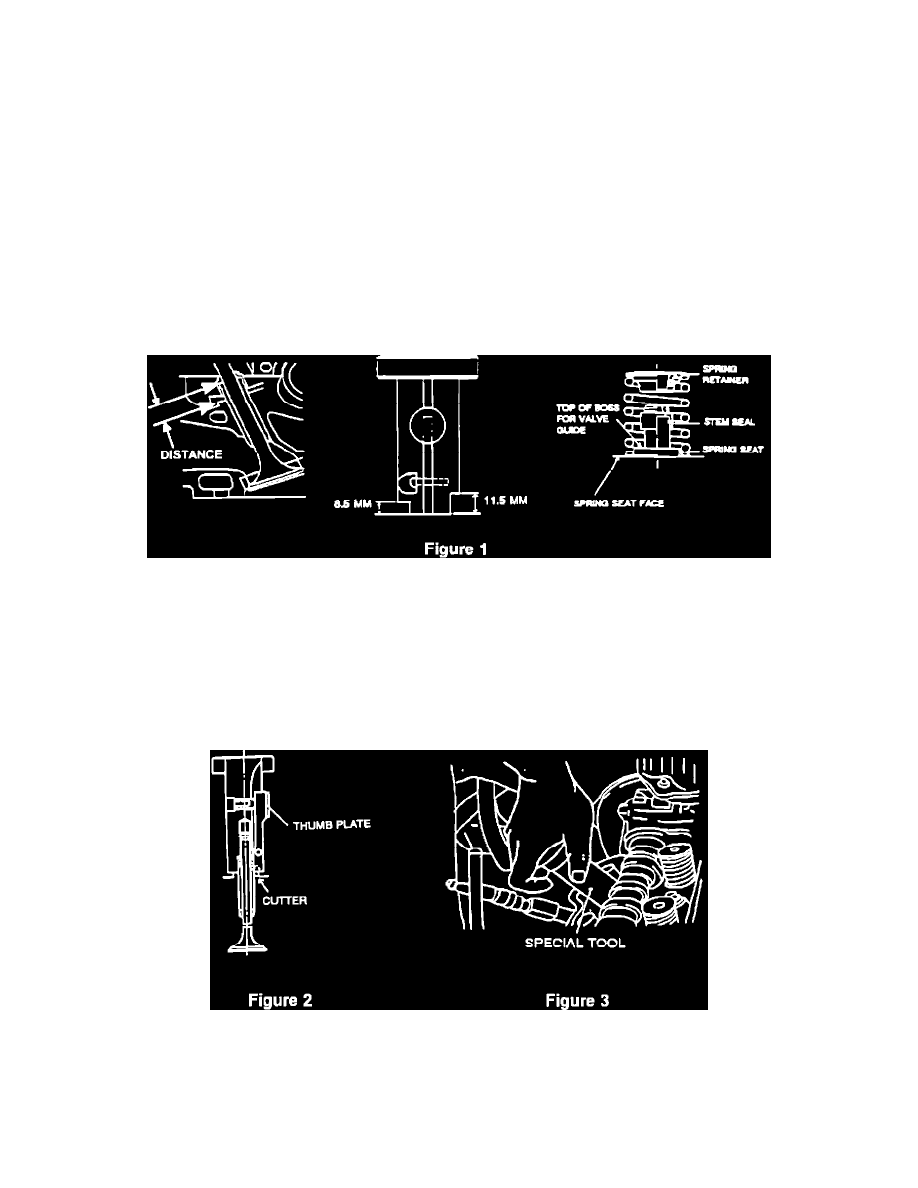
7.
Using the height gauge that is integrated into the Groove Cutter (Special tool MD998790), measure the distance between the top of the exhaust
valve guide and the top of the valve guide boss on the cylinder head (refer to illustrations of Fig. 1). If the distance is .335" (8.5 mm) or less the
cylinder head will have to be removed for repair, perform PROCEDURE B. If the distance is .335" (8.5 mm) or more, perform PROCEDURE A.
8.
Repeat steps 2 through 7 for the rear bank. Do the cylinders in # 3, # 1, and # 5 sequence.
Procedure A
PROCEDURE A:
Snap Ring Installation and Valve Stem Seal Replacement (On the Vehicle)
1.
Using the groove cutter (Special tool MD998790), make a groove in the exhaust valve guide (refer to Fig. 2 and 3).
a.
Install the special tool on the exhaust valve guide.
b.
Turn the tool clockwise until the force required to turn the tool suddenly decreases.
c.
Remove the tool.