
Sprinter 2500 L5-2.7L DSL Turbo (2003)
1. Raise and support the vehicle.
2. Remove the rear wheels.
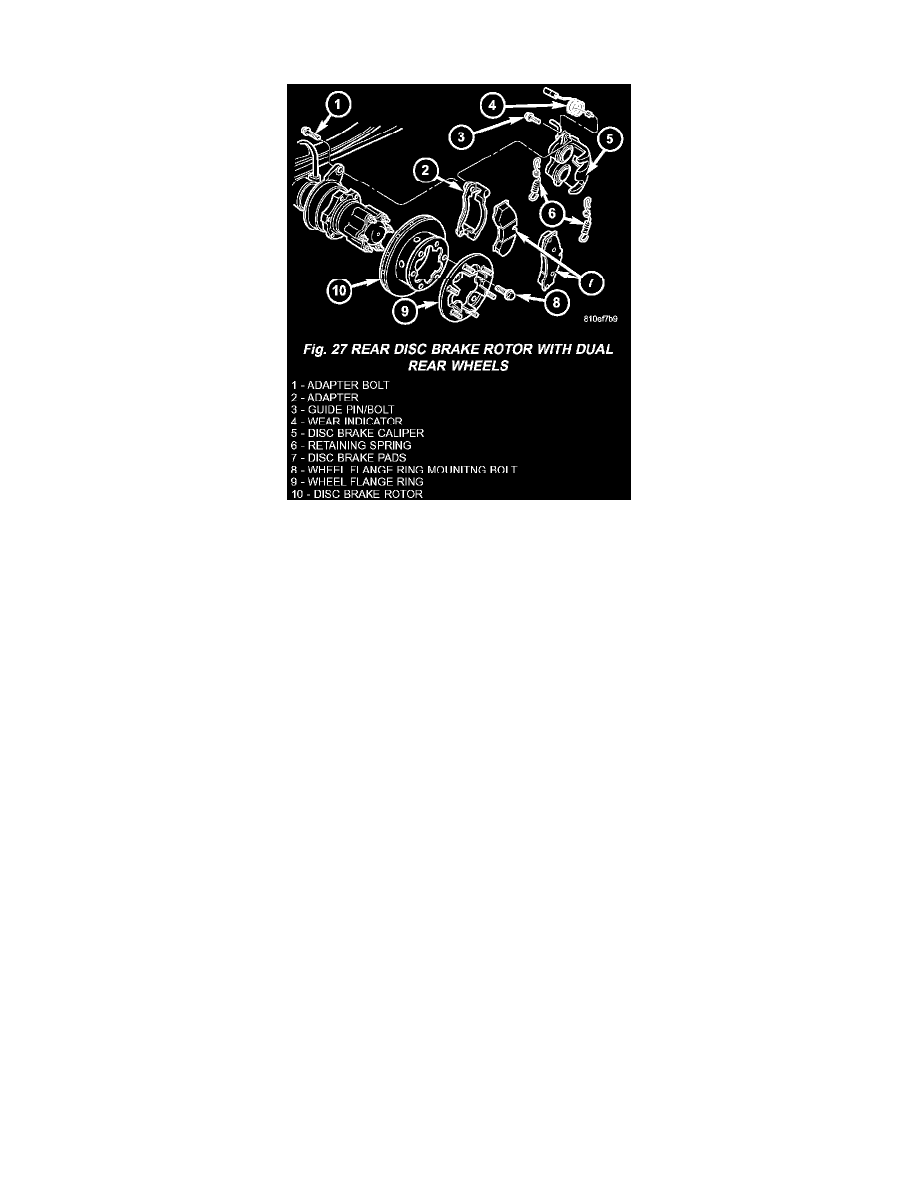
3. Remove the rear disc brake pads (Fig. 27).
4. Remove the disc brake caliper adapter (Fig. 27).
5. Apply the parking brake.
6. Install two lug studs to secure the disc brake rotor when the locking bolt is removed.
7. Remove the wheel flange ring (Fig. 27).
8. Remove the locking bolt for the disc brake rotor (Fig. 27).
9. Remove the two lug nuts.
10. Release the parking brake.
11. loosen the park brake adjuster to allow clearance for the rotor removal (Fig. 27).
12. Remove the rear disc brake rotor.
INSTALLATION (DRW)
1. Install the disc brake rotor to the hub and install two lug studs to hold rotor in place (Fig. 27).
2. Apply the parking brake.
3. Install the locking bolt for the rotor (Fig. 27). Tighten to 23 Nm (204 inch lbs.).
4. Install the disc brake caliper adapter (Fig. 27). Tighten to 170 Nm (125 ft. lbs.).
5. Install the wheel flange ring (Fig. 27) Tighten to 200 Nm (148 ft. lbs.).
6. Install the brake pads (Fig. 27).
7. Release the parking brake.
8. Adjust the parking brake.
9. Press and release the brake pedal several times until pressure has built up.
10. Check fluid in reservoir and correct if necessary.
11. Install the rear wheels.
12. Lower the vehicle.