
Sprinter 2500 L5-2.7L DSL Turbo (2003)
9. Remove top side rail.
CAUTION: For all work in which the crankshaft should not rotate, secure camshaft gear to timing chain.
10. Mark camshaft sprocket relative to timing chain.
11. Unbolt camshaft sprocket from exhaust camshaft.
NOTE: Note the position of dowel pin for camshaft sprocket alignment during reassembly.
12. Remove camshaft sprocket.
CAUTION: Camshaft bearing caps must remain in proper order and position.
NOTE: Slacken the bolts of the camshaft bearing caps evenly in steps of one turn until the back pressure is eliminated. Camshafts must not be
twisted when slackening the camshaft bearing caps.
13. Paint mark or scribe, then remove camshaft bearing caps.
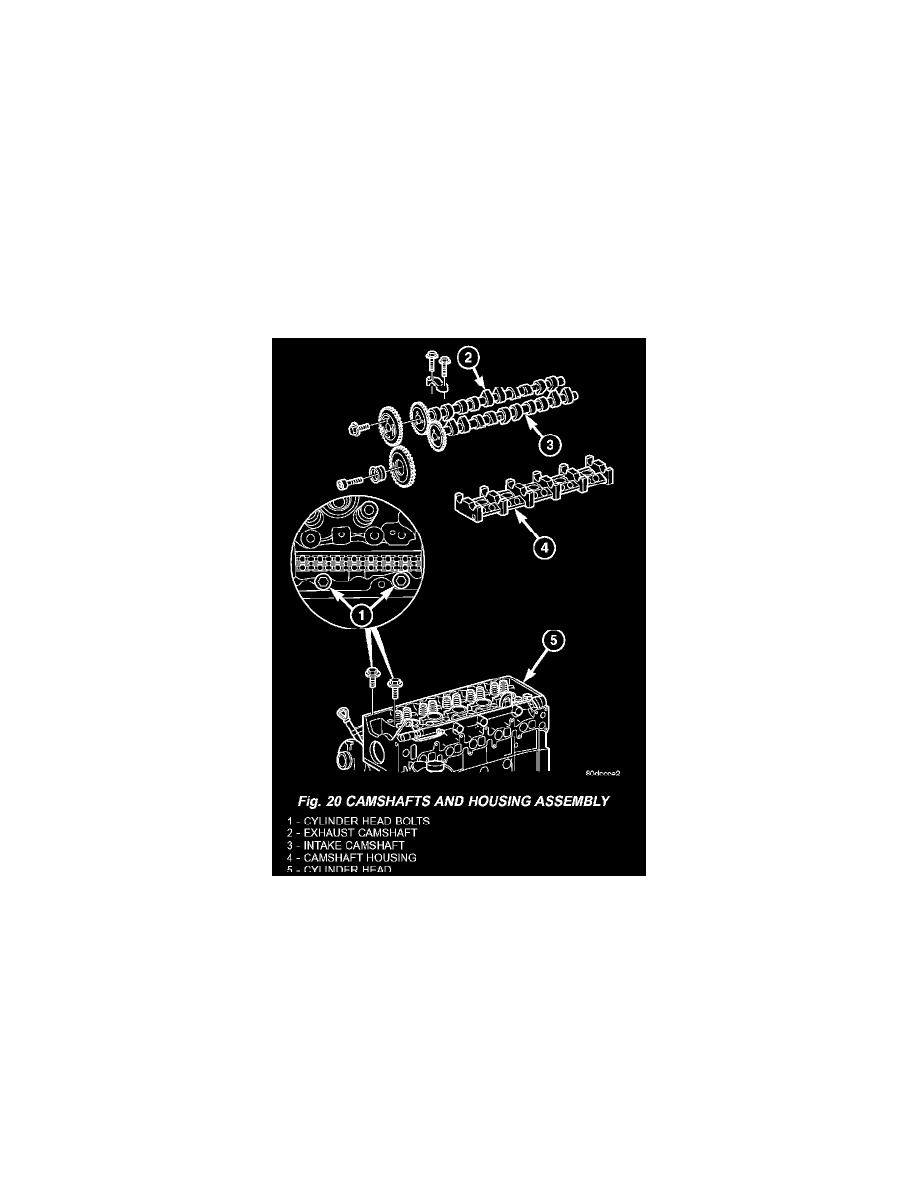
14. Remove the inlet and exhaust camshafts (Fig. 20).
INSTALLATION
CAUTION: The camshafts are sensitive to fracturing. Ensure they are installed free of stress.
CAUTION: Pay attention to assignment of camshafts. Camshaft code numbers are visible on the thrust collar of the axial bearing.
CAUTION: Oil bucket tappets and camshaft bearing points. Inspect ease of operation of bucket tappets.
1. Install inlet and exhaust camshafts.
CAUTION: Install camshafts so that the two holes in camshaft sprockets are positioned opposite and the markings of the camshaft and camshaft
bearing cap are aligned.