
Sprinter 2500 L5-2.7L DSL Turbo (2003)
Evaporator Core: Service and Repair
Rear Evaporator
REMOVAL
WARNING: REFER TO THE APPLICABLE WARNINGS AND CAUTIONS FOR THIS SYSTEM BEFORE PERFORMING THE
FOLLOWING OPERATION.
1. Remove the rear A/C housing.
2. Remove the liquid line between the rear expansion valve and the solenoid valve.
3. Remove the seals from the liquid line fittings and discard.
4. Install plug in, or tape over the opened liquid line fittings and the solenoid valve outlet port and the expansion valve inlet port.
5. Remove the condensation trap.
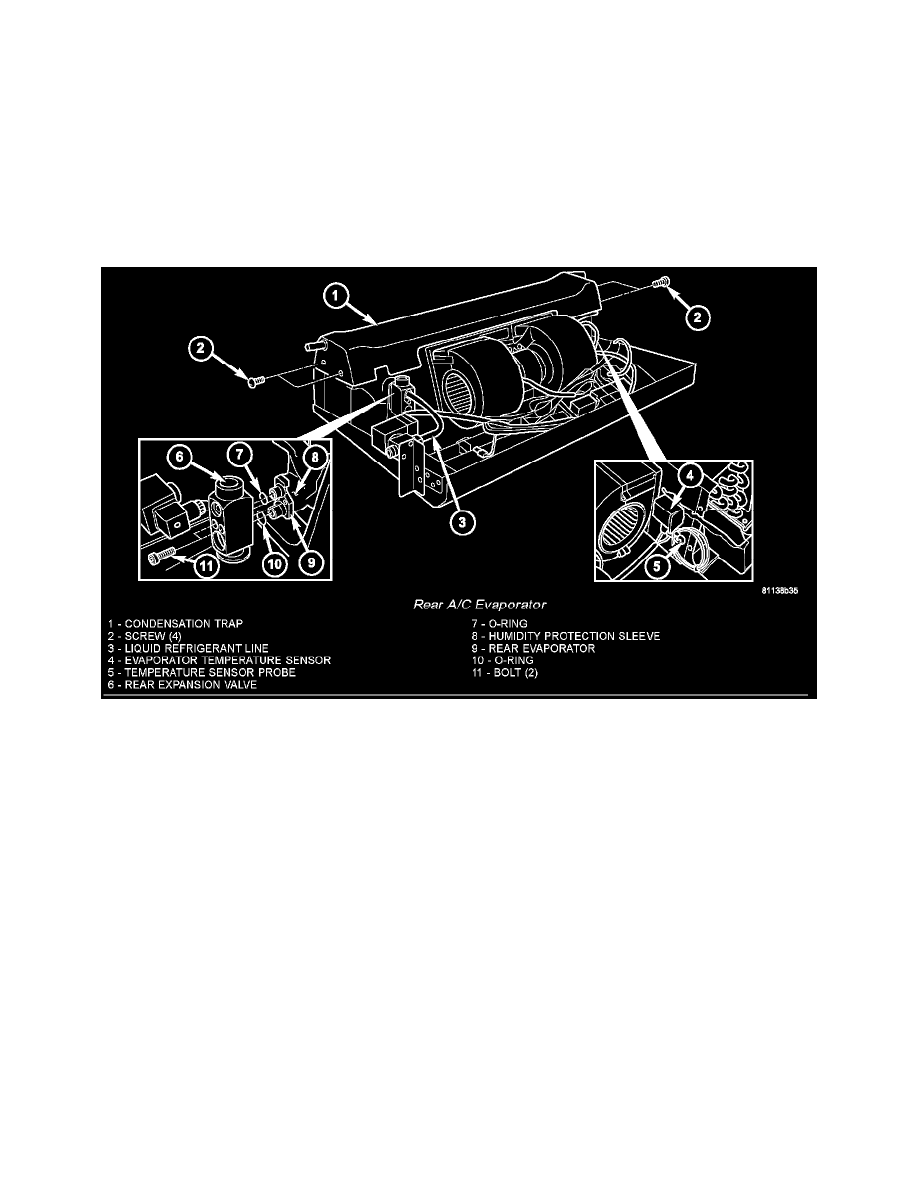
Rear A/C Evaporator
6. Remove the two bolts that secure the expansion valve to the rear evaporator tube tapping plate.
7. Remove the expansion valve from the rear evaporator tube tapping plate.
8. Remove the seals from the evaporator inlet and outlet tube fittings and discard.
9. Install plugs in, or tape over the opened evaporator inlet and outlet tube fittings and all expansion valve ports.
10. Remove the sensor probe from the rear evaporator.
11. Remove the humidity protection sleeve from the rear evaporator.
12. Drill out the rivets that secure the evaporator to the mounting plate.
13. Remove the rear evaporator from the mounting plate.
INSTALLATION
1. Position the rear evaporator onto the mounting plate.
2. Install new rivets to secure the evaporator to the mounting plate.
3. Install the humidity protection sleeve to the rear evaporator.
4. Install the sensor probe between the rear evaporator coil fins.
5. Remove the tape or plug from the evaporator inlet and outlet tube fittings and expansion valve ports.
6. Lubricate new rubber O-ring seals with clean refrigerant oil and install them on the evaporator inlet and outlet tube fittings.
7. Position the expansion valve onto the tapping plate evaporator inlet and outlet tube fittings.
8. Install and tighten the two bolts that secure the expansion valve to the evaporator tube tapping plate. Tighten the bolts to 5 N.m (45 in. lbs.).
9. Install the condensation trap.
10. Install the condensation trap screws. Tighten the screws to 2 N.m (17 in. lbs.).
11. Remove the tape or plug from the liquid line fittings and the solenoid valve outlet port and the expansion valve inlet port.
12. Lubricate new rubber O-ring seals with clean refrigerant oil and install them on the liquid line fittings.
13. Install the liquid line between the rear expansion valve and the solenoid valve.