
Sprinter 2500 L5-2.7L DSL Turbo (2003)
4. Connect the front section of the liquid line to the receiver/drier.
5. Install the bolt that secures the liquid line fitting to the receiver/drier. Tighten the bolt to 7 N.m (62 in. lbs.).
6. Position the front section of the liquid line into the routing clip and install the routing clip onto the body stud on the left frame rail.
7. Install the routing clip retaining nut. Tighten the nut to 5 N.m (45 in. lbs.).
8. Remove the tape or plugs from the condenser outlet port and the liquid line fitting.
9. Lubricate a new O-ring seal with clean refrigerant oil and install it on the liquid line fitting.
10. Connect the liquid line fitting to the condenser outlet port on the right side of the condenser.
11. Install the nut that secures the liquid line fitting to the condenser. Tighten the nut to 17 N.m (12 ft. lbs.).
12. Reinstall the A/C pressure transducer.
13. Install the front fascia.
14. Install the grille.
15. Reconnect the battery negative cable.
16. Evacuate the refrigerant system.
17. Charge the refrigerant system.
Rear Section
REMOVAL
The front air conditioner liquid line is serviced in two sections. The front section connects between the condenser and the receiver/drier and includes the
high side service port and the A/C pressure sensor on the fitting for the receiver/drier. The rear section connects between the receiver/drier and the
expansion valve.
WARNING: REVIEW THE WARNINGS AND CAUTIONS IN THE FRONT OF THIS SECTION BEFORE PERFORMING THE
FOLLOWING OPERATION.
1. Recover the refrigerant from the refrigerant system.
2. Disconnect and isolate the battery negative cable.
3. Remove the grille.
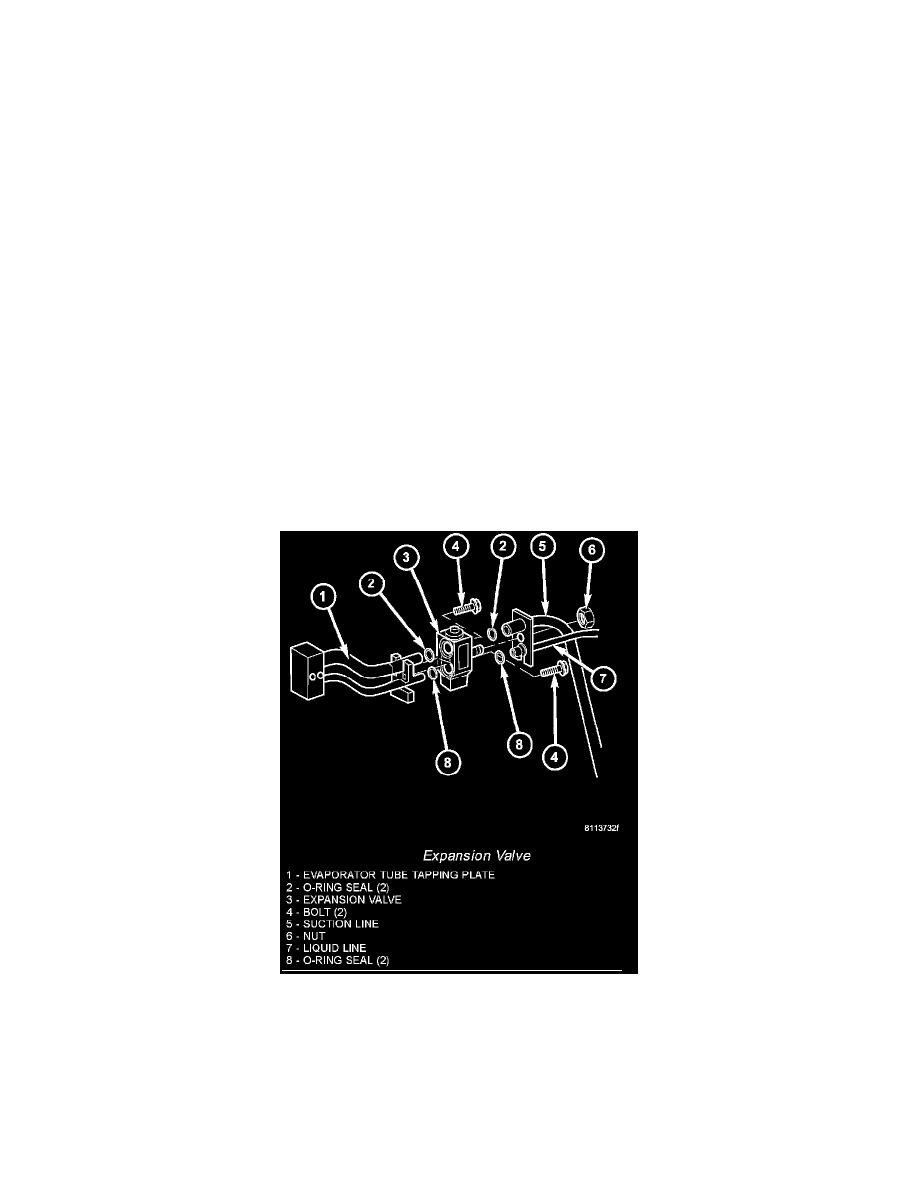
Expansion Valve
4. Remove the nut that secures the suction and liquid line to the stud on the expansion valve.
5. Disconnect the A/C suction and liquid lines from the A/C expansion valve and remove and discard the O-ring seals.
6. Disengage the routing clip retainer from the rear section of the liquid line.