
Sprinter 2500 L5-2.7L DSL Turbo (2003)
Catalytic Converter: Service and Repair
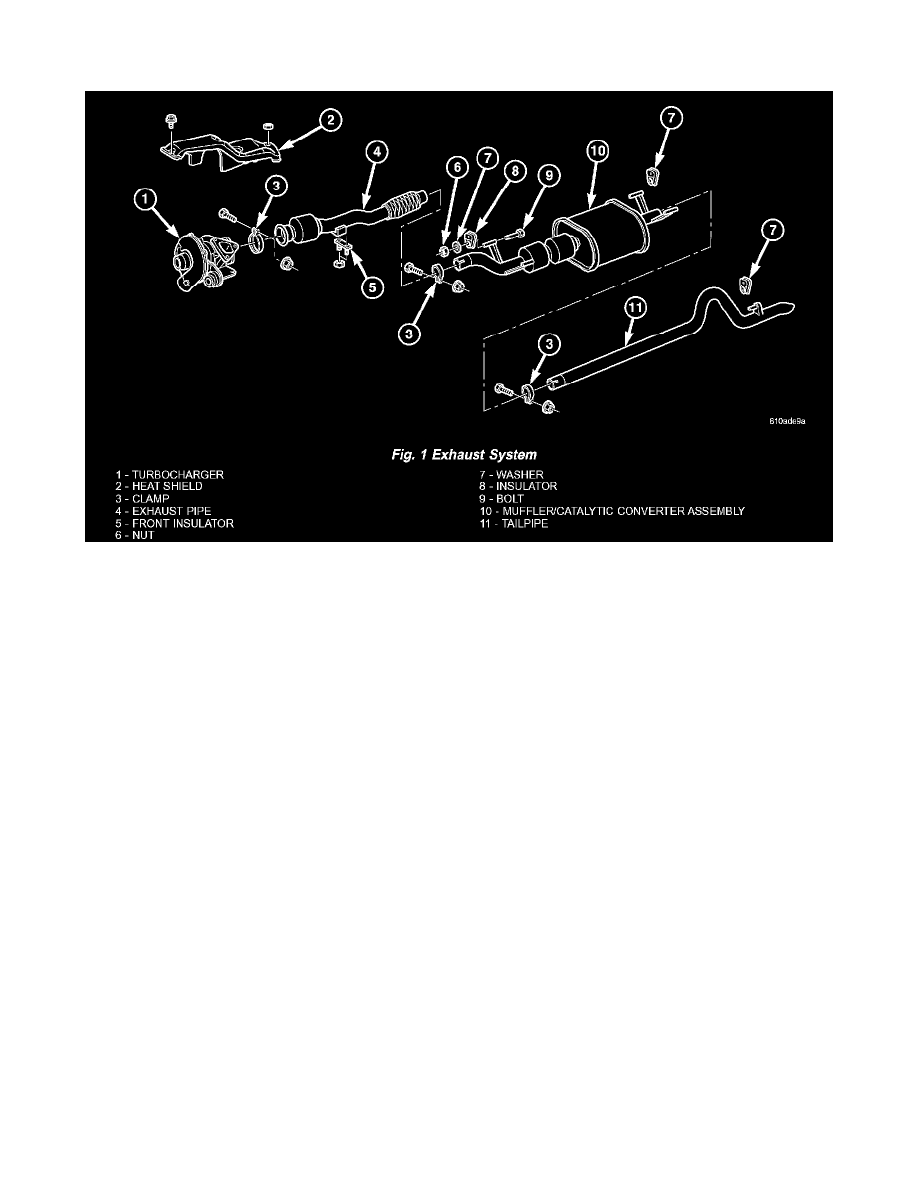
CATALYTIC CONVERTER
REMOVAL
1. Raise and support the vehicle.
2. Saturate the clamp nuts with heat valve lubricant. Allow 5 minutes for penetration. Remove the rear clamp. (Fig. 1)
3. Saturate the clamp nuts with heat valve lubricant. Allow 5 minutes for penetration. Remove the front clamp.
4. Remove the catalytic converter and muffler assembly from the isolators.
5. Separate the catalytic converter and muffler assembly from the tailpipe and the exhaust pipe.
6. Remove the catalytic converter and muffler assembly and isolators from the vehicle.
7. Remove the bolt, nut and front isolator from the catalytic converter and muffler assembly
8. Remove the rear isolator from the catalytic converter and muffler assembly.
INSTALLATION
1. Install bolt, front isolator and nut (Fig. 1).
2. Install rear insulator onto the catalytic converter and muffler assembly
3. Position the catalytic converter and muffler assembly into the exhaust pipe and tailpipe until alignment tab is inserted into the alignment slot.
4. Install the front and rear insulators.
5. Install the real clamp.
6. Install the front clamp.
7. Lower vehicle.
8. Start the vehicle and inspect for exhaust leaks. Repair exhaust leaks as necessary.
9. Check the exhaust system for contact with the body panels. Make necessary adjustments, if necessary.