
Sprinter 2500 V6-3.0L DSL Turbo VIN 45 (2007)
Compressor Clutch: Removal and Replacement
Removal
REMOVAL
NOTE: The compressor clutch assembly can be serviced with the refrigerant system fully-charged and with the A/C compressor installed on the engine.
NOTE: Typical A/C compressor and clutch assembly shown in illustrations.
1. Disconnect and isolate the negative battery cable.
2. On 5.7L and 6.1L engine equipped vehicles, remove the air intake hose and the air cleaner housing.
3. Remove the radiator fan and shroud assembly.
4. Remove the accessory drive belt.
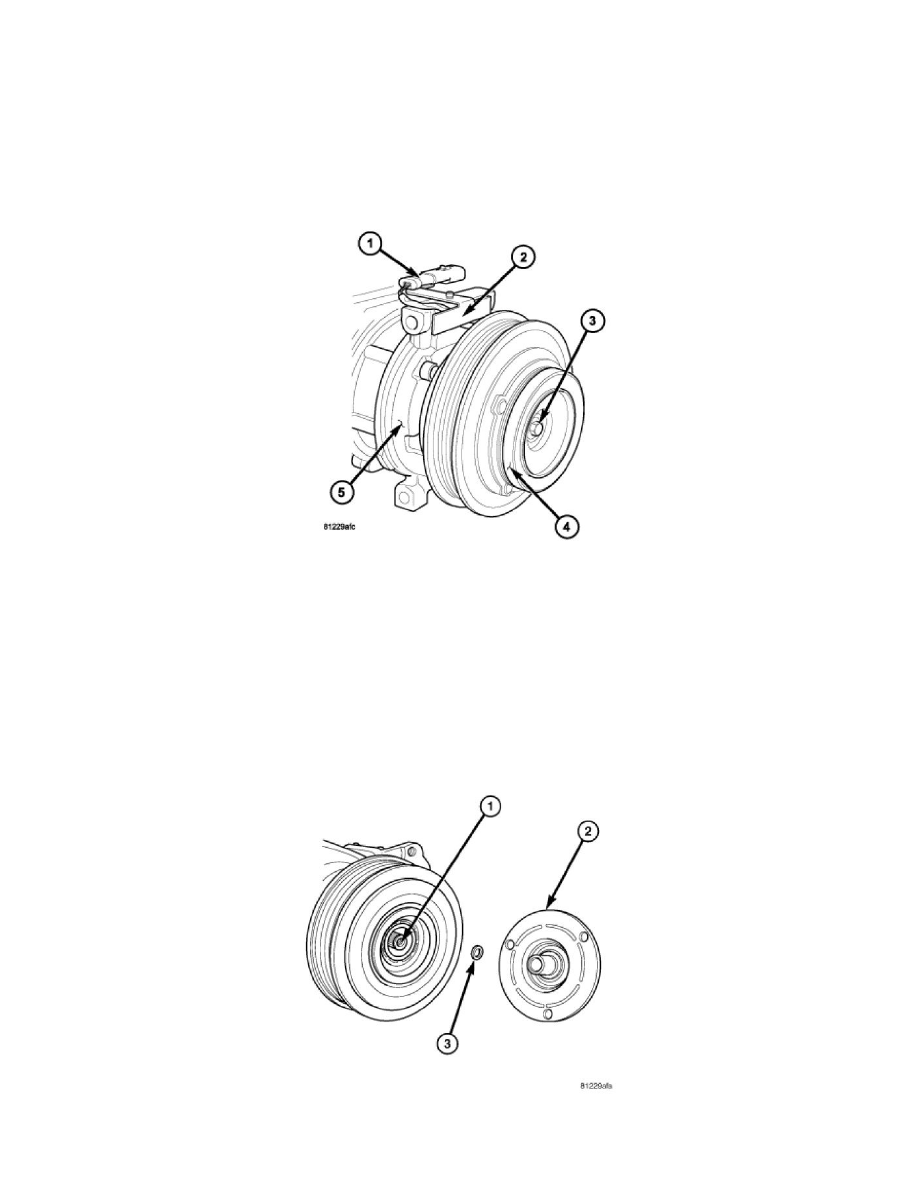
5. Disconnect the engine wire harness from the compressor clutch field coil connector (1) located on the top of the A/C compressor (5).
NOTE: Some models (depending on engine application) may require the A/C compressor to be removed from its installed location to gain access
to the compressor shaft bolt and/or pulley and field coil snap rings. However, the refrigerant system can still remain fully charged.
6. Carefully remove the compressor clutch field coil connector and wire lead from the connector bracket (2).
7. Remove the compressor shaft bolt (3). A band-type oil filter wrench or a strap wrench may be used to hold the clutch plate (4) from rotating during
bolt removal.
CAUTION: Do not pry between the clutch plate and the pulley and bearing assembly to remove the clutch plate from the compressor