
Sprinter 2500 V6-3.0L DSL Turbo VIN 45 (2007)
Expansion Valve: Service and Repair
Plumbing - Front
Removal
REMOVAL
WARNING: Review safety precautions and warnings before performing this procedure. Failure to follow the warnings and cautions may
result in serious or fatal injury.
1. Disconnect and isolate the negative battery cable.
2. Remove the air cleaner housing from the engine compartment.
3. Recover the refrigerant from the refrigerant system.
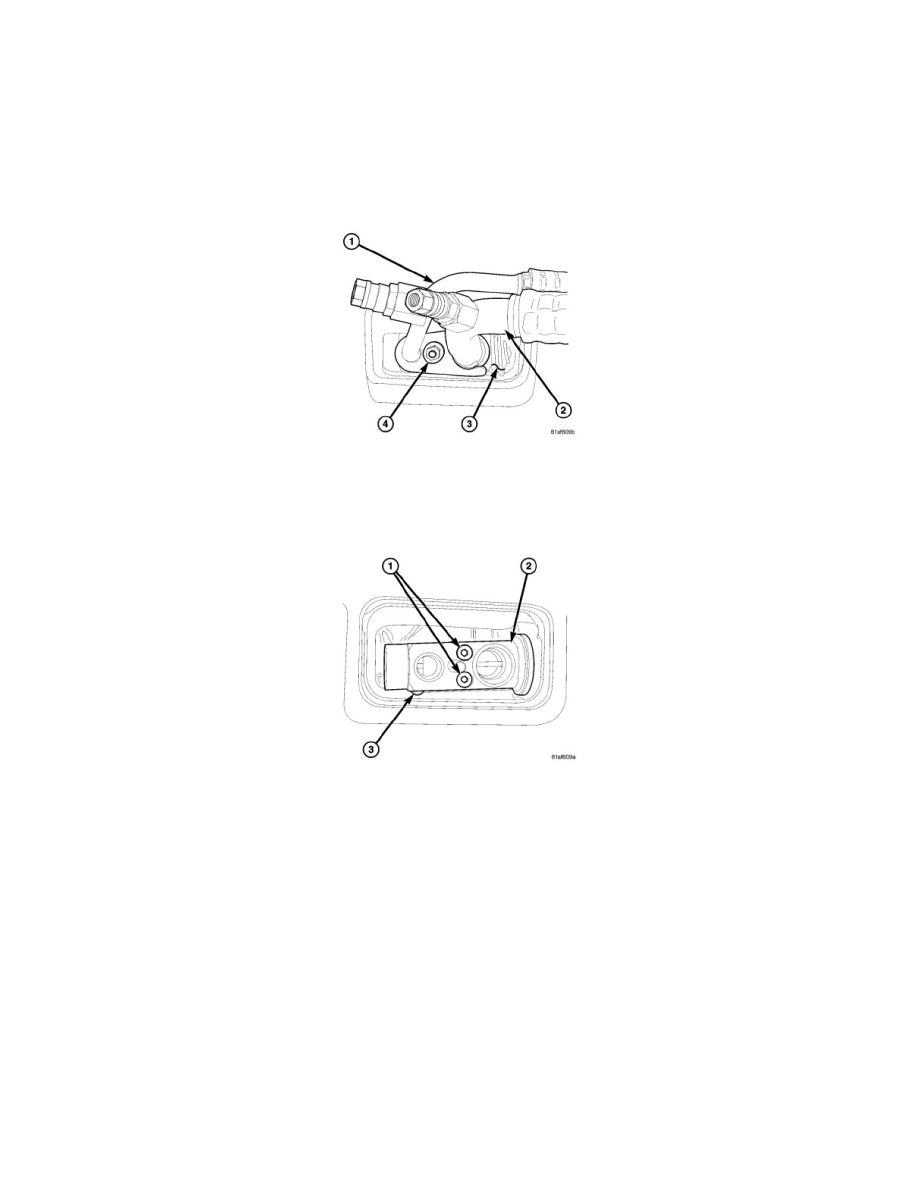
4. Remove the nut (4) that secures the A/C liquid line (1) and the A/C suction line (2) to the A/C expansion valve (3).
5. Disconnect the A/C liquid line and the A/C suction line from the A/C expansion valve and remove and discard the O-ring seals.
6. Remove the two bolts (1) that secure the A/C expansion valve (2) to the evaporator tube tapping block (3).
7. Remove the A/C expansion valve from the evaporator tube tapping block and remove and discard the O-ring seals.
8. Install plugs in, or tape over the opened refrigerant line and evaporator tube fittings and all expansion valve ports.
Installation
INSTALLATION
CAUTION: Be certain to adjust the refrigerant oil level when servicing the A/C refrigerant system. Failure to properly adjust the refrigerant
oil level will prevent the A/C system from operating as designed and can cause serious A/C compressor damage.
NOTE: When replacing multiple A/C system components, refer to the Refrigerant Oil Capacities chart to determine how much oil should be added to
the refrigerant system.
NOTE: Replacement of the refrigerant line O-ring seals is required anytime the A/C expansion valve is removed. Failure to replace the rubber O-ring
seals may result in a refrigerant system leak.