
Sprinter 2500 V6-3.0L DSL Turbo VIN 45 (2007)
18.
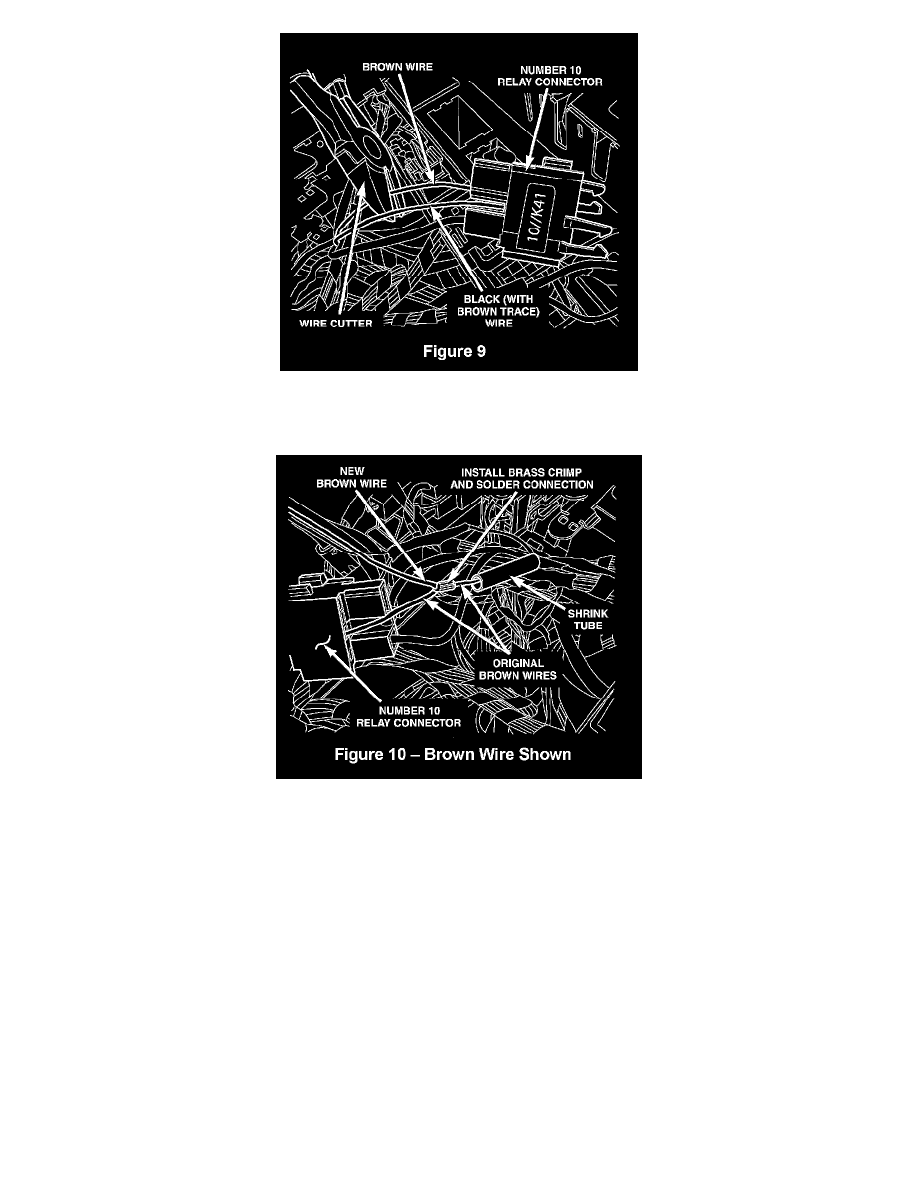
Cut the brown wire and the black (with brown trace) wire approximately 2 inches (50 mm) from the number 10 relay connector (Figure 9).
19.
Remove approximately 1/2 inch (13 mm) of insulation from both sides of both wires cut in Step 18.
20.
Place a piece of shrink tube over both the brown wire and the black (with brown trace) wire coming from the vehicle's wiring harness (Figure 10).
21.
Insert both brown wires from the original relay harness and the brown wire from the new relay harness into a small brass splice band and crimp
them together using wire splice crimp tool 10042 (Figure 10).
22.
Using rosin core solder and a soldering gun, solder the wiring connection at the brass crimp splice band (Figure 10).
23.
Slide the shrink tube over the soldered wire connection made in Step 22.
24.
Heat the shrink tube with a heat gun until it shrinks around the wire and glue comes out of both ends of the shrink tube.
25.
In the same manner as Step 21, insert both black (with brown trace) wires from the original relay harness and the black (with brown trace) wire
from the new relay harness into a small brass splice band and crimp them together using wire splice crimp tool 10042 (Figure 10).
26.
Using rosin core solder and a soldering gun, solder the wiring connection at the brass crimp splice band (Figure 10).
27.
Slide the shrink tube over the soldered wire connection made in Step 26.
28.
Heat the shrink tube with a heat gun until it shrinks around the wire and glue comes out of both ends of the shrink tube.