
Sprinter 2500 V6-3.0L DSL Turbo VIN 45 (2007)
Wiper Arm: Service and Repair
Installation
Front
FRONT
WARNING: To avoid serious or fatal injury during and following any front wiper system service, be certain that the key is removed from the
ignition lock. When the multi-function switch is set to the I (INTERMITTENT or AUTOMATIC) position, the front wipers could move
unexpectedly at any time causing injury or damage.
CAUTION: Do not open the hood while the front wiper arms are folded away from the windshield. Both the hood and the wiper arms could
become damaged.
CAUTION: Do not allow the wiper arm to spring back against the glass without the wiper blade in place or the glass may be damaged.
CAUTION: Do not rest the front wiper arms on the windshield glass without the wiper blades in place or the glass may become scratched.
NOTE: Be certain that the wiper motor is in the park position before attempting to install the front wiper arms. Turn the ignition switch to the ON
position and move the multi-function switch control knob to its 0 (OFF) position. If the wiper pivots move, wait until they stop moving, then turn the
ignition switch back to the OFF position. The front wiper motor is now in its park position.
NOTE: The front wiper arms and wiper blades for this vehicle model are both unequal in length. The longer arm is installed on the right (passenger)
side of the windshield, while the longer blade is installed on the left (driver) side of the windshield.
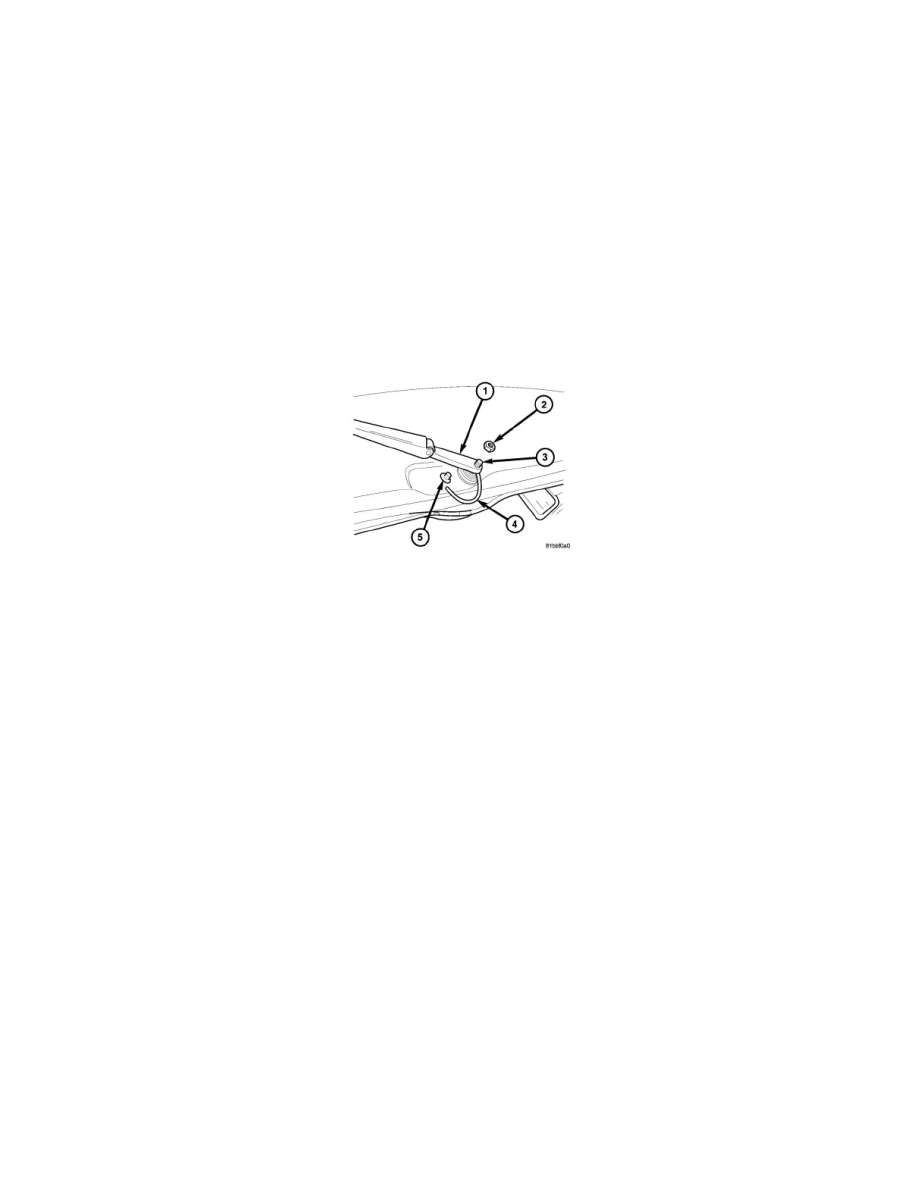
1. The front wiper arms (1) must be indexed to the pivot shafts (3) with the front wiper motor in the park position to be properly installed. Position
the wiper arm pivot end onto the wiper pivot shaft so that the lower edge of the blade is aligned with the white wiper alignment line located near
the upper margin of the lower windshield blackout area.
2. Once the wiper blade is aligned, lift the wiper arm away from the windshield slightly to relieve the spring tension on the pivot end and push the
pivot end of the wiper arm down firmly and evenly over the pivot shaft.
3. Install and tighten the nut (2) that secures the wiper arm to the pivot shaft. Tighten the nut to 30 Nm (22 ft. lbs.).
4. Wet the windshield glass, then operate the front wipers. Turn the control knob of the multi-function switch to the 0 (OFF) position, then check for
the correct wiper arm position and readjust as required.
5. Reconnect the washer nozzle hose (4) to the elbow fitting (5) on the cowl top panel near the pivot end of the front wiper arm.
Rear
REAR
CAUTION: Do not allow the wiper arm to spring back against the glass without the wiper blade in place or the glass may be damaged.
CAUTION: Do not rest the rear wiper arms on the rear door glass without the wiper blades in place or the glass may become scratched.