
Sprinter 3500 L5-2.7L DSL Turbo (2004)
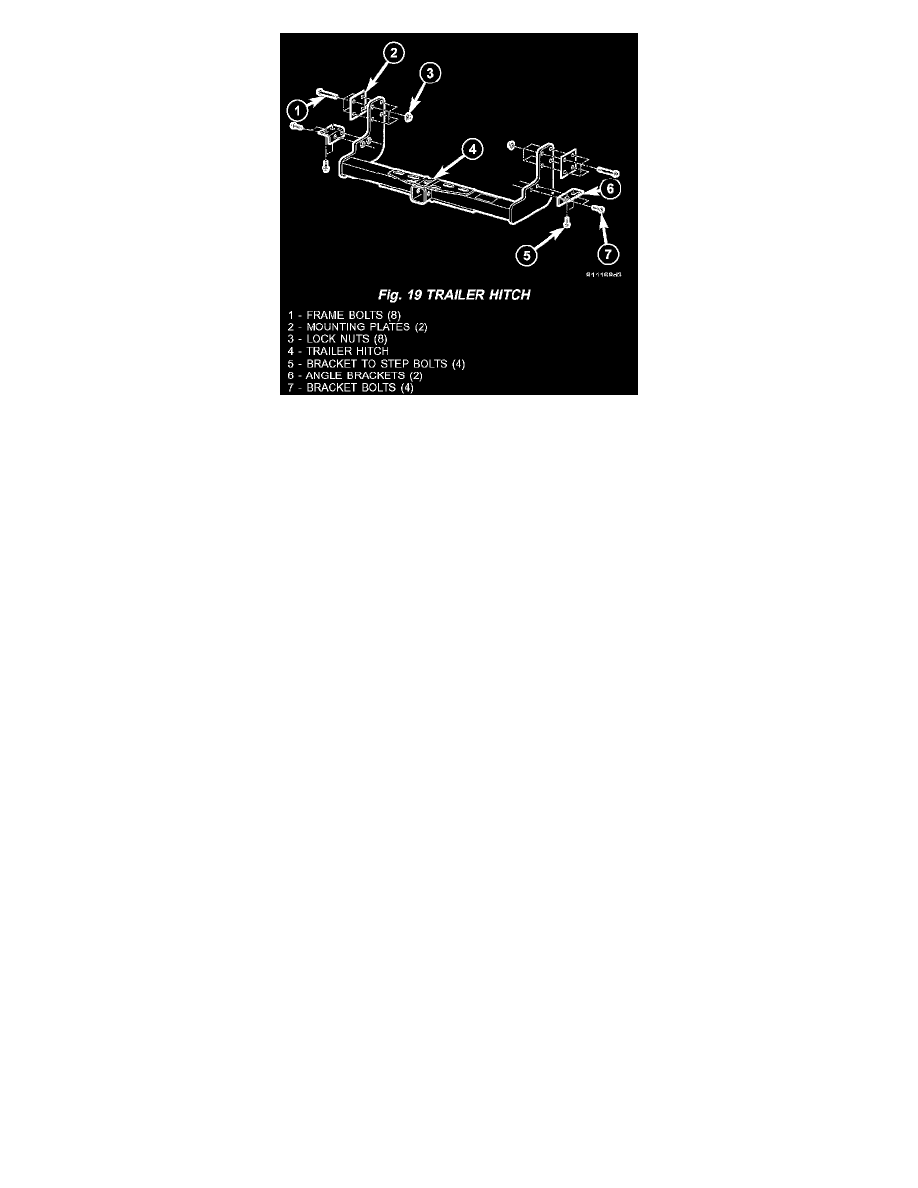
Fig. 19
5. Support hitch and remove frame bolts. (Fig. 19)
6. Lower hitch.
INSTALLATION
WARNING: Do not oil or grease the bolts and nuts. if the bolts and nuts are greased, the trailer hitch may become detached from the vehicle,
possibly resulting in a serious risk of injury and/or damage to property, including damage to the vehicle.
1. Raise hitch into position.
2. Install the mounting plate and new frame bolts/nuts and hand tighten bolts.
WARNING: Microencapsulated bolts and self-locking nuts may only be used once. If you use microencapsulated bolt or self-locking nuts
more than once, the self-locking function is rendered useless. The trailer hitch may become detached from the vehicle, possibly resulting
in a serious risk of injury and/or damage to property, including damage to the vehicle.
3. Install the angle bracket microencapsulated bolts/nuts and hand tighten.
4. Align trailer hitch.
5. Tighten the frame mounting bolts to 110 N.m (81 ft.lbs.).
6. Tighten microencapsulated angle bracket bolts to 50 N.m (37 ft.lbs.).
7. Connect trailer socket electrical connector.