
Sprinter 3500 L5-2.7L DSL Turbo (2004)
Heater Control Valve: Service and Repair
REMOVAL
1. Disconnect and isolate the negative battery cable.
2. Partially drain the engine cooling system.
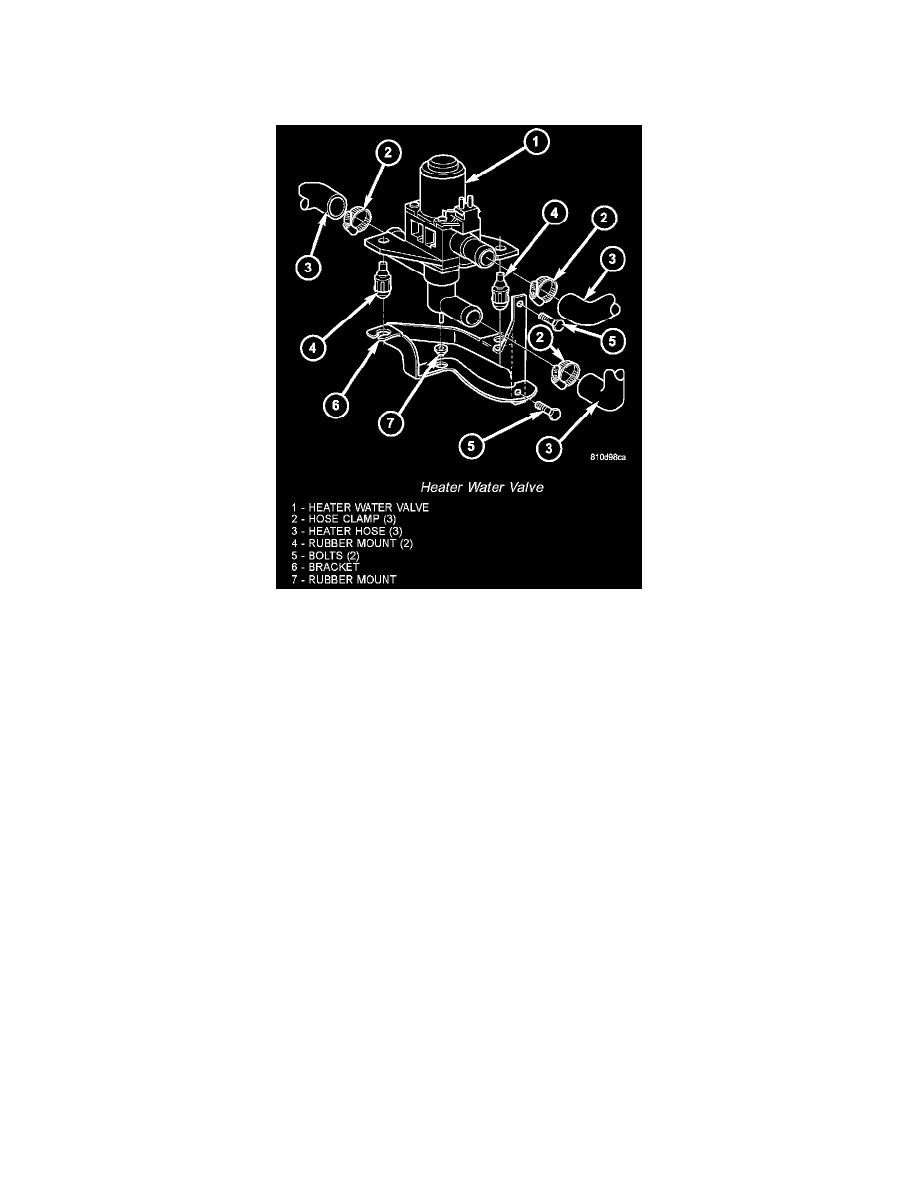
Heater Water Valve
3. Disconnect the wire harness connector from the heater water valve.
4. Loosen the hose clamps from the heater water valve.
5. Using a twisting motion gently remove the heater hoses from the heater water valve.
6. Remove the bolts that secure the heater water valve bracket.
7. Remove the bracket and pulsed water control valve from the engine compartment.
8. Turn the bracket slightly and remove the water valve from the rubber mounts.
9. If necessary, remove the rubber mounts from the bracket or water valve.
INSTALLATION
1. If removed, install the rubber mounts to the heater water valve or bracket.
2. Turn bracket slightly to the right and install the heater water valve to the bracket.
3. Install the water valve and mounting bracket into the engine compartment.
4. Install the two bracket retaining bolts. Tighten the bolts to 5 Nm (45 in. lbs.).
5. Using a twisting motion gently install the heater hoses onto the water valve.
6. Tighten the hose clamps securely.
7. Connect the wire harness connector to the heater water valve.
8. Reconnect the negative battery cable.
9. Fill the engine cooling system.