
Sprinter 3500 V6-3.0L DSL Turbo (2008)
Heater Core: Service and Repair
Front Heater Core - Installation
INSTALLATION
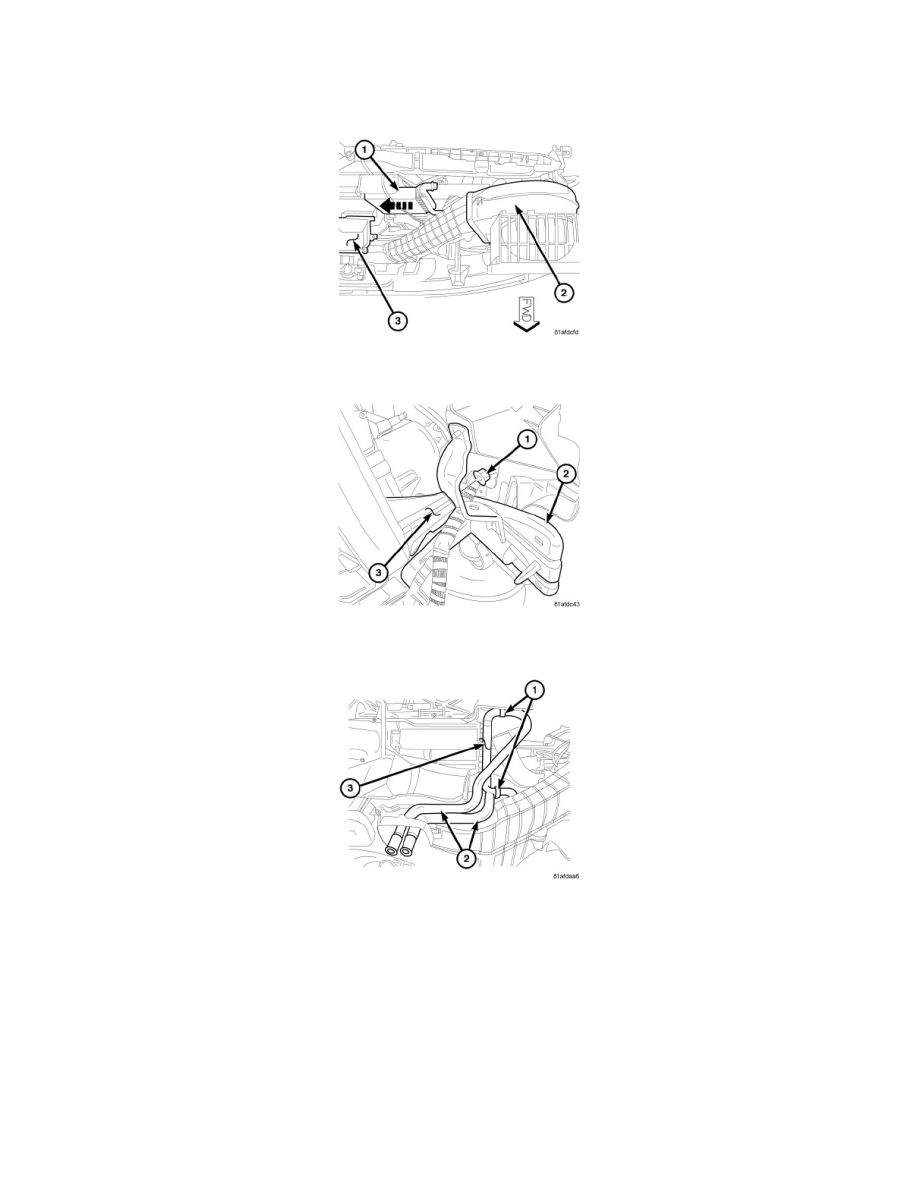
1. Carefully position the blower motor portion of the HVAC housing (2) slightly forward for clearance and install the heater core (1) into the side of
the HVAC housing (3).
2. Install the bracket (2) to the HVAC housing (3).
3. Install the nut (1) that secures the bracket to the HVAC housing. Tighten the nut securely.
4. Lubricate new rubber O-ring seals with clean engine coolant and install them onto the heater core fittings. Use only the specified O-rings as they
are made of a special material compatible to engine coolant. Use only engine coolant of the type recommended for the engine in the vehicle.
5. Install the heater core tubes (2) onto the heater core (3).
6. Install the two metal retaining clamps (1) that secure the heater core tubes to the heater core.
7. Install the blower motor power module or blower motor resistor (depending on application) or .
8. Install the HVAC housing and instrument panel as an assembly and See: Body and Frame/Interior Moulding / Trim/Dashboard / Instrument
Panel/Service and Repair/Instrument Panel - Installation.
9. If the heater core is being replaced, flush the cooling system See: Service and Repair.
10. Refill the engine cooling system See: Service and Repair.
11. Evacuate the refrigerant system See: Heating and Air Conditioning/Service and Repair/Refrigerant System Evacuate.
12. Charge the refrigerant system See: Heating and Air Conditioning/Service and Repair/Refrigerant System Charge.