
Sprinter 3500 V6-3.0L DSL Turbo (2008)
Air Duct: Service and Repair
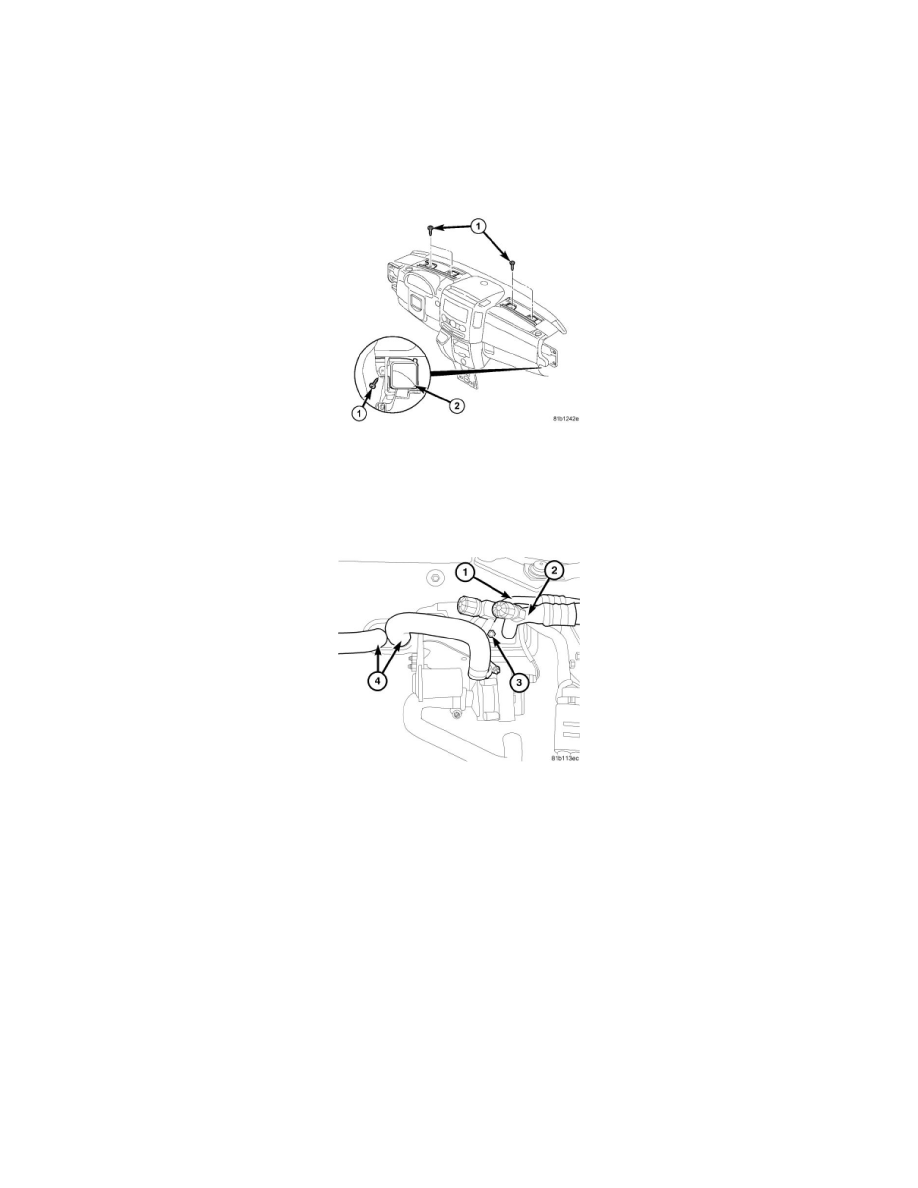
Front Instrument Panel Ducts - Installation
INSTALLATION
NOTE: Replacement of the refrigerant line O-ring seals is required anytime a refrigerant line is disconnected. Failure to replace the rubber
O-ring seals may result in a refrigerant system leak.
NOTE: Take the proper precautions to protect the front face of the instrument panel from cosmetic damage during this service procedure.
1. Position the defroster and instrument panel ducts (2) into the instrument panel and engage them to the HVAC housing. Make sure the ducts are
fully engaged to the housing.
2. Install the screws (1) that secure the ducts to the instrument panel. Tighten the screws to 2 Nm (17 in. lbs.).
3. Install the two covers onto the top of the instrument panel.
4. Install the instrument panel assembly See: Body and Frame/Interior Moulding / Trim/Dashboard / Instrument Panel/Service and Repair/Instrument
Panel - Installation.
5. Remove the tape or plugs from the opened refrigerant line fittings and expansion valve and heater core ports. ports.
6. Lubricate new rubber O-ring seals with clean refrigerant oil and install them on the refrigerant line fittings. Use only the specified O-rings as they
are made of a special material for the R-134a system. Use only refrigerant oil of the type recommended for the A/C compressor in the vehicle.
CAUTION: Use care when installing the A/C lines to the A/C expansion valve. Carefully align the tube ends with the valve prior to
tightening the A/C line retaining nut or damage to the sealing rings and tube ends may occur.
7. Install the A/C liquid line (1) and the A/C suction line (2) onto the A/C expansion valve.
8. Install the nut (3) that secures the A/C liquid line and the A/C suction line to the A/C expansion valve. Tighten the nut to 6 Nm (53 in. lbs.).
9. Connect the heater hoses (4) to the heater core. Tighten the clamps securely.
10. Install the air cleaner housing See: Engine, Cooling and Exhaust/Engine/Tune-up and Engine Performance Checks/Air Cleaner Housing/Service
and Repair.
11. Reconnect the negative battery cable.
12. Refill the engine cooling system See: Engine, Cooling and Exhaust/Cooling System/Service and Repair.
13. Evacuate the refrigerant system See: Service and Repair/Refrigerant System Evacuate.
14. Charge the refrigerant system See: Service and Repair/Refrigerant System Charge.