
Sprinter 3500 V6-3.0L DSL Turbo (2008)
Condenser HVAC: Service and Repair
Plumbing - Rear
A/C Condenser - Removal
REMOVAL
WARNING: Review safety precautions and warnings in this group before performing this procedure See: Service Precautions/Warning and
See: Service Precautions/Caution. Failure to follow the warnings and cautions may result in serious or fatal injury.
1. Disconnect and isolate the negative battery cable.
2. Recover the refrigerant from the rear refrigerant system See: Service and Repair/Refrigerant System Recovery.
3. Remove the screws that secure the rear condenser cover to the top of the vehicle and remove the cover.
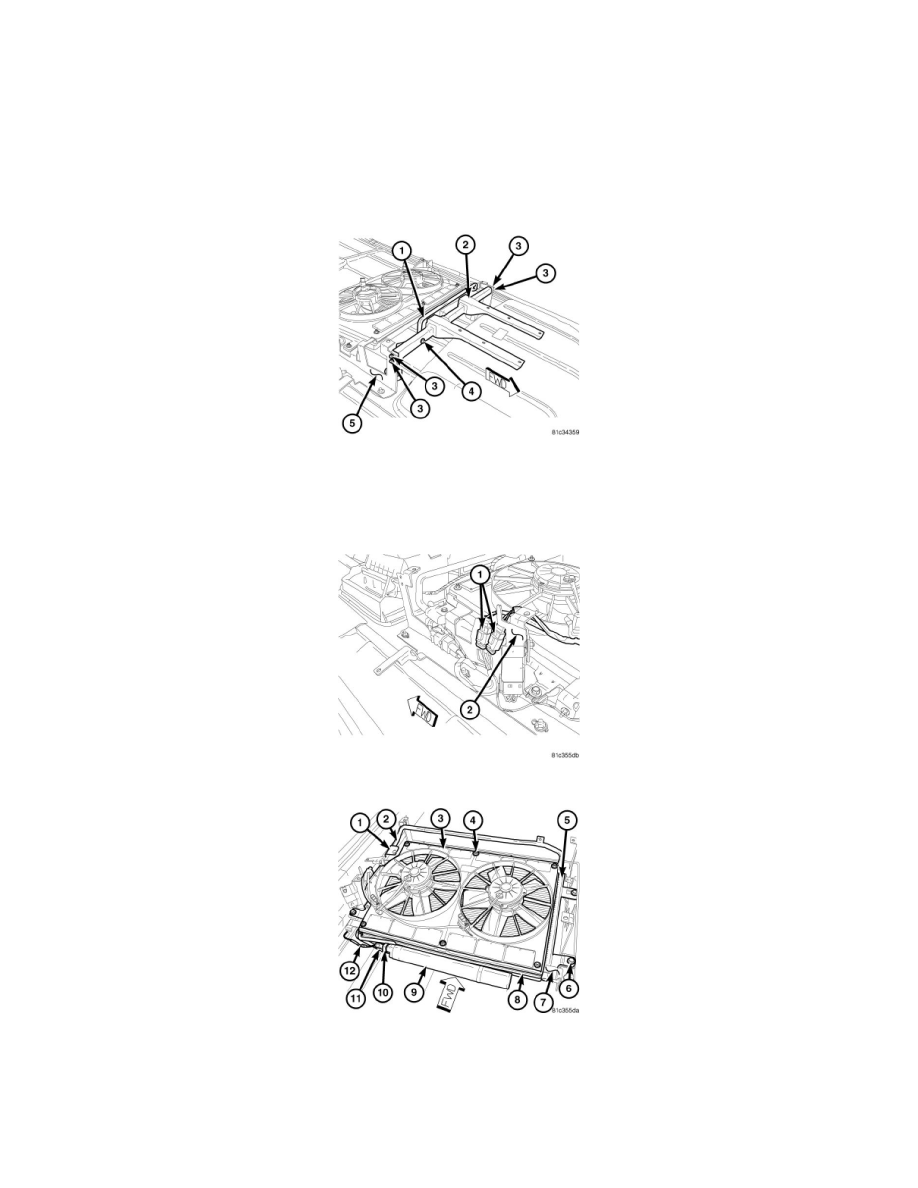
4. Remove the nut and bolt (4) that secure the rear A/C suction line (1) to the rear condenser cover bracket (2).
5. Remove the four bolts (3) that secure the rear condenser cover bracket to the rear condenser bracket (5) and remove the cover bracket.
6. Disconnect the two wire harness connectors (1) located on the left side rear condenser mounting bracket (2).
7. Remove the bolt (1) secures the rear A/C discharge line (2) to the rear A/C condenser (5).
8. Disconnect the rear A/C discharge line from the rear A/C condenser and remove and discard the O-ring seal.
9. Remove the six nuts and washers (4) that secure the rear condenser fan unit (3) to the rear A/C condenser.
10. Remove the rear condenser fan unit and the two condenser fan mounting brackets (8) from the rear A/C condenser.
11. Disconnect the wire harness and connector (12) from the rear A/C pressure transducer.
12. Remove the bolt (10) that secures the rear A/C liquid line (11) to the rear A/C receiver/drier (9).
13. Disconnect the rear A/C liquid line from the rear A/C receiver/drier and remove and discard the O-ring seal.