
Sprinter 3500 V6-3.0L DSL Turbo VIN 45 (2007)
7. Disconnect and isolate the negative battery cable.
8. Remove the A-pillar trim from the side of the vehicle being serviced.
9. Remove the instrument panel end cap from the side of the vehicle being serviced.
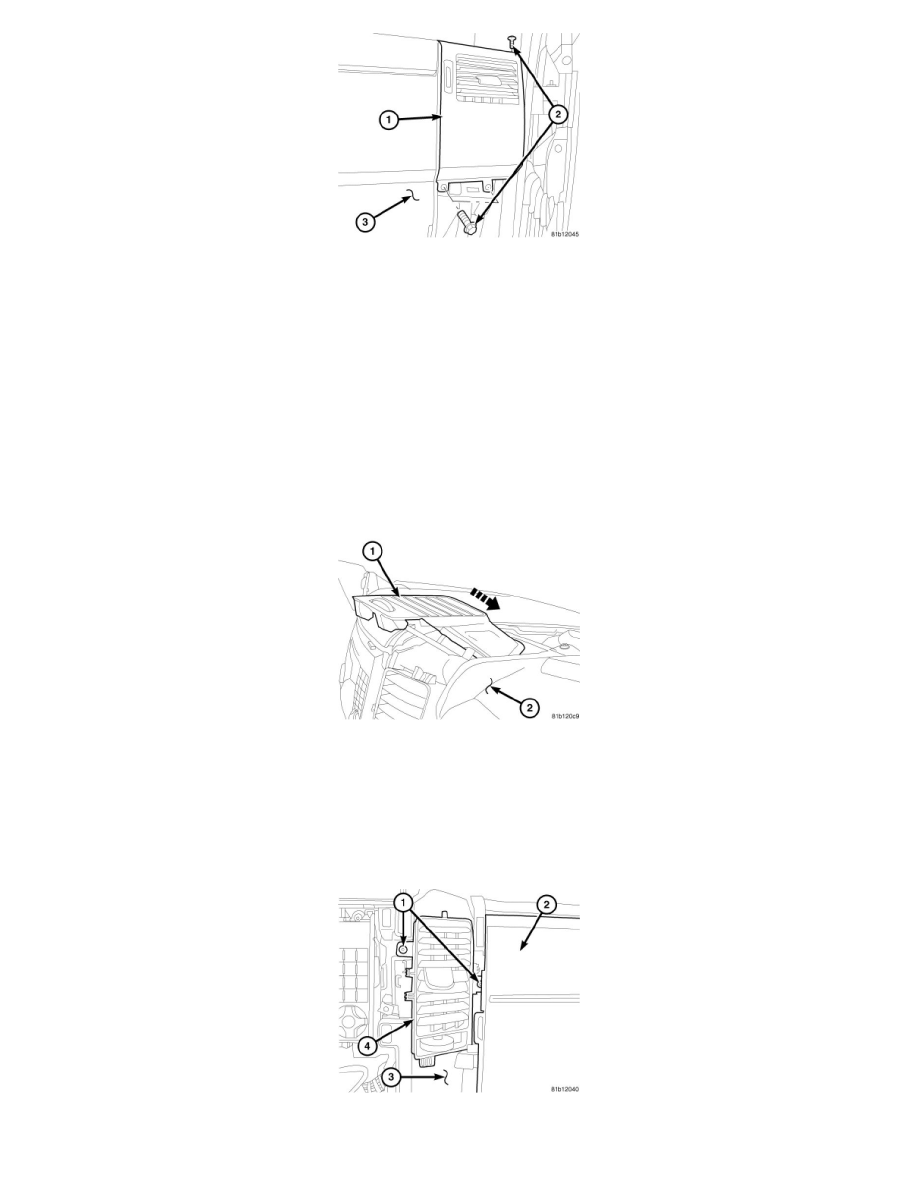
10. Remove the three screws (2) that secure the air outlet (1) to the instrument panel (3).
11. Remove the air outlet from the instrument panel by pulling the outlet straight rearward and disconnect any electrical connectors as necessary.
12. If replacement of the driver side air outlet is required, transfer all switches as necessary.
Installation
INSTALLATION
NOTE: Passenger side air outlets shown in illustrations. Driver side outlets similar.
UPPER OUTLETS
NOTE: If the foam seal on the air outlet is damaged, the seal must be replaced prior to installation of the air outlet.
1. Position the air outlet (1) to the top of the instrument panel (2) and align the outlet with the instrument panel duct opening.
2. Install the instrument panel air outlet into the instrument panel by simultaneously pushing the outlet downward and forward. Make sure the foam
seal is properly seated in the duct opening.
3. Install the instrument panel center bezel.
LOWER OUTLETS
NOTE: If the foam seal on the air outlet is damaged, the seal must be replaced prior to installation of the air outlet.