
Sprinter 3500 V6-3.0L DSL Turbo VIN 45 (2007)
Condenser HVAC: Service and Repair
Plumbing - Front
Removal
REMOVAL
WARNING: Review safety precautions and warnings before performing this procedure. Failure to follow the warnings and cautions may
result in serious or fatal injury.
1. Disconnect and isolate the negative battery cable.
2. Remove the air cleaner housing from the engine compartment.
3. Recover the refrigerant from the refrigerant system.
4. Partially drain the engine cooling system.
5. Disconnect the upper radiator hose from the radiator and position it out of the way.
6. Remove the engine cooling system reservoir.
7. Remove the engine cooling fan and fan shroud.
8. Disconnect the transmission cooler lines from the passenger side of the radiator.
9. Remove the grille.
10. Remove the A/C condenser fan assembly from the front of the A/C condenser.
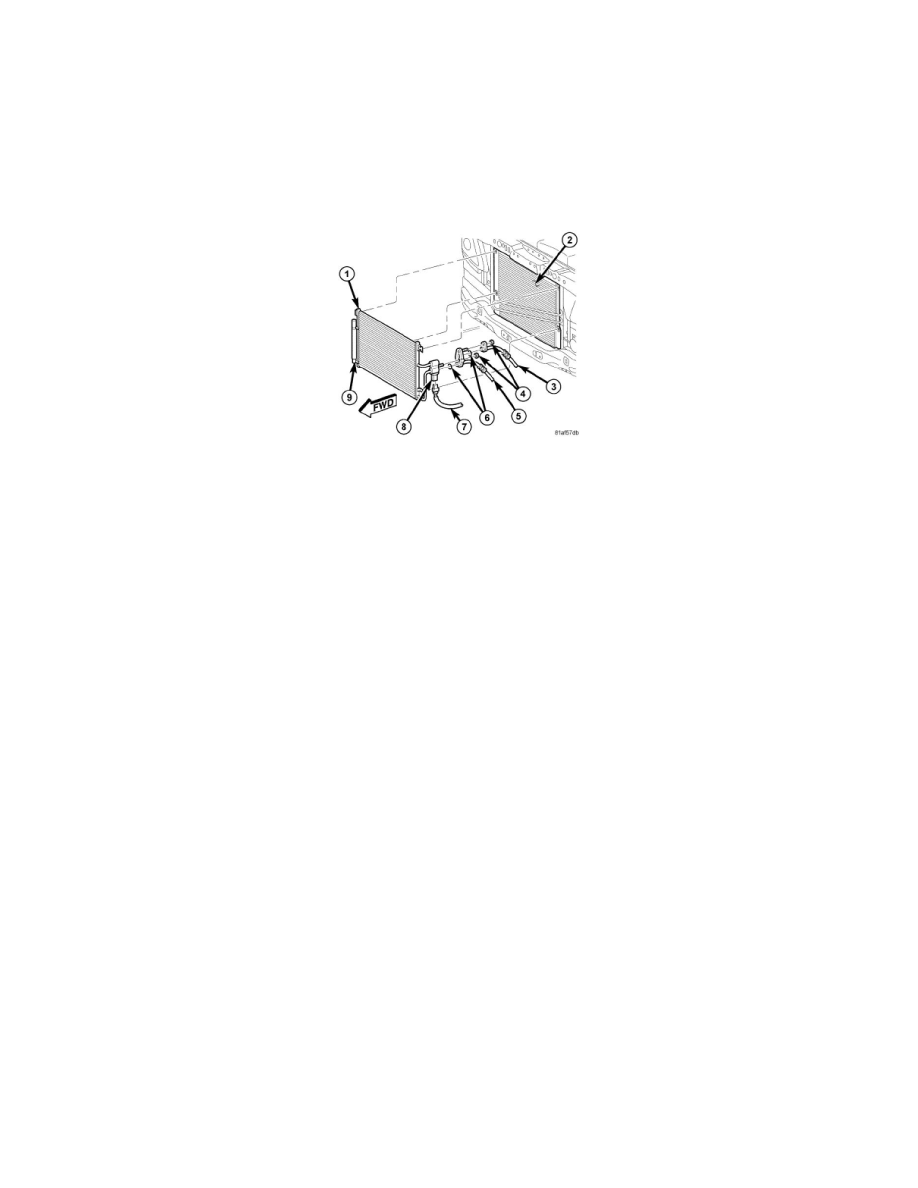
11. Remove the nuts (4) that secure the A/C discharge (3) and A/C liquid line (5) to the left side of the A/C condenser (1).
12. Disconnect the A/C discharge and A/C liquid line from the A/C condenser and remove and discard the O-ring seals (6).
13. Install plug in, or tape over the opened refrigerant line fittings and condenser ports.
14. Disconnect the wire harness connector (7) from the A/C pressure transducer (8).
15. On diesel engine equipped models, disconnect the hoses from the charge air cooler and remove the two front air seals from the front of the charge
air cooler.
16. Disengage the retaining tabs that secure the top of the radiator (2) to the radiator support and carefully position the top of the radiator rearward to
gain clearance for A/C condenser removal.
17. Disengage the condenser mounting brackets from the radiator and carefully remove the A/C condenser. Lift the condenser upward and rotate and
tilt as necessary.
18. If required, remove the A/C pressure transducer from the A/C condenser and remove and discard the O-ring seal.
19. If required, remove the A/C receiver/drier (9) from the A/C condenser.
Installation
INSTALLATION
CAUTION: Be certain to adjust the refrigerant oil level when servicing the A/C refrigerant system. Failure to properly adjust the refrigerant
oil level will prevent the A/C system from operating as designed and can cause serious A/C compressor damage.
NOTE: When replacing multiple A/C system components, refer to the Refrigerant Oil Capacities chart to determine how much oil should be added to
the refrigerant system.
NOTE: If only the A/C condenser is being replaced, add 30 milliliters (1 fluid ounce) of refrigerant oil to the refrigerant system. Use only refrigerant
oil of the type recommended for the A/C compressor in the vehicle.
NOTE: Replacement of the refrigerant line O-ring seal is required anytime a refrigerant line is disconnected. Failure to replace the rubber O-ring seals
may result in a refrigerant system leak.