
Sprinter 3500 V6-3.0L DSL Turbo VIN 45 (2007)
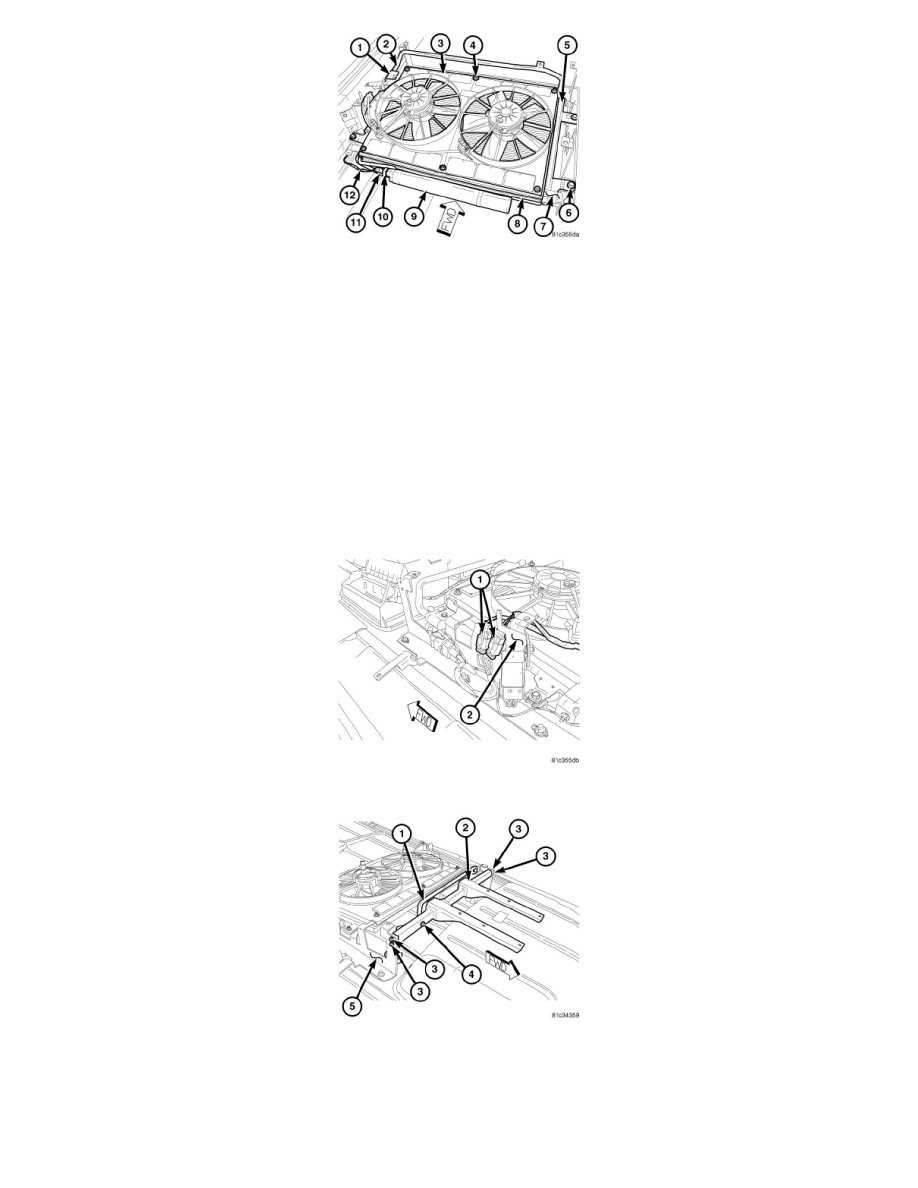
6. Position the rear A/C condenser (5) onto the two rear condenser mounting brackets located on the top of the vehicle.
7. Carefully reposition the four condenser fan mounting tabs (7).
8. Install the four bolts (6) that secure the rear A/C condenser to the rear condenser mounting brackets. Tighten the bolts securely.
9. Remove the tape or plugs from the opened refrigerant line fittings.
10. Lubricate new O-ring seals with clean refrigerant oil and install them onto the refrigerant line fittings. Use only the specified O-ring seals as they
are made of a special material for the R-134a system. Use only refrigerant oil of the type recommended for the A/C compressor in the vehicle.
11. Connect the rear A/C liquid line (11) to the rear A/C receiver/drier (9) and install the retaining bolt (10). Tighten the bolt to 6 Nm (53 in. lbs.).
12. Connect the wire harness and connector (12) to the rear A/C pressure transducer.
NOTE: Be certain that each of the rear condenser air seals are installed in their proper locations. These air seals are required for the rear A/C
system to perform as designed.
13. If replacing the rear A/C condenser, install new seals around the edge of the condenser to assure a good seal between the condenser and the rear
condenser fan unit.
14. Install the two condenser fan mounting brackets (8) and the rear condenser fan unit (3).
15. Install the six washers and nuts (4) that secure the rear condenser fan unit to the rear A/C condenser. Tighten the nuts securely.
16. Connect the rear A/C discharge line (2) to the rear A/C condenser and install the retaining bolt (1). Tighten the bolt to 6 Nm (53 in. lbs.).
17. Connect the two wire harness connectors (1) on the left side rear condenser mounting bracket (2).
18. Install the rear condenser cover bracket (2) onto the rear condenser bracket (5) and install the four retaining bolts (3). Tighten the bolts securely.
19. Install the nut and bolt (4) that secure the rear A/C suction line (1) to the rear condenser cover bracket. Tighten the nut securely.
20. Install the rear condenser cover to the top of the vehicle and install the retaining screws. Tighten the screws to 2 Nm (17 in. lbs.).
21. Reconnect the negative battery cable.
22. Evacuate the rear refrigerant system.
23. If the rear A/C evaporator is being replaced, add 60 milliliters (2 fluid ounces) of refrigerant oil to the refrigerant system. When replacing