
Sprinter 3500 V6-3.0L DSL Turbo VIN 45 (2007)
10. Reconnect the negative battery cable.
11. Evacuate the rear refrigerant system.
12. Adjust the refrigerant oil level.
13. Charge the rear refrigerant system.
Rear Interior Suction Line
REAR INTERIOR SUCTION LINE
CAUTION: Be certain to adjust the refrigerant oil level when servicing the A/C refrigerant system. Failure to properly adjust the refrigerant
oil level will prevent the A/C system from operating as designed and can cause serious A/C compressor damage.
NOTE: When replacing multiple A/C system components, refer to the Refrigerant Oil Capacities chart to determine how much oil should be added to
the refrigerant system.
NOTE: Replacement of the refrigerant line O-ring seals is required anytime a refrigerant line is disconnected. Failure to replace the rubber O-ring seals
may result in a refrigerant system leak.
NOTE: The interior suction line for the rear A/C system is serviced in two sections.
1. Remove the tape or plugs from the opened interior suction line fittings and the rear expansion valve port.
2. Lubricate new rubber O-ring seals with clean refrigerant oil and install them onto the refrigerant line fittings. Use only the specified O-rings as
they are made of a special material for the R-134a system. Use only refrigerant oil of the type recommended for the A/C compressor in the vehicle.
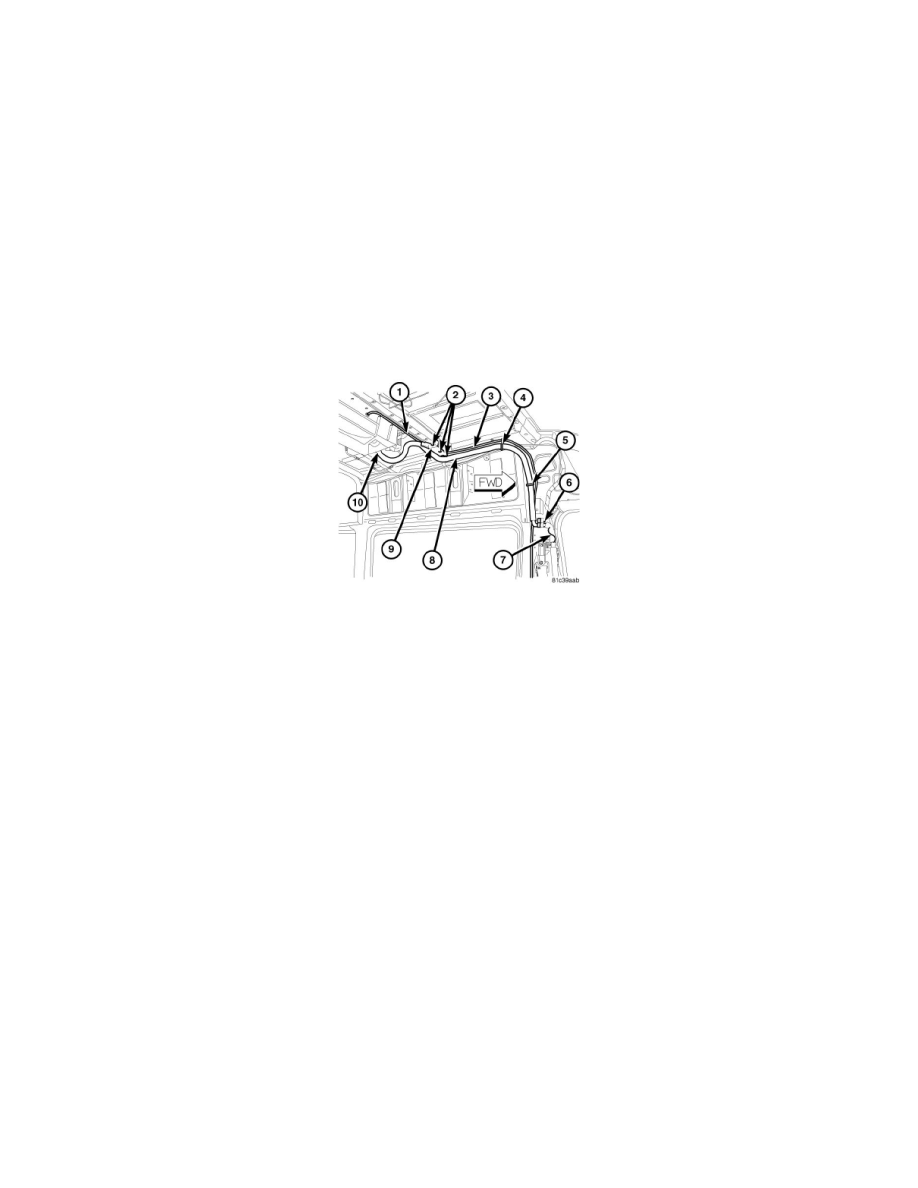
3. Position the rear interior suction line (8) into the vehicle.
4. Install the retaining screws (2) that secure the rear suction line bracket (9) to the roof brace. Tighten the screws to 3 Nm (26 in. lbs.).
5. Engage the rear interior suction line to the two retaining brackets (4 and 5).
6. Connect the rear interior suction line to the front interior suction line (7) and install the retaining bolt (6). Tighten the bolt to 8 Nm (70 in. lbs.).
7. Connect the rear interior suction line to the rear expansion valve and install the retaining nut (10). Tighten the nut to 6 Nm (53 in. lbs.).
8. Connect the front condensate drain hose (1 and 3) to the rear suction line bracket.
9. Install the center and front headliner panels.
10. Install the left side B-pillar trim panel.
11. Install the rear roof ducts.
12. Reconnect the negative battery cable.
13. Evacuate the rear refrigerant system.
14. Adjust the refrigerant oil level.
15. Charge the rear refrigerant system.
Rear Interior Discharge Line
REAR INTERIOR DISCHARGE LINE
CAUTION: Be certain to adjust the refrigerant oil level when servicing the A/C refrigerant system. Failure to properly adjust the refrigerant
oil level will prevent the A/C system from operating as designed and can cause serious A/C compressor damage.
NOTE: When replacing multiple A/C system components, refer to the Refrigerant Oil Capacities chart to determine how much oil should be added to
the refrigerant system.
NOTE: Replacement of the refrigerant line O-ring seals is required anytime a refrigerant line is disconnected. Failure to replace the rubber O-ring seals
may result in a refrigerant system leak.
NOTE: The interior discharge line for the rear A/C system is serviced in two sections.