
Sprinter 3500 V6-3.0L DSL Turbo VIN 45 (2007)
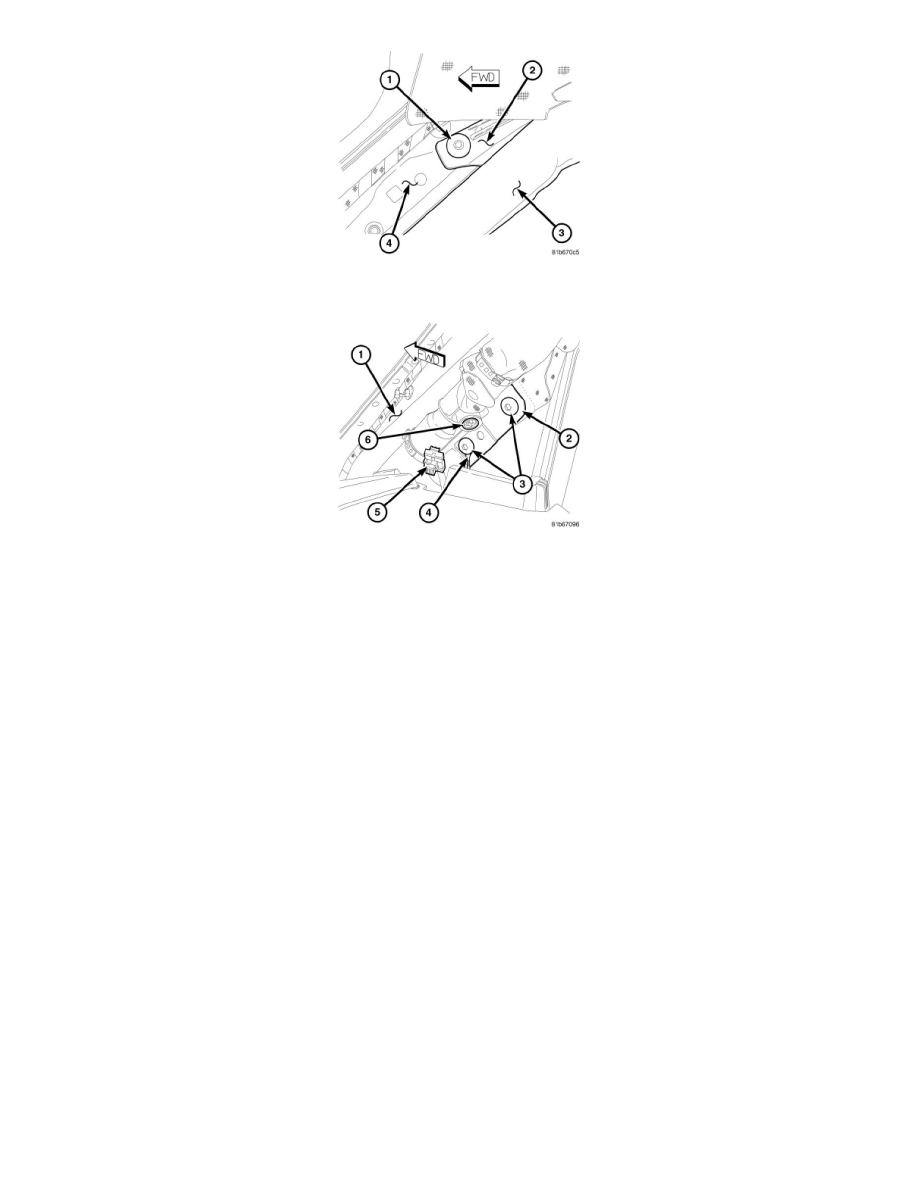
6. Install and tighten the screw (1) that secures the curtain airbag (3) and garnish molding front bracket (2) to the inside of the upper A-pillar (4).
Tighten the screw to 4 Nm (35 in. lbs.).
7. Install and tighten the two screws (3) that secure the curtain airbag inflator bracket (2) to the inside of the A-pillar (1). Be certain to reinstall the
ground wire eyelet (4) under the lower screw. Tighten the screws to 4 Nm (35 in. lbs.).
8. Reconnect the wire harness connector (5) for the curtain airbag to the inflator initiator (6). Be certain that the latch on the connector and the orange
Connector Position Assurance (CPA) lock are each fully engaged.
9. Position the A-pillar trim close enough to the inside of the A-pillar to install and tighten the screw that secures the tether on the back of the trim to
the upper A-pillar. Tighten the screw to 4 Nm (35 in. lbs.).
10. Reinstall the trim onto the inside of the A-pillar.
WARNING: DO NOT CONNECT THE BATTERY NEGATIVE CABLE. PERSONAL INJURY OR DEATH MAY RESULT IF THE
SYSTEM TEST IS NOT PERFORMED FIRST. FOR THE SYSTEM TEST, See: Powertrain Management/Computers and Control
Systems/Testing and Inspection/Diagnostic Trouble Code Tests and Associated Procedures/Verification Tests/Supplemental Restraints
Verification Test