
SRT-4 L4-2.4L Turbo VIN S (2004)
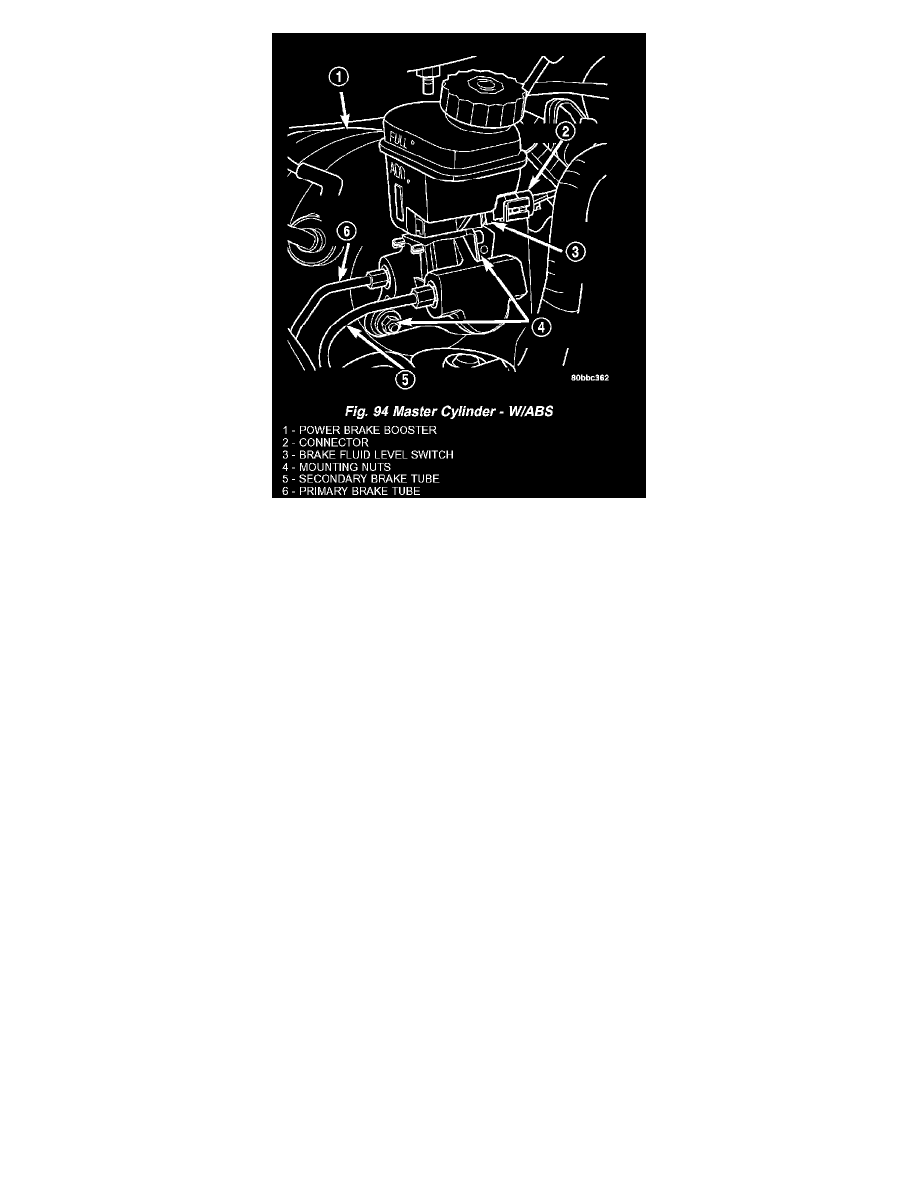
5. Install the two master cylinder mounting nuts (Fig. 94). Tighten the mounting nuts to a torque of 18 Nm (160 inch lbs.).
6. Connect the primary and secondary brake tubes to the master cylinder primary and secondary ports (Fig. 94). Tighten the nuts to a torque of 17
Nm (145 inch lbs.).
7. Install the wiring harness connector on the master cylinder reservoir fluid level switch.
8. Install the battery and clamp in place.
9. Connect the positive, then the negative (ground) cable on the battery.
10. Fill the master cylinder to the proper level.
11. Pump the brake pedal several times, then check brake fluid level in master cylinder reservoir. Adjust brake fluid level as necessary.
CAUTION: It will be necessary to bleed the entire base hydraulic system if the brake system has been open to air for an excessive amount of time
or air is present in the lines.
12. Check for leaks.
13. Road test the vehicle to ensure proper operation of the base and antilock brake systems.
Lhd Without ABS
INSTALLATION - LHD WITHOUT ABS
NOTE: The master cylinder must be bled before installing it on the vehicle.
1. If removed, install the proportioning valves in their master cylinder ports. The valves are identical, so they can be installed in either master
cylinder port going to the rear brakes. Make sure the O-rings on the proportioning valves are new.
2. Bleed the master cylinder before installing it on the vehicle.
3. Inspect and wipe clean the O-ring vacuum seal on the master cylinder rear mounting flange to ensure a good vacuum seal once installation is
complete. Replace as necessary.
4. Wipe the face of the power brake booster clean where the master cylinder seal comes in contact when it's installed. Do not get any cleaner or
debris inside the booster.
5. Position the master cylinder on the studs of the power brake booster, aligning the push rod of the power brake booster with master cylinder piston
push rod. Carefully push the master cylinder onto the studs until it contacts the face of the booster.
6. Install the two master cylinder mounting nuts and tighten each to a torque of 18 Nm (160 inch lbs.).