
SRT-4 L4-2.4L Turbo VIN S (2004)
Hose/Line HVAC: Service and Repair
A/C Suction Hose/Line Replacement
REMOVAL
WARNING: REVIEW THE WARNINGS AND CAUTIONS IN THE FRONT BEFORE PERFORMING THE FOLLOWING OPERATION.
1. Recover the refrigerant from the refrigerant system.
2. Remove the bolt that secures the suction line fitting to the top of the compressor.
3. Disconnect the suction line fitting from the compressor inlet port.
4. Remove the O-ring seal from the suction line fitting and discard.
5. Install plugs in, or tape over the opened suction line fitting and the compressor inlet port.
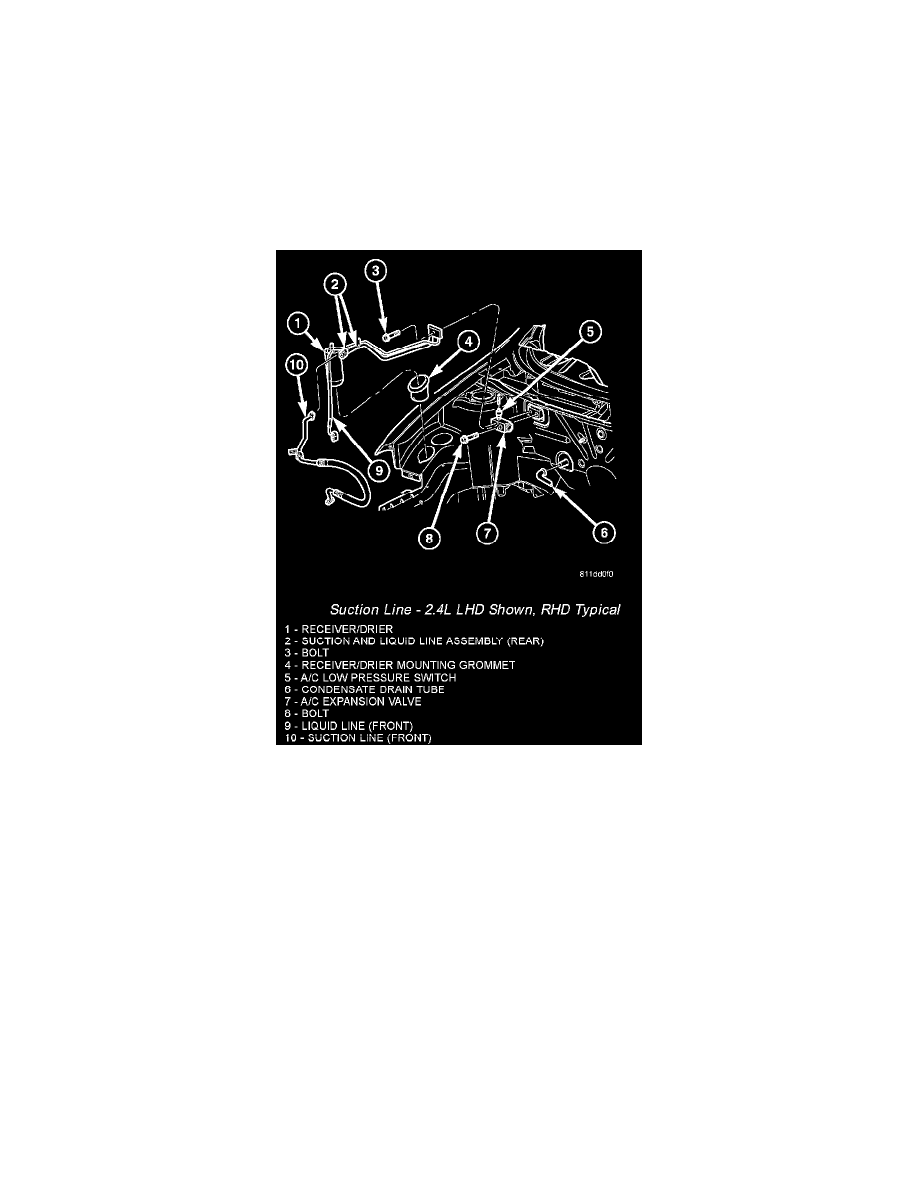
Suction Line - 2.4L LHD Shown, RHD Typical
6. Disconnect the front suction line from the mid-line connector block of the rear suction line assembly.
7. Remove the O-ring seal from the suction line fitting and discard.
8. Install plugs in, or tape over the opened suction line fitting and the mid-line connector block.
9. Remove the suction line from the retaining brackets as required and remove the front suction line from the engine compartment.
10. If equipped, relocate the vehicle speed control servo as necessary to access the receiver/drier.
11. Remove the bolt that secures the rear section of the liquid line to the receiver/drier outlet port.
12. Remove the O-ring seals from the opened liquid line fitting and discard.
13. Install plugs in, or tape over the opened liquid line fitting and receiver/drier outlet port.
14. Remove the bolt that secures the rear suction and liquid line assembly to the A/C expansion valve.
15. Disconnect the rear suction and liquid line assembly from the A/C expansion valve
16. Remove the gasket from the A/C expansion valve and discard.
17. Install plugs in, or tape over the opened rear suction and liquid line fittings and both expansion valve ports.
18. Disengage the rear suction and liquid line assembly from the retaining clips as required and remove the rear suction and liquid line assembly from
the engine compartment.
INSTALLATION
1. Position the rear suction and liquid line assembly into the engine compartment.
2. Engage the rear suction and liquid line assembly to the retaining clips as required.
3. Remove the tape or plugs from the liquid and suction line fittings and both ports on the front of the A/C expansion valve.
4. Install a new gasket onto the A/C expansion valve.
5. Connect the liquid and suction line fitting to the A/C expansion valve.