
SRT-4 L4-2.4L Turbo VIN S (2004)
5. Connect the liquid and suction line fitting to the A/C expansion valve.
6. Install the bolt that secures the suction and liquid line fitting to the A/C expansion valve. Tighten the bolt to 20 Nm (15 ft. lbs.).
7. Remove the tape or plugs from the front suction line fitting and the mid-line connector block of the suction and liquid line assembly.
8. Lubricate a new rubber O-ring seal with clean refrigerant oil and install it on the suction line fitting. Use only the specified O-rings as they are
made of a special material for the R-134a system. Use only refrigerant oil of the type recommended for the compressor in the vehicle.
9. Connect the front suction line fitting to the mid-line connector block.
10. Install the nut that secures the front suction line fitting to the mid-line connector block. Tighten the nut to 4.5 Nm (40 in. lbs.).
11. Position the front section of the liquid line into the engine compartment.
12. Remove the tape or plugs from the opened liquid line fittings and receiver/drier ports.
13. Lubricate new rubber O-ring seals with clean refrigerant oil and install them on the liquid line fittings. Use only the specified O-rings as they are
made of a special material for the R-134a system. Use only refrigerant oil of the type recommended for the compressor in the vehicle.
14. Reconnect the liquid line fittings to the receiver/drier.
15. Install the bolts that secure the liquid line fittings to the receiver/drier. Tighten the bolts to 2.3 Nm (20 in. lbs.).
16. If equipped, reinstall the vehicle speed control servo.
17. Remove the tape or plug from the condenser outlet port and the liquid line fitting.
A/C Suction Hose/Line Replacement
REMOVAL
WARNING: REVIEW THE WARNINGS AND CAUTIONS IN THE FRONT BEFORE PERFORMING THE FOLLOWING OPERATION.
1. Recover the refrigerant from the refrigerant system.
2. Remove the bolt that secures the suction line fitting to the top of the compressor.
3. Disconnect the suction line fitting from the compressor inlet port.
4. Remove the O-ring seal from the suction line fitting and discard.
5. Install plugs in, or tape over the opened suction line fitting and the compressor inlet port.
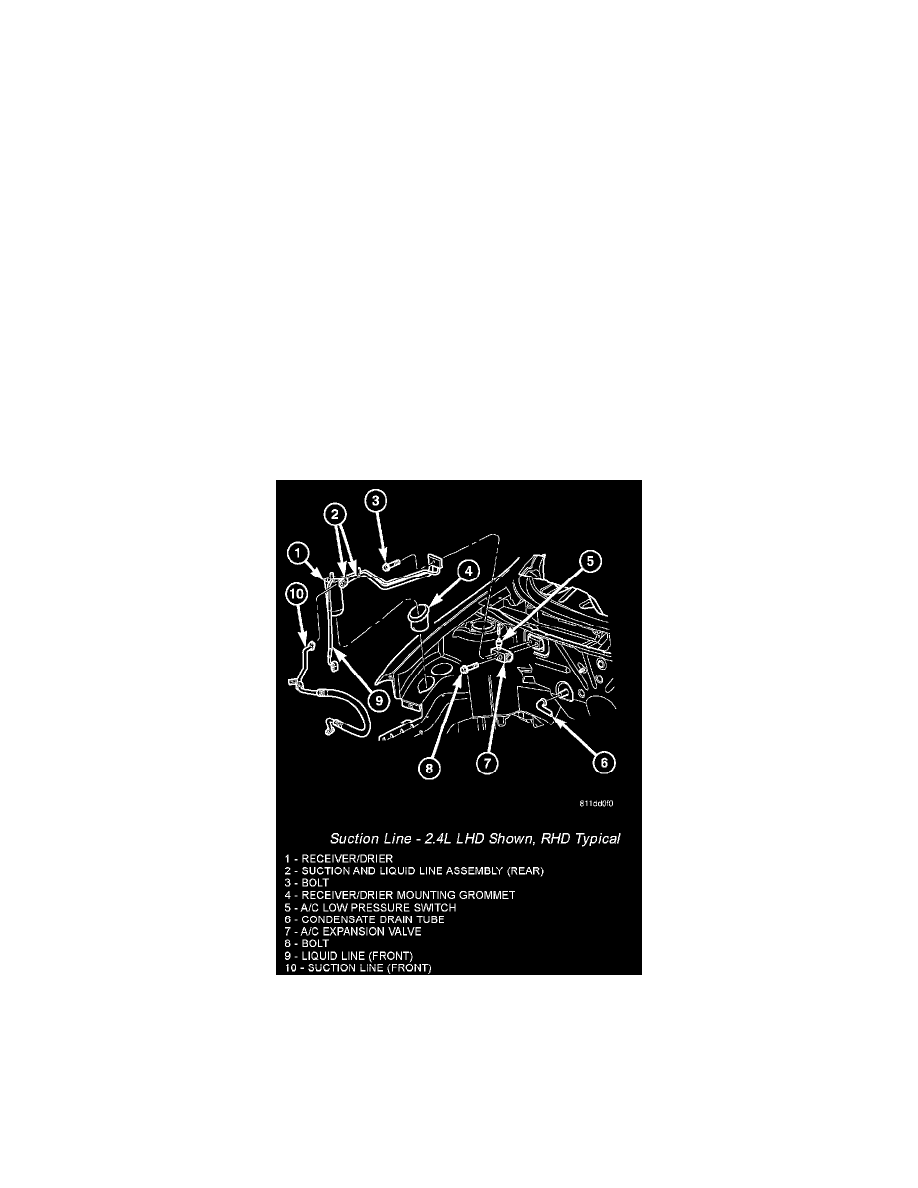
Suction Line - 2.4L LHD Shown, RHD Typical
6. Disconnect the front suction line from the mid-line connector block of the rear suction line assembly.
7. Remove the O-ring seal from the suction line fitting and discard.
8. Install plugs in, or tape over the opened suction line fitting and the mid-line connector block.
9. Remove the suction line from the retaining brackets as required and remove the front suction line from the engine compartment.
10. If equipped, relocate the vehicle speed control servo as necessary to access the receiver/drier.
11. Remove the bolt that secures the rear section of the liquid line to the receiver/drier outlet port.
12. Remove the O-ring seals from the opened liquid line fitting and discard.