
SRT-4 L4-2.4L Turbo VIN S (2004)
CAUTION: There are separate camber adjustment bolt packages for the front and rear of the vehicle. Be sure to use the correct package.
1. Raise the vehicle until its tires are not supporting the weight of the vehicle.
CAUTION: The knuckle to strut assembly attaching bolt shanks are serrated and must not be turned during removal. Remove the nuts while
holding the bolts stationary.
2. Remove the wheel and tire assembly at the strut requiring modification.
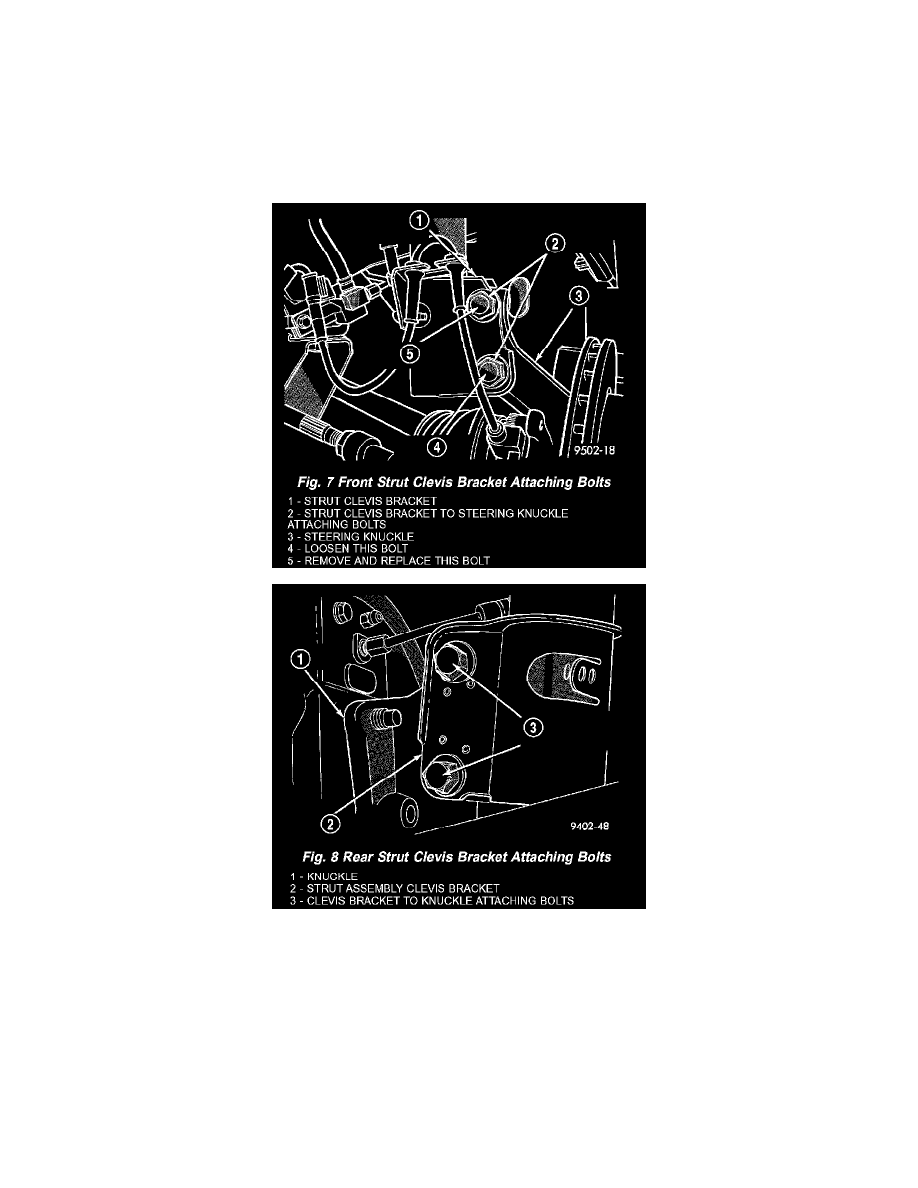
3. Remove the original upper bolt attaching the strut clevis bracket to the knuckle (Fig. 7) (Fig. 8).
4. Seperate the knuckle from the strut clevis bracket.
5. Draw an imaginary line from the center of the clevis bracket upper bolt hole down throughthe center of the clevis bracket lower bolt hole.Pivoting
the line at the center of the lower hole,move the upper end of the line inward so as to follow an arc past the inner edge of the upper bolt hole
approximately 3.0 mm (0.12 in). Mark the bracket showing what area of the surface needs to be removed to form the elongated hole.
Remember,this elongation must follow the arc. Repeat this step on the opposite side of the clevis bracket..
6. Using an appropriate grinding tool,elongate the upper hole as indicated by the markings until the neccesary material is removed. Repeat this step
on the opposite side of the clevis bracket.
7. Place the knuckle back in the clevis bracket.
8. Install bolts from the adjustment package into the holes where the original boltswere removed. Install the bolts from the rear.
9. Install a nut provided in the adjustment package on each replacement bolt. Tighten the nuts until snug,but still allowing the knuckle to slide in the
clevis bracket.
10. Reinstall the tire and wheel assembly.