
SRT-4 L4-2.4L Turbo VIN S (2004)
14. Install the drive-belt splash shield and fasteners.
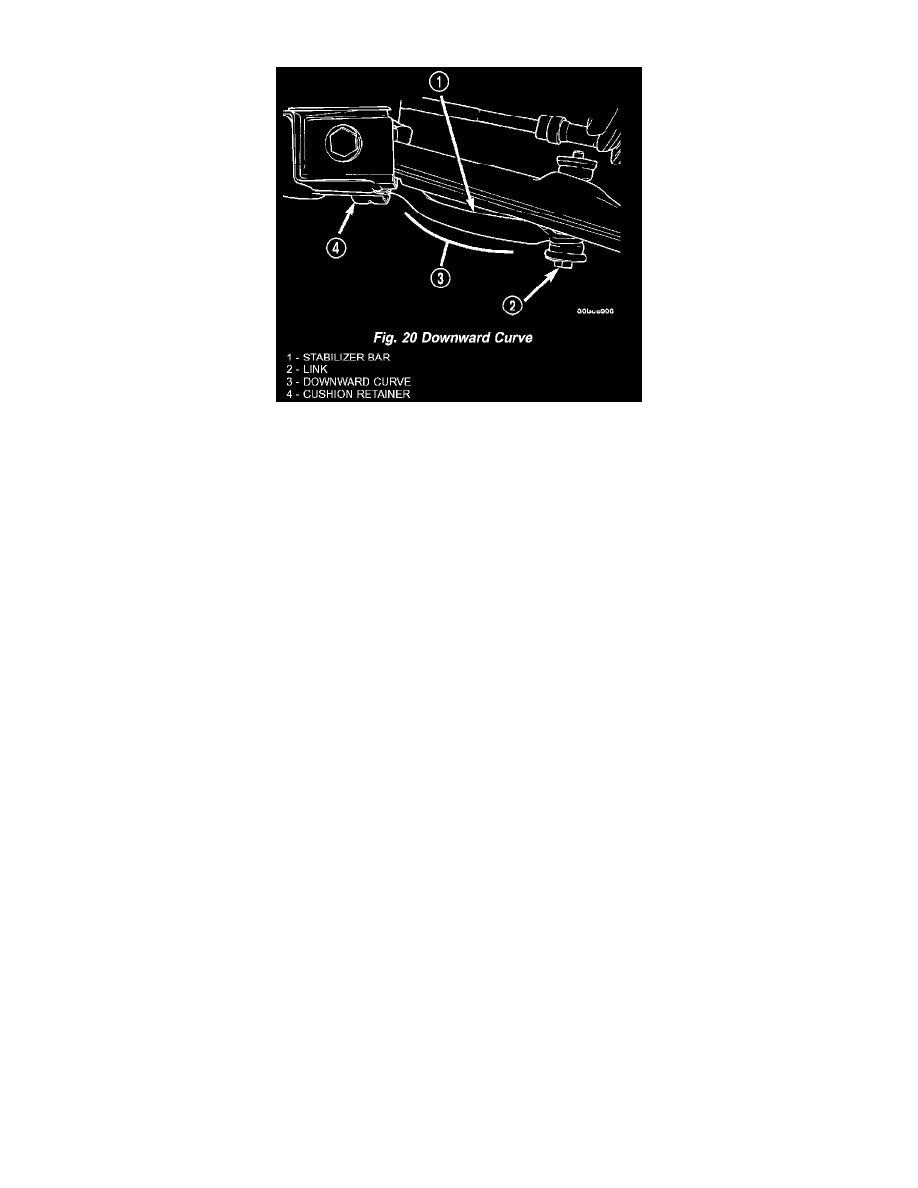
Fig. 20
NOTE: Before installing the stabilizer bar, make sure the bar is not upside-down. The stabilizer bar must be installed with the curve on the
outboard ends of the bar facing downward to clear the control arms once fully installed (Fig. 20).
15. First, place the stabilizer bar in position on the front suspension crossmember. The slits in each cushion must point toward the front of the vehicle
and sit directly on top of the raised beads formed into the stamping on the crossmember. Next, install the cushion retainers, matching the raised
beads formed into the cushion retainers to the grooves formed into the cushions. Install the cushion retainer bolts, but do not completely tighten
them at this time.
16. Install both stabilizer bar links back on vehicle (Fig. 13). Start each stabilizer bar link bolt with bushing from the bottom, through the stabilizer bar
, inner link bushings, lower control arm, and into the upper retainer/nut and bushing. Do not fully tighten the link assemblies at this time.
17. Install the tire and wheel assemblies back on vehicle. Tighten the wheel mounting nuts to 135 N.m (100 ft.lbs.) torque.
18. Lower the vehicle.
NOTE: It may be necessary to put the vehicle on a platform hoist or alignment rack to gain access to the stabilizer bar mounting bolts with the
vehicle at curb height.
19. Tighten each stabilizer bar link by holding the upper retainer/nut with a wrench and turning the link bolt. Tighten each link bolt to a torque of 23
N.m (200 in.lbs.).
20. Tighten the stabilizer bar cushion retainer bolts to a torque of 34 N.m (300 in.lbs.).
21. Check the front wheel alignment on the vehicle.